
Pawpaw trees (Asimina triloba) may not be as commonly known as apples or peaches, but these native North American trees hold a unique place in gardening and culinary circles. Their fruit is often described as a tropical delicacy, with a custard-like texture and a flavor that combines banana, mango, and melon. Pawpaw trees are also relatively easy to grow from seed, making them an excellent choice for home gardeners looking to experiment with a less traditional, yet highly rewarding fruit tree.
If you’re wondering how to grow pawpaw trees from seed, you’re in the right place. This guide will walk you through everything you need to know, from collecting seeds to germination and eventual transplantation into your garden. With patience and care, you’ll soon be growing your own pawpaw trees and enjoying their delicious fruit.
Understanding the Pawpaw Tree
Before we dive into the specifics of growing pawpaw trees from seed, it’s essential to understand what makes these trees special. Pawpaw trees are deciduous, small to medium-sized trees that thrive in temperate climates. They are the largest fruit-bearing native tree in North America, growing to heights of 15 to 30 feet, and they produce large, greenish-brown fruit that ripens to a yellow or brown color in late summer or early fall.
The fruit of the pawpaw tree is known for its custard-like flesh, which is often described as a mix of banana, mango, and melon in flavor. Although pawpaws are not commercially grown on a large scale, they are prized by foragers and those who appreciate heirloom and native plant species. These trees are also relatively easy to grow, especially from seed, making them a fantastic option for gardeners looking to grow unique fruits.
Step-by-Step Guide to Growing Pawpaw Trees from Seed
Growing pawpaw trees from seed is a fun and relatively straightforward process, though it does require some patience. Unlike many other fruit trees, pawpaws require a period of stratification to germinate successfully. This process mimics the natural winter conditions that pawpaw seeds would experience in the wild.
Here’s a step-by-step guide to help you grow your own pawpaw trees from seed:
1. Harvesting and Collecting Seeds
The first step in growing pawpaw trees from seed is harvesting the fruit. Pawpaw trees typically bear fruit in late summer or early fall, depending on your region’s climate. The fruit should be fully ripe before collecting seeds; a ripe pawpaw will yield slightly to pressure and have a yellowish to brown color.
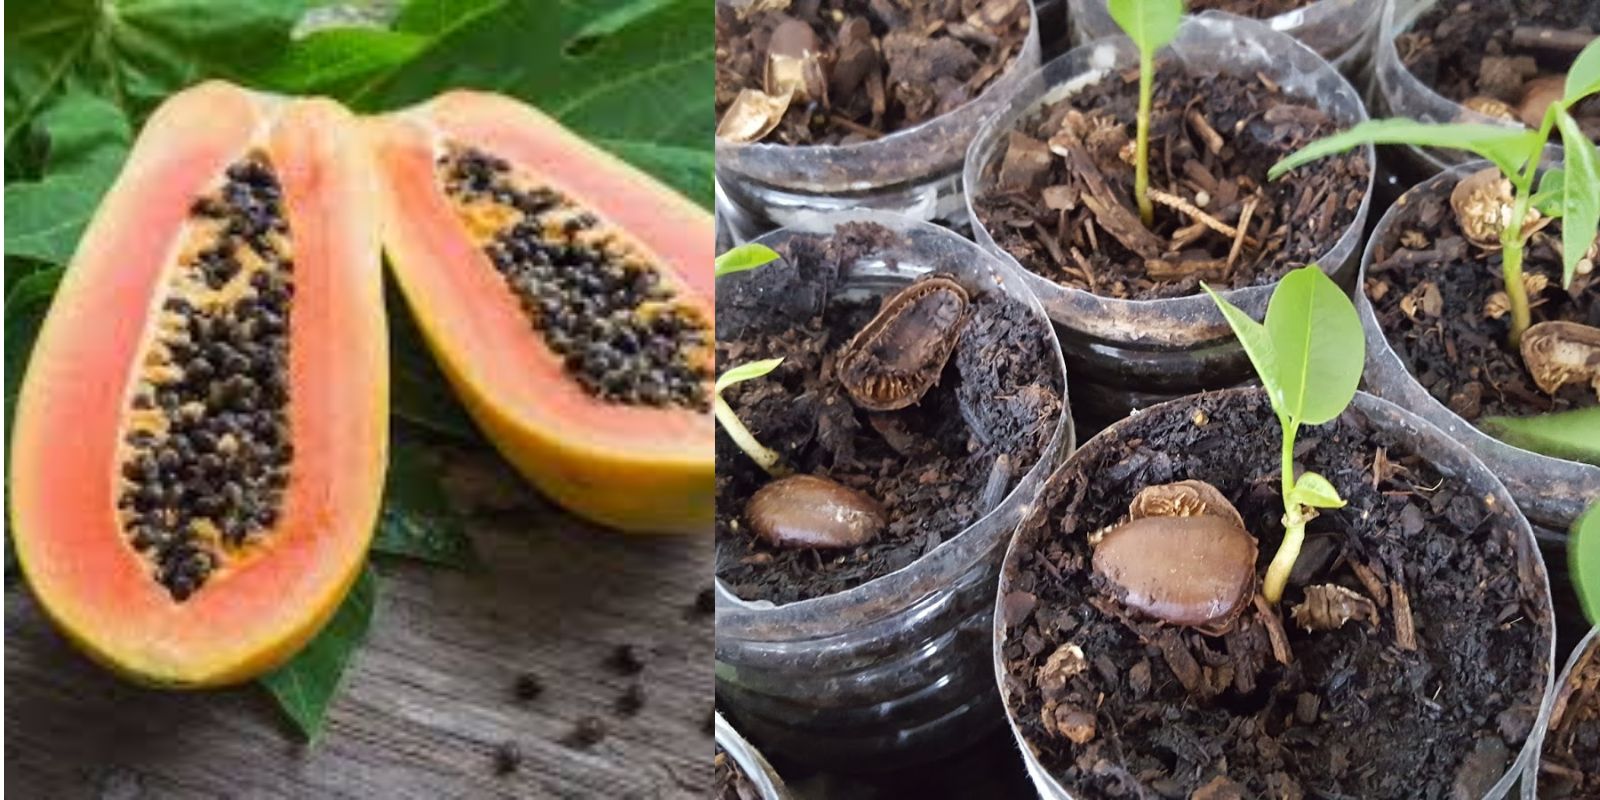
Once you’ve harvested the fruit, cut it open, remove the seeds, and wash them thoroughly to remove any fruit pulp. Be sure to handle the seeds carefully to avoid damaging them. Pawpaw seeds are oval, brown, and about the size of a small walnut.
2. Stratifying the Seeds
Pawpaw seeds need a period of cold stratification to break their dormancy and encourage germination. This step is crucial because it mimics the winter conditions that pawpaw seeds would naturally experience in the wild.
To stratify pawpaw seeds, follow these steps:
- Dampen a Paper Towel: Moisten a paper towel with water, ensuring it is not soaking wet, and place the seeds on the towel. Fold the towel over the seeds, covering them entirely.
- Place in a Plastic Bag: Put the damp paper towel with the seeds inside a resealable plastic bag. Seal the bag to create a humid environment for the seeds.
- Refrigerate the Seeds: Store the bag in the refrigerator for 60 to 90 days. The cold conditions will help break the seed’s dormancy and prepare it for germination in the spring.
During the stratification process, check on the seeds occasionally to ensure they are still moist, but not overly wet. If the towel becomes too dry, lightly mist it with water.
3. Planting the Seeds
After the stratification period, your pawpaw seeds are ready to be planted. Choose a well-draining potting mix, preferably a mix that’s designed for trees or fruit plants. You can also make your own by combining equal parts of peat moss, perlite, and vermiculite to create a light and airy mix that will retain moisture while allowing for good drainage.
To plant the seeds, follow these steps:
- Prepare Your Pots: Select small pots or containers with drainage holes. You will plant one seed per pot.
- Plant the Seeds: Fill each pot with potting mix and plant the seed about 1 to 2 inches deep. Cover the seed with soil and gently firm it down.
- Water the Seeds: After planting the seeds, water the soil thoroughly. Be sure to keep the soil moist but not waterlogged, as excessive moisture can lead to rot.
Place the pots in a warm, bright location, but avoid direct sunlight, as this can dry out the soil too quickly. A windowsill with indirect light or a location under grow lights works well.
4. Germination Process
Pawpaw seeds take time to germinate, so don’t be discouraged if you don’t see results right away. Germination usually takes 4 to 6 weeks, though it can occasionally take longer. During this time, the seed will develop a small root system and shoot, breaking through the soil.
Once the seedlings begin to sprout, continue to provide them with plenty of light and keep the soil consistently moist. Be patient—pawpaw seedlings grow slowly in the first year.
5. Transplanting Seedlings
After the seedlings have developed a few sets of leaves and are large enough to handle (usually after 6 to 12 months), you can begin the process of transplanting them into your garden or larger containers. Be sure to wait until the danger of frost has passed before transplanting pawpaw trees, as they are sensitive to cold temperatures.
When transplanting pawpaw seedlings, follow these steps:
- Choose a Sunny Location: Pawpaw trees prefer partial to full shade, especially when they are young. As the trees mature, they will tolerate more sunlight.
- Prepare the Soil: Dig a hole that is large enough to accommodate the root ball of the seedling. The soil should be rich, well-draining, and slightly acidic (pH 5.5 to 6.5).
- Transplant the Seedlings: Carefully remove the seedlings from their pots, being mindful not to damage the roots. Place the seedling in the hole, and fill it with soil, ensuring that the root crown is level with the surrounding soil.
- Water and Mulch: Water the transplant thoroughly and apply a layer of mulch around the base of the tree to retain moisture and keep weeds at bay.
6. Caring for Your Pawpaw Tree
Pawpaw trees are low-maintenance once established, but they do require some care to thrive:
- Watering: Pawpaw trees prefer consistently moist soil, especially during the growing season. Water deeply but avoid waterlogging the soil.
- Fertilizing: In early spring, apply a balanced fertilizer to promote healthy growth. Avoid over-fertilizing, as this can lead to excessive leaf growth and poor fruiting.
- Pruning: Prune your pawpaw tree to remove dead or damaged branches, and to shape the tree as it grows. You can also prune to encourage multiple trunks, as this helps support the tree’s structure.
- Pest Control: Pawpaw trees are generally resistant to pests and diseases. However, keep an eye out for common issues like aphids or caterpillars, which can be controlled with organic pest solutions if necessary.
7. Harvesting Pawpaw Fruit
After 4 to 5 years of growth, your pawpaw tree should start to produce fruit. The fruit will ripen in late summer or early fall, depending on your climate. Pawpaw fruit should be harvested when it yields slightly to pressure and turns yellowish-brown. The fruit’s flavor improves once it is fully ripe and soft to the touch.
To harvest pawpaw fruit, simply twist the fruit gently off the tree. Be careful not to damage the branches.
Conclusion
Growing pawpaw trees from seed is a fun and rewarding experience for gardeners who are willing to invest a little time and patience. With their unique tropical flavor and rich history, pawpaws make a fascinating addition to any garden. Whether you’re interested in growing them for their delicious fruit or as part of a native plant restoration project, pawpaw trees are an excellent choice for home gardeners.
By following the steps outlined in this guide—harvesting seeds, stratifying them, planting, and caring for the seedlings—you can successfully grow pawpaw trees and enjoy their exotic fruit in the years to come. Happy gardening!