
Okra, also known as “lady’s finger,” is a warm-season vegetable loved for its unique texture and taste. Growing okra in containers offers a convenient solution for gardeners with limited space or those interested in urban gardening. With just a little care, you can enjoy a bountiful okra harvest right from your balcony or patio. This guide will take you through every step of growing okra in containers from seeds, ensuring you cultivate healthy, productive plants.
Why Grow Okra in Containers?
Growing okra in containers is ideal for several reasons:
- Space-saving: Whether you live in a small apartment or have limited outdoor space, container gardening allows you to maximize your growing area.
- Mobility: Containers are easy to move around, allowing you to adjust the plants’ position to ensure optimal sunlight exposure.
- Control: Growing in containers gives you control over the soil type, water levels, and pest management, which can lead to healthier plants and a better yield.
Now, let’s dive into how to plant and grow okra from seeds in containers!
Step-by-Step Guide to Growing Okra in Containers from Seeds
Step 1: Choose the Right Container
The size and material of the container play a critical role in the success of growing okra. Okra plants have deep root systems, so choose a pot that is at least 12-14 inches deep and wide, with drainage holes at the bottom to prevent waterlogging. A container with a diameter of at least 14-18 inches is ideal to support the plant’s growth and prevent overcrowding.
Materials like terracotta, plastic, or ceramic are all suitable, but make sure your container has good drainage to avoid root rot.
Step 2: Select High-Quality Seeds
Selecting the right variety of okra is essential for container gardening. Popular varieties like Clemson Spineless, Emerald, and Burgundy Okra are well-suited for container growth. Clemson Spineless, for example, grows relatively compact, making it a perfect choice for small spaces.
Buy high-quality seeds from reputable garden centers or online stores to ensure a high germination rate and healthy plants.
Step 3: Prepare the Soil
Okra thrives in well-draining, nutrient-rich soil. The ideal soil mix should consist of a balanced blend of:
- Potting soil
- Compost (provides essential nutrients)
- Perlite or sand (to enhance drainage)
A pH level between 6.0 and 6.8 is optimal for okra growth. Ensure the soil is loose and aerated to encourage proper root development.
Step 4: Soak the Seeds
Okra seeds have a hard outer shell, which can slow down germination. To help speed up the process, soak the seeds in warm water overnight (about 12 hours) before planting. This softens the outer shell, allowing for faster germination.
Step 5: Plant the Seeds
Once the seeds are ready, plant them about 1 inch deep into the prepared soil. For larger containers, space each seed 12-18 inches apart. If you’re using smaller pots, it’s best to plant one seed per pot. Cover the seeds with soil and lightly press down to ensure good seed-to-soil contact.
Water the seeds gently right after planting to help them settle into the soil.
Step 6: Water Regularly
Okra needs consistently moist soil to germinate and grow well. Water the container regularly, but avoid overwatering, as this can lead to root rot. It’s essential to maintain a balanced watering schedule—watering once or twice a week, depending on the climate and soil moisture levels, should suffice.
During germination, keep the soil evenly moist, and once the seedlings emerge, allow the top inch of soil to dry out between watering.
Step 7: Ensure Proper Sunlight
Okra loves the sun and needs 6-8 hours of direct sunlight daily to thrive. Place the container in a sunny spot, such as a balcony, patio, or windowsill that receives ample sunlight. The more sunlight your plants receive, the healthier and more productive they will be.
If you’re growing indoors, consider placing the containers near a sunny window or using grow lights to supplement natural sunlight.
Step 8: Fertilize for Growth
Fertilizing okra is crucial, especially when growing in containers where nutrients can be quickly depleted. Start by mixing slow-release organic fertilizer into the soil when planting. After the seedlings emerge, feed your plants with a balanced liquid fertilizer every 2-3 weeks.
A fertilizer with an NPK ratio of 10-10-10 or 5-10-10 will promote strong root development and encourage flowering, leading to a larger harvest.
Step 9: Thin the Seedlings
Once the seedlings have sprouted and are about 3-4 inches tall, thin them out by removing the weaker ones, leaving only the strongest plant in each container. Thinning ensures that the remaining plant gets enough nutrients, space, and light to grow into a healthy, productive okra plant.
Step 10: Provide Support
As okra plants grow, they can become top-heavy and may need some support to prevent the stems from bending or breaking. Use stakes or a small trellis to provide support as the plant grows taller, ensuring it remains upright.
Step 11: Watch for Pests
Like all plants, okra can attract pests such as aphids, whiteflies, and spider mites. Regularly inspect your plants for signs of pests, such as yellowing leaves or small holes. Use organic insecticidal soap or a homemade garlic spray to manage pest problems naturally.
Keep the surrounding area clean and remove any fallen leaves or debris that can harbor pests.
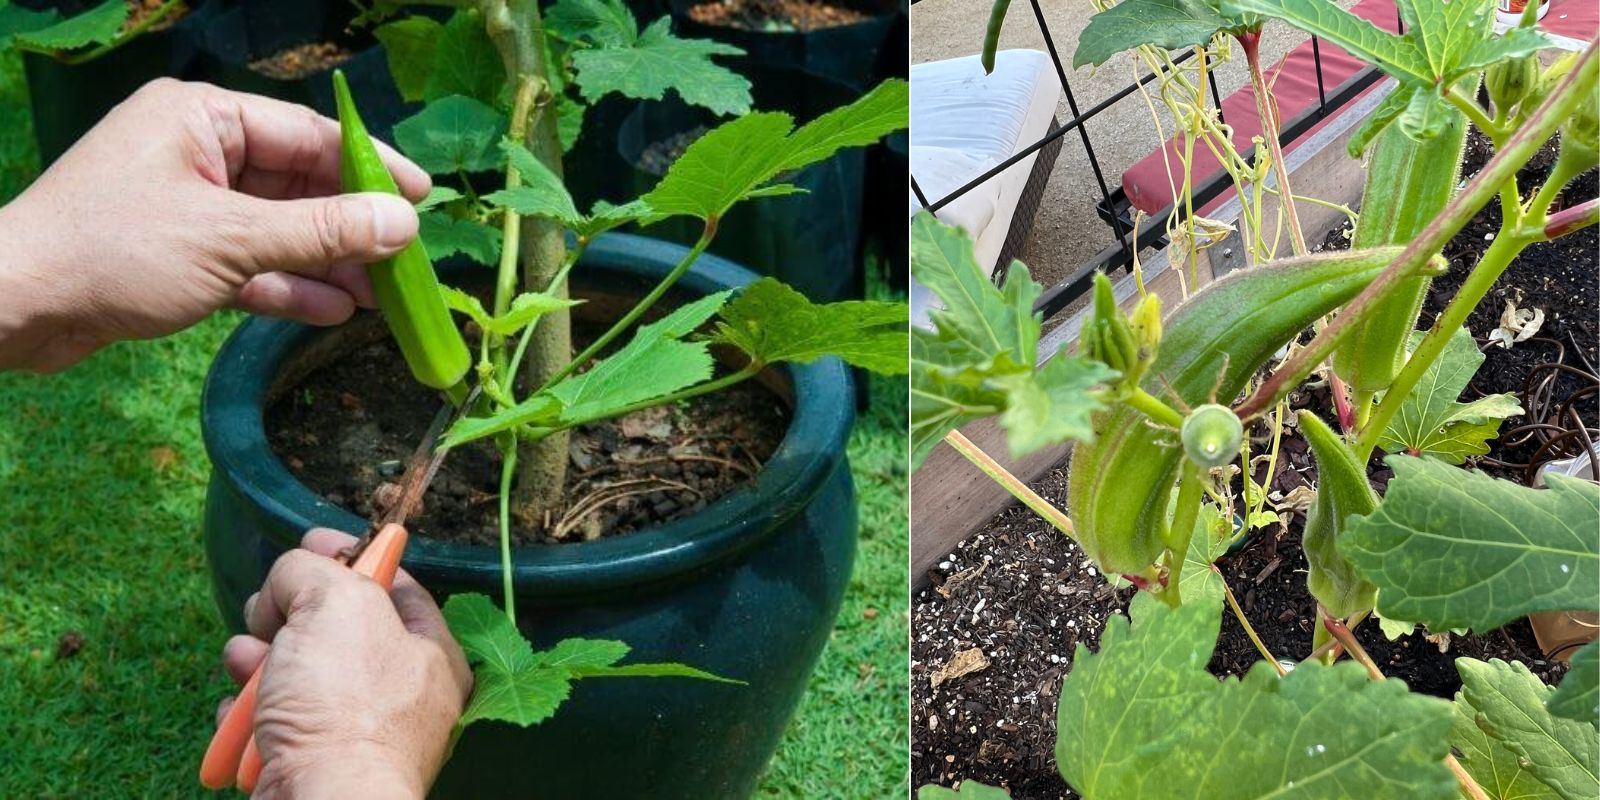
Step 12: Harvesting Your Okra
Okra grows fast, and once the pods start appearing, you’ll need to check them regularly. Harvest the pods when they are about 2-4 inches long—at this stage, they are tender and tasty. Use a pair of scissors or pruners to cut the pods from the plant, and be sure to harvest often to encourage continued production.
Leaving pods on the plant for too long can make them tough and reduce the plant’s yield.
Step 13: Continuous Care
Okra is a hardy plant, but it benefits from continuous care throughout the growing season. Watering regularly, fertilizing as needed, and pruning the plants can help keep them healthy and productive. With proper attention, your container-grown okra can provide fresh pods for months.
Conclusion
Growing okra in containers is an excellent option for anyone who wants to enjoy fresh, homegrown vegetables, even in limited spaces. By following these steps and giving your plants the care and attention they need, you’ll be rewarded with a steady supply of nutritious and delicious okra. Whether you’re an experienced gardener or a beginner, container gardening offers a flexible and accessible way to cultivate your favorite crops.
If you’re ready to start your own okra container garden, share your progress and tips with fellow gardeners! 🌱
#ContainerGardening #GrowYourOwnFood #OkraLovers #UrbanGardening #GardeningTips #OrganicGardening