
Growing oats at home can be a rewarding experience. Not only do you get to enjoy fresh, home-grown grains, but you also gain a deeper connection with your food. Whether you’re looking to add a healthy staple to your diet or simply explore home gardening, growing oats is a practical and satisfying endeavor. This guide will walk you through the process of growing oats from start to finish.
Introduction
Oats are a nutritious grain packed with fiber, vitamins, and minerals. They’re incredibly versatile, used in everything from oatmeal and granola to baked goods. Growing oats at home allows you to enjoy these benefits and gain control over the quality of your food. Plus, oats are relatively easy to cultivate, making them an ideal choice for both beginner and seasoned gardeners.
1. Choosing the Right Variety
The first step in growing oats is selecting the appropriate variety. Oats come in several types, but most home gardeners will find that common oat varieties like ‘Berkley’ or ‘Cavalry’ are well-suited to a range of climates. When choosing a variety, consider your local climate, as oats generally thrive in cooler temperatures. Check with local garden centers or extension services for recommendations specific to your region.
2. Preparing the Soil
Oats prefer well-drained, loamy soil with a pH between 6.0 and 7.0. Before planting, prepare your soil by loosening it to a depth of about 6-8 inches. Remove any weeds, rocks, or debris that might impede growth. If your soil is heavy clay or sandy, amend it with organic matter such as compost to improve its structure and fertility. Oats don’t require overly rich soil, but they do benefit from a balanced nutrient profile.
3. Sowing the Seeds
Oats are typically sown in early spring or late summer, depending on your climate. For spring planting, sow seeds as soon as the soil can be worked, typically in early to mid-April. For fall planting, aim for late summer to early fall, about 6-8 weeks before the first expected frost.
Plant seeds about 1 inch deep and space them 6-8 inches apart. You can use a garden seeder or simply broadcast the seeds and cover them lightly with soil. If planting in rows, space the rows 12-18 inches apart.
4. Watering and Maintenance
Oats require consistent moisture for optimal growth. Water the plants regularly, especially during germination and early growth stages. Aim to keep the soil moist but not waterlogged. As the plants mature, they become more drought-tolerant, but regular watering will still help ensure a good yield.
Monitor your oat plants for signs of pests and diseases. Common issues include rusts, mildew, and aphids. Address problems promptly using organic or integrated pest management methods to minimize damage and ensure a healthy crop.
5. Fertilizing Your Oats
Oats generally don’t require heavy fertilization. Before planting, apply a balanced fertilizer or compost to provide essential nutrients. A typical recommendation is 10-10-10 or similar, but follow local guidelines for specific needs. Over-fertilizing can lead to excessive leaf growth at the expense of grain development, so use fertilizer sparingly.
6. Managing Weeds and Pests
Weeds can compete with oats for nutrients and water, so it’s important to manage them effectively. Regularly check your garden for weeds and remove them by hand or with a hoe. Applying mulch around your oat plants can also help suppress weed growth and retain soil moisture.
Pests such as aphids or birds may be attracted to your oat plants. Use natural deterrents like row covers or traps to keep them at bay. Regular inspections and prompt action can prevent significant infestations and protect your crop.
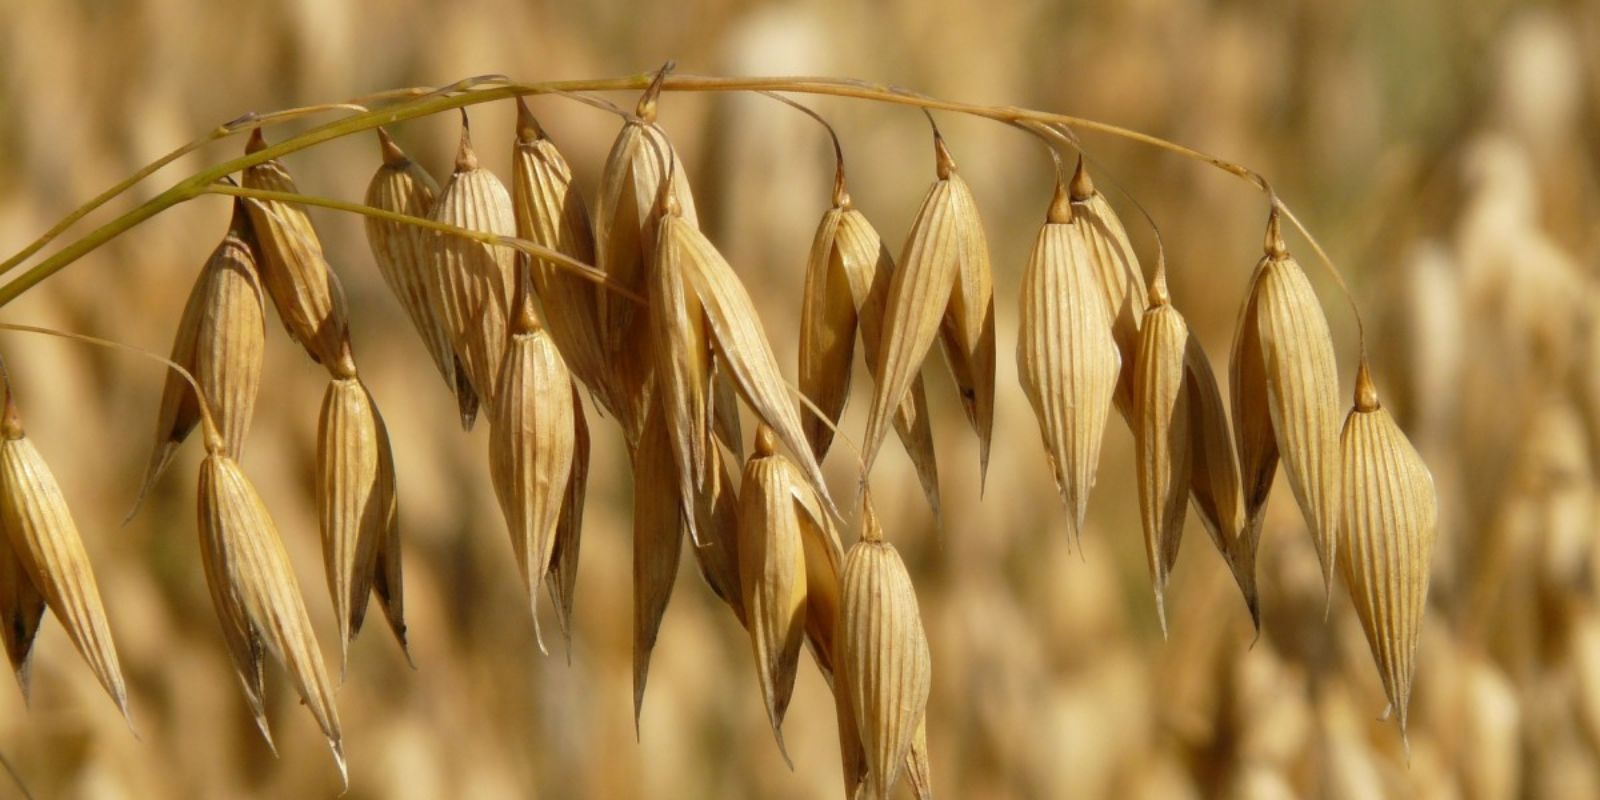
7. Harvesting Your Oats
Timing is crucial for harvesting oats. The optimal time to harvest is when the oat plants have turned golden-brown and the seeds are firm. This typically occurs about 70-90 days after planting, depending on the variety and growing conditions.
To harvest, cut the oat stalks with a sickle or scythe when they are dry. Gather the stalks into bundles and allow them to dry completely. Once fully dried, thresh the oats to separate the seeds from the chaff. This can be done by hand or with a threshing machine if you have access to one.
8. Storing Your Oats
Proper storage is key to maintaining the quality of your harvested oats. Store the dried oats in airtight containers in a cool, dry place. Avoid exposing them to moisture or direct sunlight, as this can cause spoilage or loss of nutritional value. Properly stored oats can last for several months to a year.
Conclusion
Growing oats at home is a practical and rewarding gardening project. With the right preparation and care, you can enjoy a bountiful harvest of nutritious, home-grown grains. From selecting the right variety and preparing the soil to managing pests and harvesting, each step contributes to a successful crop. Embrace the satisfaction of growing your own food and add a nutritious staple to your diet with home-grown oats.
Motivational Sentence: Embrace the satisfaction of cultivating your own food by growing oats at home—enjoy the fresh, nutritious benefits and gain a deeper connection with your meals!