
Hydrangeas are beloved for their large, colorful blooms that add beauty and charm to gardens and landscapes. Growing hydrangeas from clippings is a practical and rewarding way to expand your garden without breaking the bank. This article will provide you with a step-by-step guide on how to successfully propagate hydrangeas, along with tips and tricks to ensure your new plants thrive.
Why Grow Hydrangeas from Clippings?
Hydrangeas come in various species and colors, making them a versatile choice for gardeners. Here are some compelling reasons to consider growing hydrangeas from clippings:
- Cost-Effective: Purchasing established plants can be expensive, especially if you want multiple varieties. Propagating from clippings allows you to multiply your plants without significant investment.
- Personal Satisfaction: Watching a cutting develop into a full-grown plant provides immense satisfaction and a sense of accomplishment.
- Preserve Varieties: If you have a favorite hydrangea in your garden, taking cuttings ensures that you can preserve that variety.
- Easy Process: Propagating hydrangeas from clippings is relatively straightforward and can be done with minimal supplies.
Understanding Hydrangea Varieties
Before diving into the propagation process, it’s essential to understand the different types of hydrangeas. The most common varieties include:
- Bigleaf Hydrangeas (Hydrangea macrophylla): Known for their large, rounded blooms, they thrive in various colors, including blue, pink, and white.
- Panicle Hydrangeas (Hydrangea paniculata): These have cone-shaped flower clusters and are known for their hardiness.
- Smooth Hydrangeas (Hydrangea arborescens): With large, white flowers, they are often found in traditional gardens.
- Oakleaf Hydrangeas (Hydrangea quercifolia): Recognized for their unique oak-shaped leaves and beautiful fall color.
Understanding the type of hydrangea you wish to propagate will help you determine the best method for success.
Step-by-Step Guide to Growing Hydrangeas from Clippings
Step 1: Choose the Right Time
The best time to take hydrangea cuttings is during late spring to early summer when the plant is actively growing. This is when the stems are firm but still flexible, offering the best chance for successful rooting.
Step 2: Select Healthy Stems
When selecting stems for cuttings, look for healthy, non-flowering branches. Here’s what to consider:
- Health: Choose stems that are green and free from pests or disease.
- Length: Aim for cuttings that are about 4 to 6 inches long.
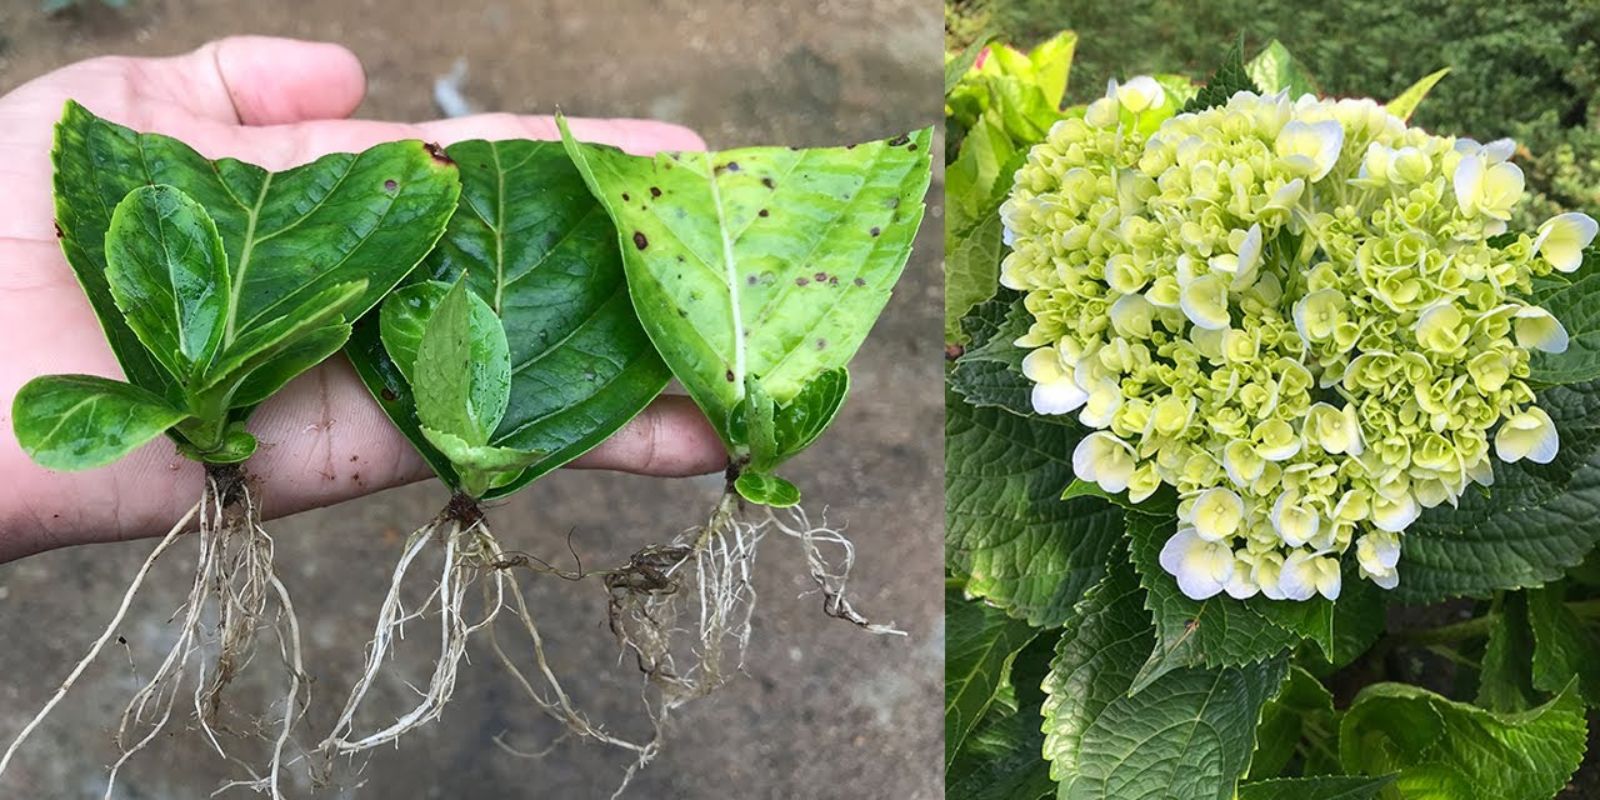
Step 3: Prepare the Cuttings
- Make the Cut: Using sharp, clean pruning shears, make a diagonal cut just below a leaf node. This angle helps with water absorption.
- Remove Lower Leaves: Strip off the leaves from the bottom half of the cutting, leaving a few leaves at the top. This reduces moisture loss and encourages root development.
- Optional Rooting Hormone: To boost your success rate, consider dipping the cut end of the stem in rooting hormone. This substance encourages root growth and can significantly improve your chances of success.
Step 4: Plant in Soil
- Choose a Pot: Select small pots or trays with drainage holes. This prevents waterlogging, which can lead to root rot.
- Use Quality Potting Mix: Fill the pots with a well-draining potting mix. A blend designed for seed starting or a mixture of peat moss and perlite works well.
- Insert the Cuttings: Create small holes in the soil with a pencil or your finger. Insert each cutting into the soil, ensuring that at least one leaf node is buried to promote root growth. Firm the soil around the cutting.
Step 5: Create a Humid Environment
Hydrangea cuttings thrive in a humid environment. Here’s how to create one:
- Cover the Pots: Use a clear plastic bag, plastic wrap, or a propagation dome to cover the pots. This traps moisture and creates a mini greenhouse effect.
- Air Circulation: Ensure that there is some air circulation to prevent mold and mildew. You can do this by leaving a small opening in the plastic cover.
Step 6: Watering and Light
- Moisture Maintenance: Keep the soil consistently moist but not soggy. Use a spray bottle to mist the soil and cuttings lightly.
- Light Conditions: Place the pots in a bright location with indirect sunlight. Too much direct sunlight can scorch the cuttings, while too little light can hinder growth.
Step 7: Monitor Growth
Over the next few weeks, monitor your cuttings for signs of growth. You should begin to see new leaves or growth at the top of the cutting within 4-6 weeks.
Step 8: Transplanting
Once your cuttings have developed a healthy root system (you can gently tug to feel resistance), it’s time to transplant them.
- Select Larger Pots: Choose pots that are slightly larger than the initial containers to give the roots room to grow.
- Transplant Carefully: Gently remove the cutting from its current pot, being careful not to damage the roots. Place it in the new pot and fill it with soil, watering lightly afterward.
- Acclimate to Outdoor Conditions: If you plan to move the hydrangeas outdoors, gradually acclimate them by placing them outside for a few hours each day, increasing the time gradually over a week.
Step 9: Long-Term Care
- Watering: Continue to water regularly, ensuring the soil remains moist but well-drained.
- Fertilization: Once the plants are established, you can begin fertilizing with a balanced, water-soluble fertilizer every 4-6 weeks during the growing season.
- Pruning: Prune your hydrangeas as needed to maintain shape and encourage bushier growth. Remove any dead or diseased branches.
- Pest Control: Keep an eye out for pests such as aphids or spider mites. Use insecticidal soap or neem oil to treat infestations as needed.
Troubleshooting Common Issues
- Wilting Leaves: This can be a sign of underwatering. Ensure the soil is consistently moist.
- Mold or Mildew: If you see mold forming on the soil or cuttings, reduce humidity by removing the plastic cover for a while.
- No Root Development: If your cuttings haven’t rooted after several weeks, ensure you’re using fresh cuttings and consider reapplying rooting hormone.
Conclusion: The Joy of Growing Hydrangeas from Clippings
Growing hydrangeas from clippings is not only an economical way to expand your garden but also a fulfilling project that connects you with nature. With a little patience and care, you can enjoy the beauty of these stunning flowers right from your own backyard.
Whether you’re an experienced gardener or just starting, propagating hydrangeas is a straightforward process that yields delightful results. So gather your supplies, choose your favorite hydrangea, and embark on this rewarding gardening adventure. You’ll soon find yourself surrounded by vibrant blooms, brightening your outdoor space and bringing joy for years to come!