
Hydrangeas are among the most beloved flowering plants in gardens worldwide. Their lush blooms, ranging in shades from deep blue to soft pink and crisp white, add elegance and charm to any outdoor space. While you can buy hydrangeas at nurseries, did you know that you can easily propagate them from cuttings? This method allows you to grow new plants without spending extra money, and it’s a fantastic way to expand your garden naturally.
In this article, we will explore everything you need to know about growing hydrangeas from cuttings, from selecting the right stems to ensuring successful root development.
Why Propagate Hydrangeas from Cuttings?
There are several reasons why growing hydrangeas from cuttings is a great idea:
- Cost-Effective: Instead of buying new plants, you can multiply your existing hydrangeas at no cost.
- Faster Growth: Cuttings establish and grow into mature plants faster than seeds.
- Guaranteed Results: Unlike seeds, cuttings ensure that the new plant will have the same characteristics as the parent plant.
- Preserving a Favorite Variety: If you have a unique or sentimental hydrangea, propagation allows you to preserve and share it.
Now, let’s get into the step-by-step process.
Step 1: Selecting the Right Cutting
The success of hydrangea propagation starts with choosing the right cutting. Follow these guidelines:
- Take cuttings from a healthy, mature hydrangea plant.
- Select a non-flowering stem, as flowering stems put energy into blooms rather than root development.
- Choose a green, softwood stem (spring to early summer) or semi-hardwood stem (late summer to early fall).
- Cut a 4-6 inch section using clean, sharp pruning shears.
💡 Tip: The best time to take hydrangea cuttings is in the morning when the plant is well-hydrated.
Step 2: Preparing the Cutting
Once you have selected your cutting, follow these steps to prepare it for planting:
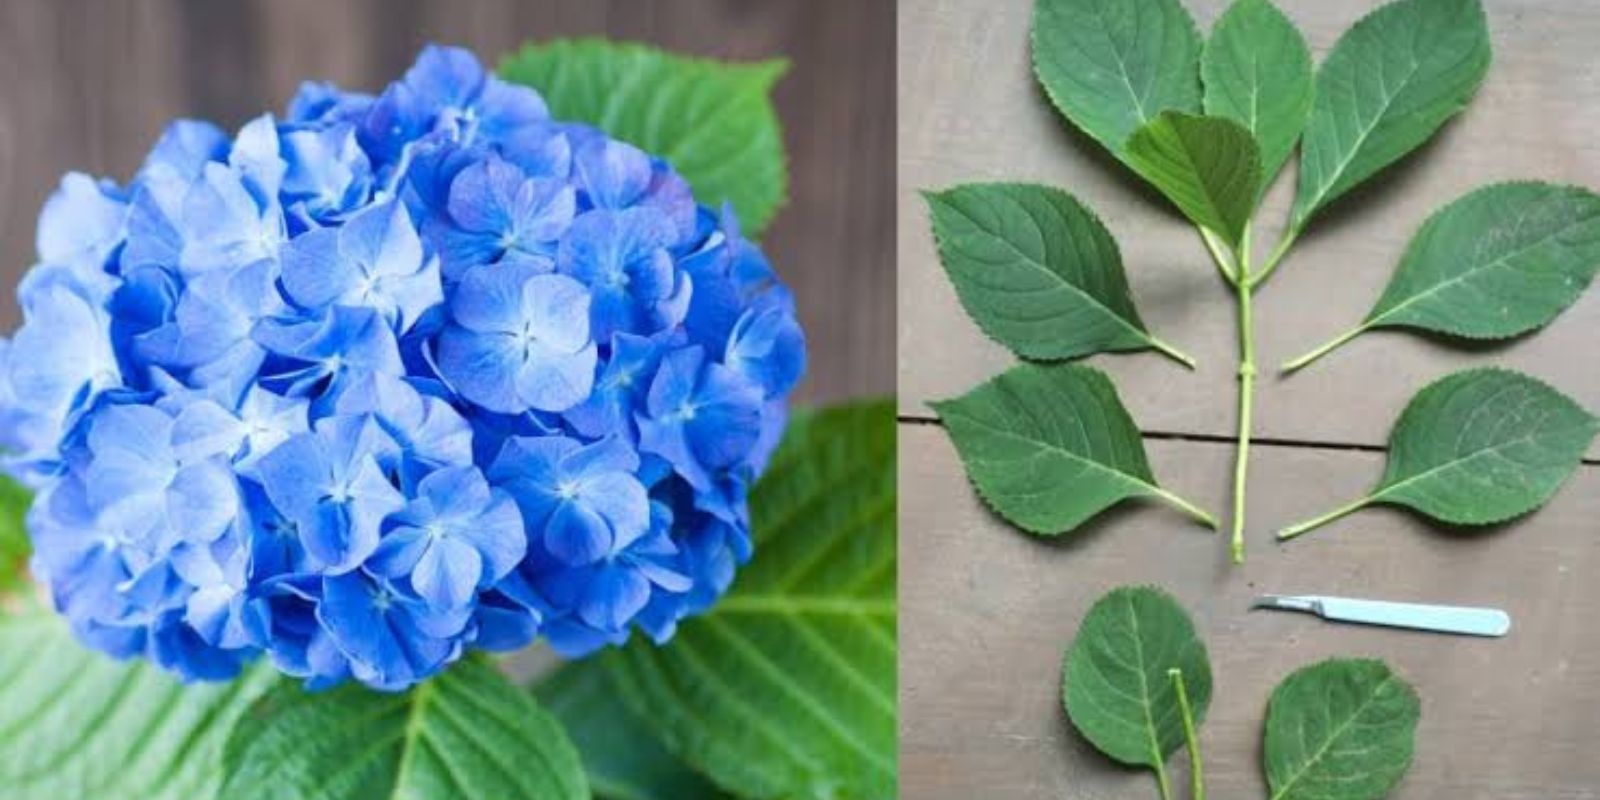
- Remove Lower Leaves – Strip off the leaves from the bottom half of the cutting, leaving a few at the top. This prevents excess moisture loss.
- Trim Below a Node – Make a clean cut just below a leaf node (the point where leaves attach to the stem). Nodes contain growth hormones that encourage rooting.
- Dip in Rooting Hormone (Optional) – To boost root development, dip the cut end into rooting hormone powder or gel. While optional, this increases the success rate.
💡 Tip: If you don’t have rooting hormone, honey or cinnamon can act as natural alternatives!
Step 3: Planting the Cutting
Now that your cutting is prepared, it’s time to plant it in the right medium:
- Choose a Suitable Pot – Use a small pot with drainage holes. If propagating multiple cuttings, plant them in a tray with compartments.
- Use Well-Draining Soil – A mix of potting soil, perlite, and sand works best. Hydrangeas prefer moisture-retentive but well-drained soil.
- Make a Planting Hole – Use a pencil or stick to create a small hole in the soil to prevent damaging the delicate cutting.
- Insert the Cutting – Place the cutting into the hole and gently press the soil around it for stability.
💡 Tip: If you’re planting multiple cuttings, space them at least 2 inches apart to allow good air circulation.
Step 4: Creating the Ideal Growing Environment
Hydrangea cuttings thrive in a humid, warm environment. Here’s how to create the best conditions:
- Cover with Plastic – Place a clear plastic bag or dome over the pot to maintain humidity. Avoid letting the plastic touch the leaves.
- Provide Indirect Light – Keep the cuttings in a bright area with indirect sunlight. Direct sun can dry them out.
- Keep Moist but Not Waterlogged – Mist the leaves occasionally and keep the soil consistently damp but not soggy.
💡 Tip: Placing a small stick inside the bag will keep it from touching the cutting, preventing rot.
Step 5: Monitoring and Caring for Your Cuttings
Your hydrangea cuttings should start developing roots within 4-6 weeks. Here’s how to ensure their success:
- Check for Roots – After a few weeks, gently tug on the cutting. If you feel resistance, roots have developed.
- Remove the Plastic Cover Gradually – Once new growth appears, slowly reduce humidity by removing the plastic for a few hours daily before removing it completely.
- Transplanting – When roots are 2 inches long, transplant the cutting into a larger pot or directly into the garden.
💡 Tip: Acclimate the young plant to outdoor conditions by exposing it to natural light gradually before transplanting.
Common Mistakes to Avoid
- Using Old or Diseased Stems – Always choose fresh, healthy growth for the best success.
- Overwatering – Too much moisture can cause rot; keep the soil damp but not soaked.
- Lack of Humidity – Cuttings without sufficient humidity may dry out and fail to root.
- Placing in Direct Sunlight – Bright, indirect light is ideal for root development.
Caring for Newly Transplanted Hydrangeas
After successfully rooting your hydrangea cuttings, continue providing the right care for strong, healthy plants:
- Watering: Keep the soil moist, especially in hot weather.
- Mulching: Apply mulch around the base to retain moisture and prevent weeds.
- Fertilizing: Use a balanced fertilizer in early spring and summer for healthy growth.
- Pruning: Remove dead or weak stems to encourage bushy, vibrant growth.
💡 Tip: To control hydrangea color, adjust soil pH. Acidic soil (low pH) produces blue flowers, while alkaline soil (high pH) results in pink blooms.
Final Thoughts
Growing hydrangeas from cuttings is a rewarding and simple process that allows you to expand your garden effortlessly. With just a little patience and the right care, you can enjoy beautiful, lush hydrangeas year after year.
Have you ever propagated hydrangeas? Share your experience and tips in the comments below! 🌸👇