
Growing grapevines from cuttings is one of the most accessible and rewarding ways to start your own vineyard or to simply add some fruitful greenery to your backyard. Grape vines are a symbol of patience and dedication in the garden, but with the right approach, they can be easily propagated from cuttings, giving you a thriving plant that can produce delicious fruit for years to come. This article will guide you through the simple steps of growing grapevines from cuttings, covering everything from choosing the right cuttings to planting and care.
Why Propagate Grapevines from Cuttings?
Before we dive into the steps, it’s important to understand why propagating grapevines from cuttings is an excellent choice for gardeners. Grape vines are generally hardy and adaptable to various climates, making them a great addition to many home gardens. However, purchasing mature vines from a nursery can be costly, and in many cases, it might not be necessary. Propagating grapevines from cuttings allows you to grow multiple plants from a single parent vine, saving money and time while still achieving a beautiful and fruitful garden.
Moreover, grapevines are relatively easy to propagate, especially when compared to other types of fruit-bearing plants. Once you learn the basics, you’ll be able to grow an entire vineyard from cuttings, whether you are interested in growing them for their fruit, ornamental value, or even for their ability to provide shade and privacy.
Step 1: Selecting Healthy Cuttings
The first and most important step in propagating grapevines from cuttings is selecting healthy, mature canes. Here’s what you need to do:
Timing:
The best time to take cuttings is during the grapevine’s dormant period, which typically occurs in late winter or early spring. During this time, the vine is not actively growing, and the cuttings will have a higher chance of developing roots successfully.
Choose the Right Vine:
Look for mature, healthy vines that have no signs of disease or damage. The cane should be about the thickness of a pencil and have a firm texture. The ideal cane for propagation is one that is at least one year old, as these tend to be more robust and have a better chance of growing into strong plants.
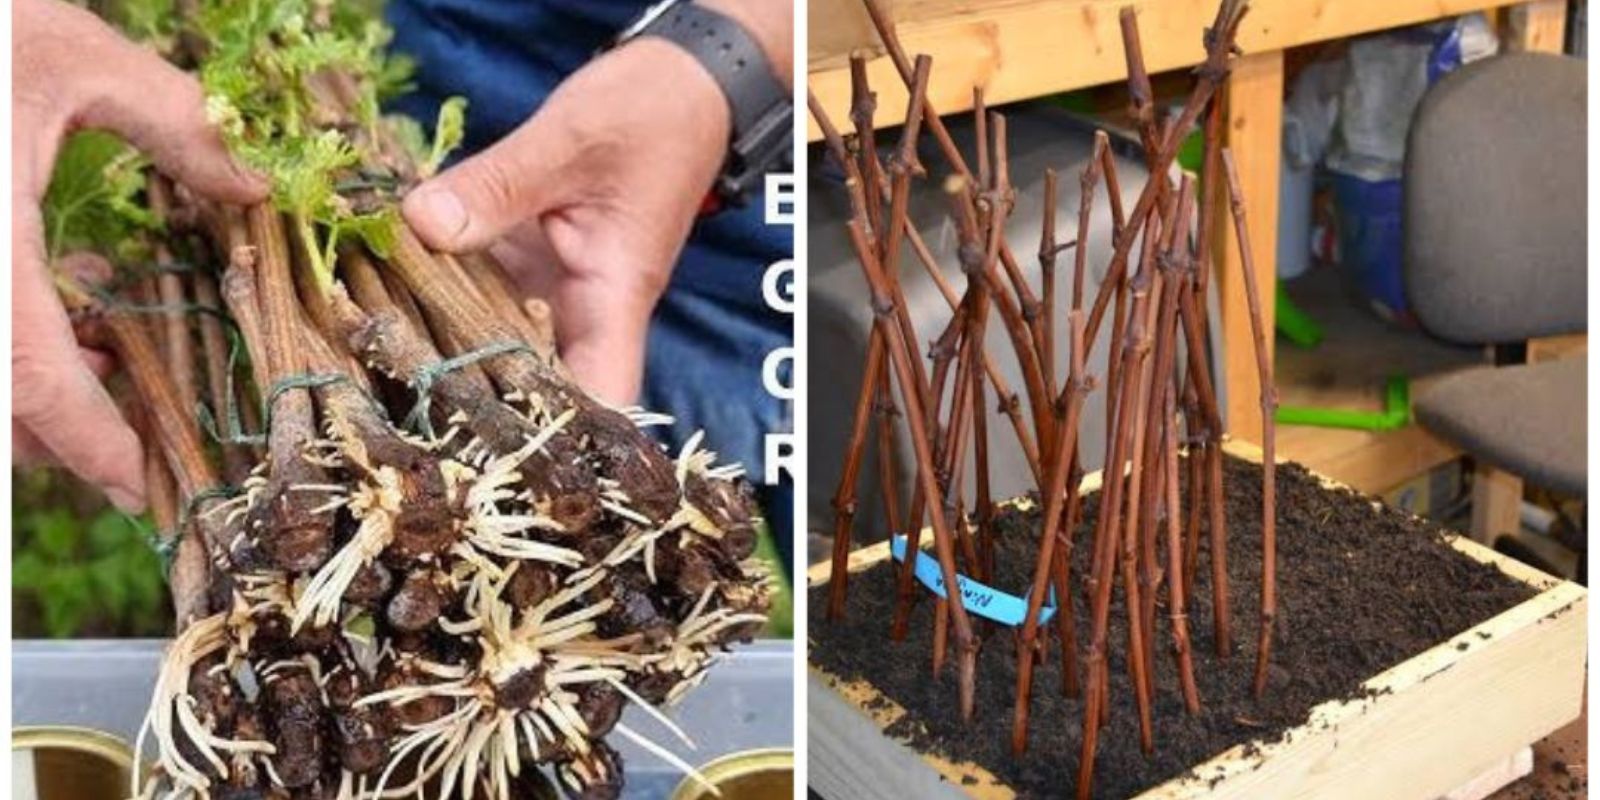
Cut the Canes:
Cut 30-45 cm sections of the vine, making sure each cutting has at least three to four nodes. Nodes are the areas on the stem where leaves and branches grow. These nodes are essential because they are where the roots will eventually emerge.
Step 2: Preparing the Cuttings
Once you’ve selected and cut the canes, it’s time to prepare them for planting. The preparation process is crucial in ensuring that the cuttings have the best chance of rooting.
Trim the Cuttings:
You should trim the bottom of the cutting just below a node and the top above a node. This will help the cutting focus its energy on root production rather than leaf growth. Be sure to use clean, sharp pruning shears to ensure that the cuts are clean and straight, which helps prevent damage and disease.
Hormone for Rooting:
To increase the chances of successful rooting, you can dip the bottom end of the cutting in rooting hormone. Rooting hormone is a substance that encourages the development of roots and can significantly improve your success rate. Simply dip the cut end into the hormone powder, tapping off any excess. While this step is optional, it is highly recommended, especially if you’re propagating multiple cuttings.
Step 3: Planting the Cuttings
After preparing the cuttings, the next step is to plant them in the right medium. You want to ensure that the cuttings have the best conditions to form roots.
Soil Preparation:
Choose a well-draining soil mix for planting the cuttings. A mixture of sand, perlite, and potting soil works well because it allows for proper drainage and airflow to the developing roots. The cuttings need a stable environment with enough moisture to keep them hydrated, but not too much to encourage rot.
Planting Depth:
When planting the cuttings, make sure at least two nodes are buried beneath the soil. The nodes will develop roots, so planting them deep enough is essential for the rooting process. Planting the cuttings too shallow could lead to insufficient root development.
Spacing:
Space your cuttings at least 15-20 cm apart, especially if you’re planting multiple cuttings in the same container. This gives each cutting enough room to grow and prevents overcrowding, which can lead to poor growth and competition for nutrients.
Step 4: Creating the Right Environment for Rooting
Grape cuttings need the right environment to root successfully. This involves managing temperature, humidity, and moisture levels.
Watering:
Keep the soil consistently moist, but not waterlogged. Overwatering can lead to root rot, which is the most common reason for failure in propagation. The soil should be moist to the touch, but you should be able to lightly press on it without it becoming soggy.
Humidity and Temperature:
Cuttings need high humidity to encourage rooting. To maintain humidity, you can cover the cuttings with a plastic bag or a plastic dome. This will trap moisture and create a mini greenhouse effect, which promotes healthy root growth.
Place the container in a warm location with temperatures between 21-29°C. Grapevines root best in warmer conditions, so ensure the space is warm enough, but not too hot.
Monitoring:
It’s important to check your cuttings regularly to ensure that the conditions remain stable. Water them as needed, and watch for any signs of mold or rot. Depending on the conditions, the cuttings can take anywhere from a few weeks to a couple of months to develop roots.
Step 5: Transplanting Rooted Cuttings
Once the cuttings have developed strong roots, it’s time to transplant them into larger pots or directly into the garden.
Check for Roots:
After about 1-2 months, gently tug on the cuttings to check for resistance. If you feel a firm pull, this indicates that the cutting has developed roots. If there’s no resistance, give it more time to root.
Transplanting:
When the roots are well-established, move the cuttings to larger containers or directly into the garden. Choose a sunny, well-draining location in your garden, as grapevines thrive in full sunlight. If you’re planting in the garden, make sure the soil is loose and drains well to prevent waterlogging.
Providing Support:
Grape vines are climbers, so it’s essential to provide support for the growing vines. Install a trellis, stake, or arbor to give the vines something to climb on. This will help the vines grow vertically, ensuring that they get enough sunlight and air circulation.
Step 6: Caring for Young Vines
Now that your grapevines are in the ground, they need regular care to ensure healthy growth and fruit production.
Watering:
Continue to water the vines regularly, but make sure the soil doesn’t stay too wet. Allow the soil to dry out slightly between waterings to prevent root rot.
Fertilization:
Feed the vines with a balanced fertilizer every few weeks during the growing season. Fertilizer will encourage strong growth and help the vines produce fruit.
Pruning:
As the vines grow, they will need regular pruning to encourage healthy growth and prevent disease. Remove any weak or diseased growth, and train the vines to grow along your support structure. Regular pruning will also help promote fruit production in the future.
Conclusion
Growing grapevines from cuttings is a rewarding and simple process that can yield beautiful, fruitful plants with just a little patience and care. By following these steps and providing the right environment for your cuttings, you can have a thriving vineyard or a beautiful grapevine to enhance your garden. Whether you’re growing grapes for their delicious fruit or simply for their aesthetic value, propagating from cuttings is a cost-effective and satisfying way to get started with these remarkable plants.
Happy gardening!