
Garlic is a staple in kitchens around the world. Known for its rich flavor and numerous health benefits, it’s no surprise that growing garlic at home has become a popular gardening trend. Imagine never having to buy garlic again—just planting a single bulb and harvesting your own endless supply. The good news is, with the right knowledge and a few simple techniques, you can achieve this and much more. This comprehensive guide will walk you through the process of growing garlic from the stem, multiplying your harvest, and ensuring that you have an ongoing supply for years to come.
Why Grow Garlic?
Before diving into the how-to details, let’s first explore why growing garlic is so beneficial. Garlic is not only a flavorful addition to your meals but also a fantastic plant to cultivate in your garden. Here are a few reasons why garlic is an excellent choice for home gardeners:
- Low Maintenance: Garlic is easy to grow, requiring minimal care once planted. It thrives in a variety of conditions and is relatively pest-free compared to other crops.
- Space-Efficient: Garlic doesn’t take up much room, making it ideal for small gardens, raised beds, or containers.
- Health Benefits: Garlic is packed with antioxidants and has long been praised for its medicinal properties, including supporting heart health and boosting the immune system.
- Endless Supply: Once you learn how to grow garlic, you can perpetuate the cycle by saving your best bulbs and cloves for future planting.
Step 1: Selecting the Right Garlic for Planting
The first step in growing garlic at home is selecting the right type. Garlic is typically categorized into two main varieties: hardneck and softneck. Each has its benefits and is better suited to different climates.
- Hardneck Garlic: This variety is best suited for colder climates. It produces fewer but larger cloves and has a more intense flavor. Hardneck garlic also produces a flower stem, or scape, which can be harvested and eaten.
- Softneck Garlic: Softneck garlic is better for milder climates and has a longer shelf life. It produces more cloves, which tend to be smaller but still flavorful. Softneck varieties are commonly used for braiding.
When choosing garlic to plant, always pick organic bulbs or high-quality garlic from a trusted source. Avoid using garlic from the grocery store, as it may have been treated to prevent sprouting.
Step 2: Preparing the Soil and Planting Area
Garlic prefers well-drained, fertile soil that is rich in organic matter. Before planting, you’ll want to ensure that the soil is loose and easy for the garlic to grow into. Here’s how to prepare your planting area:
- Location: Garlic thrives in full sun, so choose a location that gets at least six hours of sunlight per day.
- Soil Preparation: If your soil is heavy or clay-like, amend it with compost or organic matter to improve drainage. Garlic also prefers slightly acidic soil, with a pH of 6.0 to 7.0.
- Raised Beds or Containers: If your garden has poor soil, consider growing garlic in raised beds or containers. This allows you to control the soil quality and drainage more easily.
Once the soil is prepared, it’s time to plant your garlic cloves.
Step 3: Planting the Garlic Cloves
To start your garlic harvest, you’ll need to plant individual cloves. Here’s how to do it correctly:
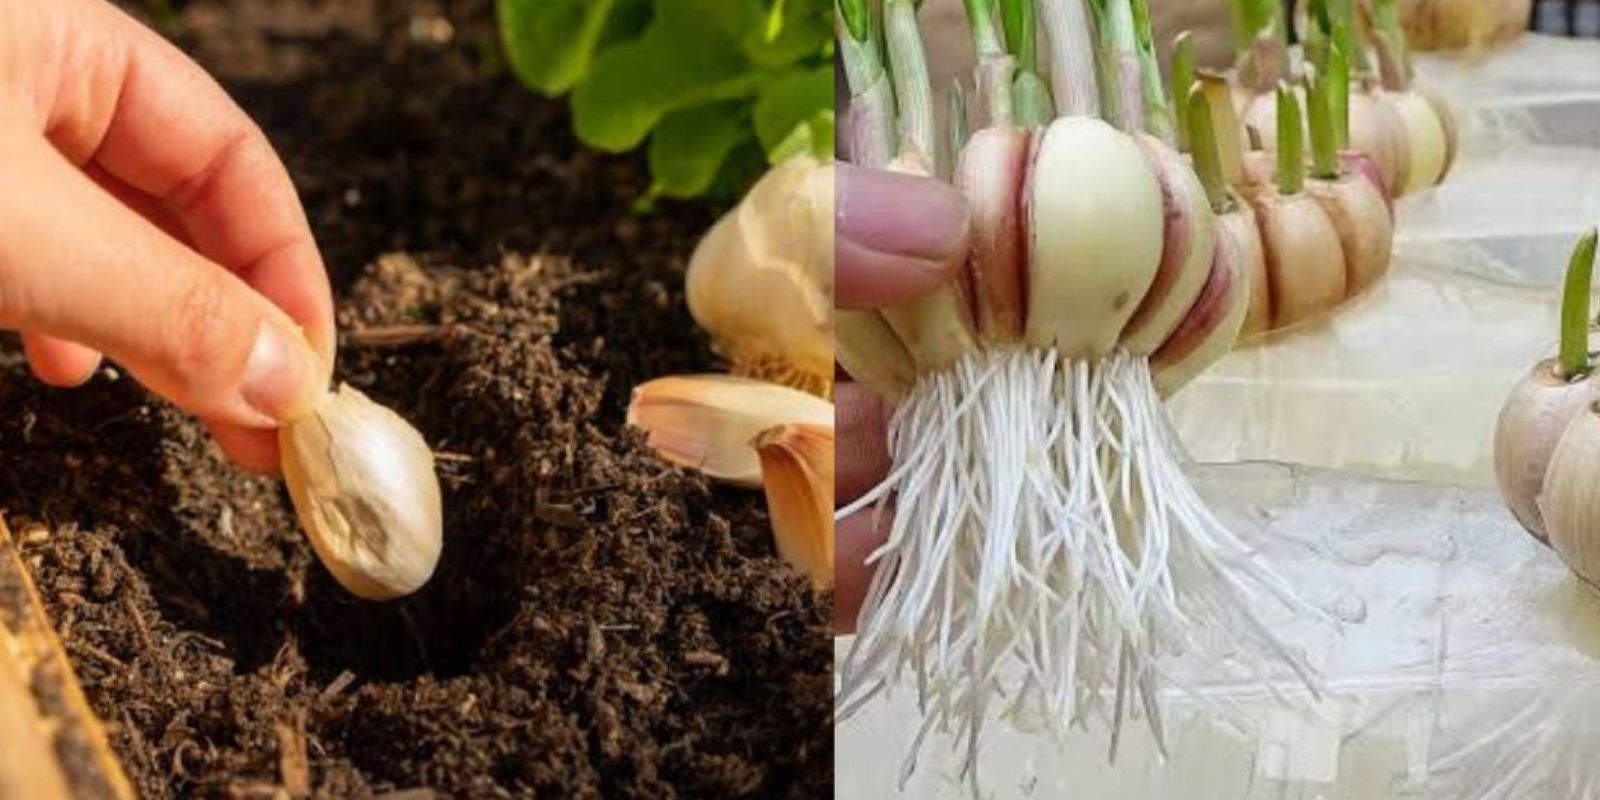
- Separate the Cloves: Take your garlic bulb and carefully separate the cloves. Be sure to leave the papery skin on each clove to protect it during the growing process.
- Plant the Cloves: Dig holes that are 2 inches deep and space them about 4-6 inches apart. The pointy side of the clove should face up, while the flat side should face down. Garlic grows best when each clove has ample room to spread and grow.
- Watering: After planting, water the cloves gently to settle the soil around them. Keep the soil moist throughout the growing season, but avoid over-watering, as garlic does not like to sit in soggy soil.
Step 4: Caring for Garlic Plants
Garlic requires minimal care but still benefits from a few essential practices:
- Mulch: Apply a layer of mulch, such as straw or leaves, around the garlic plants. Mulch helps retain moisture, keeps the soil cool in the summer, and prevents weed growth.
- Watering: Keep the soil consistently moist, but not waterlogged. Garlic does not like being too wet or too dry, so monitor the moisture levels carefully.
- Fertilizing: Garlic is a heavy feeder, so you may need to fertilize during the growing season. Use an organic fertilizer or compost to keep your plants healthy.
- Weeding: Regularly remove weeds that may compete with the garlic for nutrients and water.
As your garlic grows, you’ll see tall green shoots emerging from the soil. If you planted hardneck garlic, you may also notice scapes (flower stems) growing from the center of the plant. These can be harvested and used in cooking as well.
Step 5: Harvesting Garlic
The timing of your garlic harvest is critical. Garlic is typically ready to harvest in late spring or early summer, depending on when it was planted. Here’s how to know when your garlic is ready:
- Signs of Maturity: Garlic is ready for harvest when the leaves begin to yellow and die back. The plant’s leaves will start to dry out, leaving just a few green leaves standing.
- Digging Up the Garlic: Use a garden fork or shovel to carefully dig around the garlic bulbs. Be gentle to avoid damaging the bulbs. Pull the garlic plants from the soil, leaving the bulbs intact.
- Curing the Garlic: Once harvested, allow the garlic to cure in a cool, dry place for 2-3 weeks. Hang the garlic in bunches or lay it out on a rack. This curing process helps the garlic develop its flavor and ensures a longer shelf life.
Step 6: Saving Garlic for Future Planting
One of the best things about growing garlic is that you can save your largest and healthiest cloves for the next growing season. By doing this, you ensure a continuous supply of garlic in your garden, year after year. Here’s how to save garlic for future planting:
- Select the Best Cloves: When harvesting, choose the largest and healthiest cloves for replanting. These will produce the best bulbs next season.
- Storage: Store the selected cloves in a cool, dry place until it’s time to plant. Avoid storing them in plastic bags, as they can mold. Instead, store them in mesh bags or baskets.
Step 7: Growing Garlic Indefinitely
By following these simple steps each year, you can establish a perpetual garlic harvest that doesn’t require purchasing garlic from the store. Each year, you can save your best cloves, plant them in the fall, and enjoy fresh, homegrown garlic without interruption. This sustainable gardening method will not only provide you with an abundant supply of garlic but also help you become more self-sufficient and eco-conscious.
Final Thoughts
Growing garlic at home is an easy, rewarding, and sustainable gardening practice that pays off year after year. With just a few simple steps—selecting quality garlic, preparing the soil, planting cloves, and saving the best bulbs for future harvests—you can ensure that you never have to buy garlic again. Plus, the satisfaction of harvesting your own garlic is hard to beat.
So, grab a garlic bulb, get planting, and enjoy the incredible flavor and health benefits of homegrown garlic. Your garden will thank you!
Call to Action
Ready to start growing your own garlic? Let us know how your garlic garden is coming along, and share your tips with the community. Don’t forget to use the hashtag #HomeGrownGarlic and tag us in your gardening posts for a chance to be featured!