
English peas, also known as garden peas or sweet peas, are a delightful addition to any home garden. Known for their crisp texture and sweet flavor, these legumes are a favorite in spring and early summer dishes. Growing English peas can be incredibly rewarding, and with the right knowledge, you can enjoy fresh, homegrown peas straight from the garden. This comprehensive guide will take you through every step of growing English peas, from selecting the right variety to harvesting at the perfect time.
Why Grow English Peas?
Before delving into the how-to’s, let’s first explore why you might want to grow English peas in your garden. Here are a few reasons:
- Delicious and Nutritious: English peas are rich in vitamins, minerals, and antioxidants, making them a healthy addition to any meal. They are an excellent source of vitamin K, vitamin C, folate, and fiber.
- Cool-Weather Crop: Unlike many vegetables that thrive in the heat of summer, English peas prefer cool temperatures and are perfect for planting in early spring or late winter. They can handle frost, making them ideal for gardeners in temperate regions.
- Easy to Grow: English peas are relatively easy to grow, especially when compared to other vegetables. They don’t require a lot of attention or complicated techniques to thrive, which makes them an excellent choice for beginner gardeners.
- Fresh and Tasty: There’s nothing quite like harvesting peas from your garden and eating them fresh. The sweetness of homegrown peas is unbeatable, and you’ll find that they taste far superior to store-bought varieties.
- Fix Nitrogen in the Soil: As a legume, peas naturally fix nitrogen in the soil, enriching the soil with nutrients that will benefit other plants in your garden.
Choosing the Right Variety of English Peas
Before you start planting, it’s important to choose the right variety of English peas. English peas come in two main types: bush peas and vining peas.
- Bush Peas: These peas are shorter in height and don’t require a trellis for support. They are perfect for smaller gardens or containers. Bush peas are ideal for gardeners who want a low-maintenance plant.
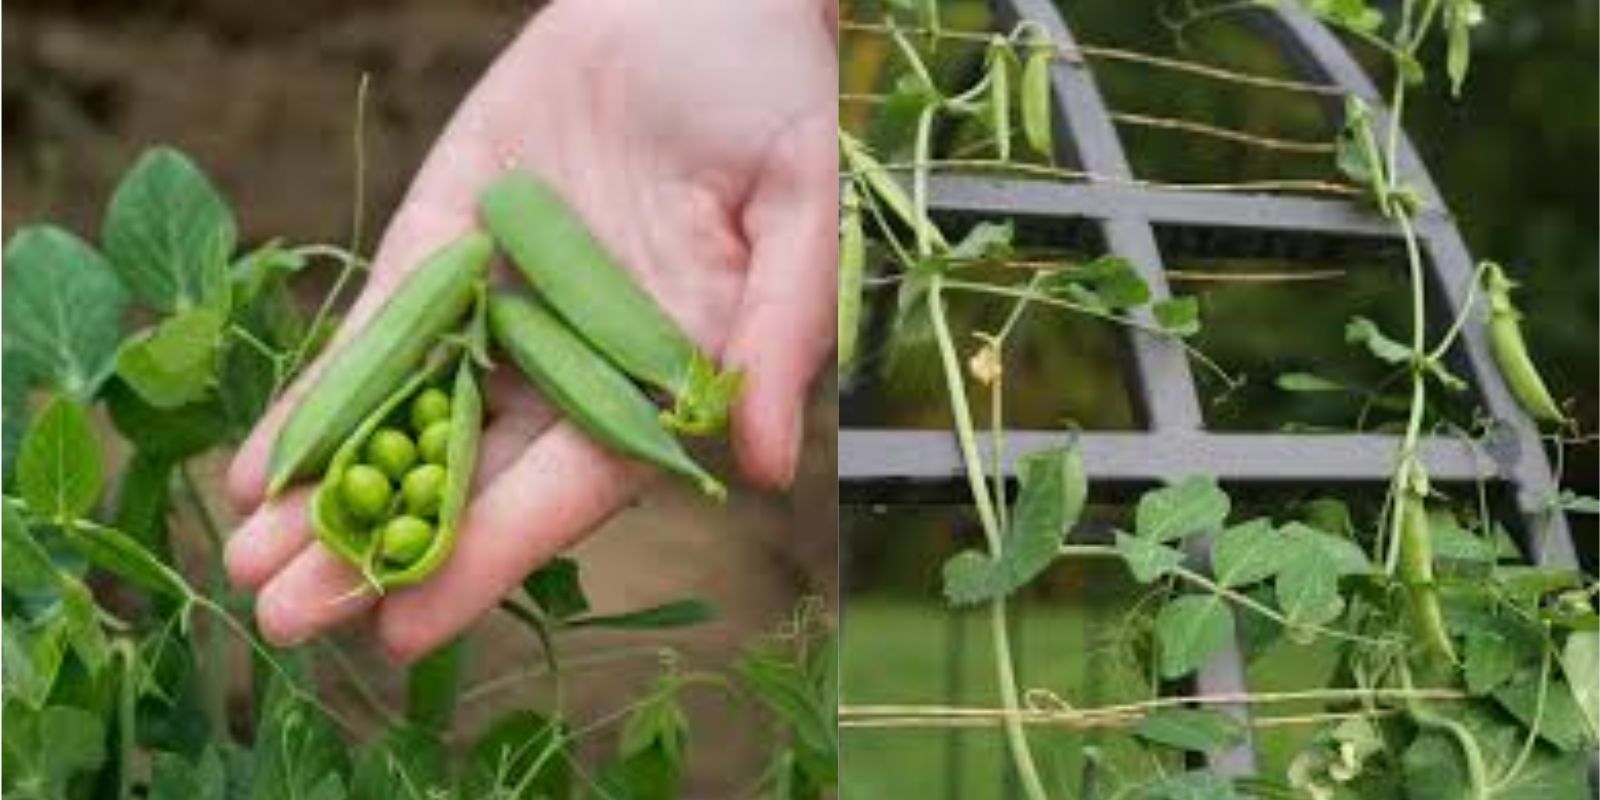
- Vining Peas: These peas grow taller, sometimes reaching heights of 4–6 feet or more. They require a trellis or netting to help support their vines. Vining peas tend to produce larger yields and are a good choice for gardeners with space for vertical growth.
There are many varieties of English peas to choose from, each with different pod sizes, plant heights, and flavor profiles. Some popular varieties include:
- Wando: A cold-hardy variety that can withstand frost and is ideal for early planting.
- Little Marvel: A classic variety known for its sweet flavor and compact size, perfect for small gardens.
- Progress No. 9: A high-yielding variety with large pods and a rich, sweet flavor.
When to Plant English Peas
The timing of your pea planting is critical to ensuring a successful harvest. English peas prefer cool temperatures, and planting them at the right time will set you up for success.
- Plant Early in Spring: In general, English peas should be planted as soon as the soil can be worked in the spring, about 4 to 6 weeks before the last expected frost. If you live in a warmer climate, you can plant peas in the fall, allowing them to grow through the cooler winter months.
- Soil Temperature: The soil temperature for planting peas should be between 40°F and 75°F (4°C to 24°C). Peas don’t do well in hot weather, so avoid planting them during the summer months.
- Frost Tolerance: English peas are hardy to light frost, so don’t worry if a light frost occurs after planting. However, be mindful of extreme weather, as heavy frost or prolonged freezing temperatures can damage the plants.
Preparing the Soil for Planting
English peas prefer well-drained soil that is rich in organic matter. Here are the key steps to preparing your soil for planting:
- Choose a Sunny Spot: Peas grow best in full sun, so choose a location in your garden that receives at least 6 to 8 hours of sunlight a day. However, they can tolerate partial shade, especially during hot summer months.
- Loosen the Soil: Use a garden fork or shovel to loosen the soil to a depth of 2–3 inches. This will help the pea roots penetrate the soil and promote healthy growth.
- Improve Soil Drainage: Peas do not like to sit in soggy soil, so ensure that your soil has good drainage. If you have heavy clay soil, mix in organic matter such as compost, well-rotted manure, or peat moss to improve drainage and soil structure.
- Incorporate Fertilizer: Peas don’t require heavy fertilization, but adding compost or a light application of a balanced fertilizer can help improve soil fertility. Peas are nitrogen-fixing plants, so they don’t need additional nitrogen, but they will benefit from the other nutrients in compost.
Planting English Peas
Now that your soil is ready, it’s time to plant your English peas. Follow these steps for a successful planting:
- Sow the Seeds: Plant your pea seeds 1 to 2 inches deep and space them 2 to 3 inches apart in rows. If you’re planting in a raised bed or container, ensure that the seeds are spaced accordingly.
- Row Spacing: For traditional rows, space the rows about 18 to 24 inches apart to give the plants plenty of room to grow. If you’re planting vining peas, the vines will need space to climb, so make sure the rows are spaced further apart if needed.
- Watering: Water the seeds gently after planting to help them settle into the soil. Keep the soil consistently moist, but not soggy. Be careful not to overwater, as peas do not tolerate waterlogged soil.
- Mulching: Apply a light layer of mulch around the plants to help retain moisture and keep weeds at bay. Organic mulch, such as straw or grass clippings, works well.
Supporting Vining Peas
If you’re growing vining peas, they will need some form of support to help them climb and grow upward. Here are a few options:
- Trellis: A simple vertical structure such as a wooden or wire trellis will give your vining peas something to grab onto as they grow. Space the trellis about 6 inches from the row of peas, allowing the vines to grow up and over the support.
- Cages or Netting: For smaller garden spaces, you can use tomato cages or pea netting to support your plants. These can be placed over the row as the peas begin to grow, allowing the vines to climb up.
Caring for Your English Peas
Once your peas are planted, they require minimal care, but some regular attention will help them thrive:
- Watering: Peas need consistent moisture, especially while they’re germinating and growing. Water them regularly, but be careful not to overwater, as peas do not like wet feet.
- Weeding: Keep the area around your peas free from weeds, as they can compete for nutrients and water. Mulching, as mentioned earlier, can help control weeds.
- Pest Control: Watch for common pea pests, such as aphids, pea weevils, and snails. Regularly check your plants for signs of infestation, and consider using natural remedies such as insecticidal soap or neem oil if necessary.
- Fertilizing: Peas are low-maintenance when it comes to fertilizing. Avoid high-nitrogen fertilizers, as they can encourage excessive foliage growth at the expense of pod production. If the soil is well-amended with compost, additional fertilizer is usually unnecessary.
Harvesting Your English Peas
English peas are ready for harvest when the pods are full and firm, but still tender. Here’s how to harvest them:
- Check the Pods: The pods should be plump but still slightly rounded. They shouldn’t feel hard or leathery. Open a pod to check the peas inside; they should be bright green and well-formed.
- Pick by Hand: Gently snap the pods from the plant by hand, or use scissors to cut them off the vine. Be careful not to damage the plant while harvesting.
- Continuous Harvesting: Harvesting peas regularly encourages the plant to produce more pods. You can pick peas every few days to ensure that the plant continues to produce throughout the growing season.
Final Thoughts
Growing English peas is a rewarding and easy way to enjoy fresh, homegrown vegetables. With just a few simple steps—preparing the soil, planting at the right time, and caring for the plants as they grow—you can enjoy a bountiful harvest of sweet, delicious peas. Whether you have a large garden or a small container, English peas are a perfect addition to your gardening routine.
Happy gardening! 🌱