
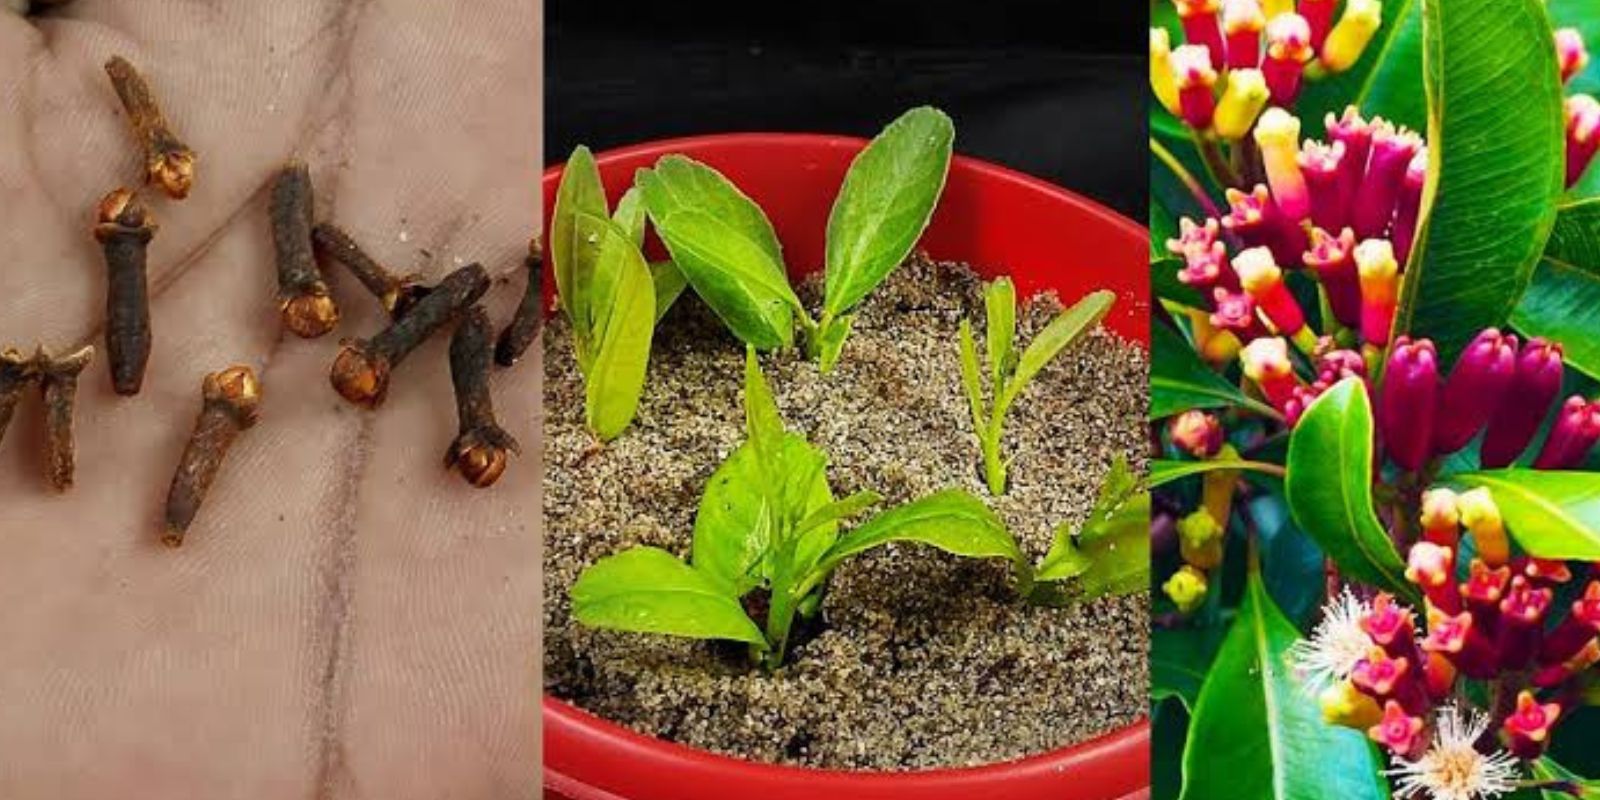
Growing your own spices is a rewarding and fulfilling gardening experience. While many are familiar with growing common herbs and vegetables, few know the joy of cultivating cloves right in their own garden or home. Cloves, often associated with warm spices and used in cooking and medicinal applications, come from a flowering tree (Syzygium aromaticum). These tiny, aromatic buds are harvested from the flower and dried to create the spice we know and love.
But how do you grow cloves? Can they thrive in a typical home garden or indoor container? The answer is yes! Growing cloves is a process that requires patience, dedication, and a few key steps. This article will guide you through the process of growing cloves from seeds to harvesting the flavorful spice, so you can enjoy fresh, homegrown cloves at your fingertips.
Why Grow Cloves at Home?
Before we dive into the “how-to,” let’s explore why you might want to grow cloves at home.
- Flavor & Aroma: Freshly grown cloves have a richer, more vibrant aroma than store-bought varieties. They’ll add an authentic, homemade flavor to your cooking.
- Medicinal Benefits: Cloves are not only used in the kitchen. They have a long history in traditional medicine for their antioxidant, anti-inflammatory, and antimicrobial properties.
- Sustainability: Growing cloves yourself means you know exactly how they were cultivated. You can avoid the pesticides and additives that may be found in store-bought versions.
- Personal Satisfaction: There’s something special about growing your own spices. It’s a fulfilling experience that connects you to your food in a unique way.
Now that you understand the benefits, let’s break down the process of growing cloves at home.
1. Selecting Clove Seeds
The first step in growing cloves is to acquire high-quality clove seeds. You can often find these at garden centers, online nurseries, or even from other gardeners who have successfully grown cloves. When selecting your seeds, make sure they are fresh, healthy, and free from any mold or damage. Old, dried-out seeds are unlikely to germinate properly.
It’s important to note that cloves grow best in warm, tropical climates, and they require specific conditions to thrive. If you live in a temperate or cold climate, you may need to grow your cloves indoors or in a greenhouse where you can control the environment.
2. Germinating Clove Seeds
Germination is one of the trickiest steps when it comes to growing cloves. The seeds have a tough outer shell that makes them difficult to sprout. To improve your chances of success, it’s important to scarify the seeds before planting.
Scarifying the Seeds:
Scarification is the process of breaking or softening the seed coat to encourage sprouting. For cloves, you can use a sharp knife or a small file to make small incisions on the hard outer shell. Be careful not to cut into the seed itself; the goal is to simply nick the outer layer.
Soaking the Seeds:
After scarifying, soak the seeds in warm water for 12-24 hours. This helps to soften the seed coat further and stimulates the seed to begin germinating. This pre-treatment will increase the likelihood of successful germination.
3. Planting Clove Seeds
Once your seeds have been soaked, it’s time to plant them. For best results, use well-draining potting soil or a sandy loam mixture. The soil should be rich in organic matter but also light enough to allow for proper drainage. If you are planting in containers, make sure the pots have good drainage holes.
Container Selection:
Cloves have a deep root system, so it’s important to choose a container that allows for adequate root growth. A pot that is at least 8-10 inches deep should be sufficient. Larger containers can accommodate multiple plants if you want to grow more than one clove tree.
Planting Depth:
Place the seeds about 1 inch deep into the soil, gently covering them with a thin layer of soil. Be careful not to compact the soil too much, as the seeds need some room to sprout.
Location:
Find a warm and humid location for your clove seeds to germinate. Cloves require a tropical climate with temperatures ranging from 70°F to 85°F (21°C to 29°C). If you’re growing indoors, a bright windowsill or grow light is ideal. Avoid direct sunlight, as it may dry out the seeds.
Water the seeds gently to keep the soil moist, but not waterlogged. The goal is to keep the environment warm and humid to encourage sprouting.
4. Caring for Clove Seedlings
Once your clove seeds have germinated, you’ll need to care for the seedlings to help them grow into strong, healthy plants. Here are a few key tips for caring for your clove seedlings:
Light:
Cloves need bright but indirect sunlight for optimal growth. If you’re growing your plants indoors, place them in a location where they’ll receive plenty of light but avoid harsh, direct sunlight. A grow light can also be a great addition to your setup.
Watering:
Keep the soil consistently moist, but not soggy. Water the plants regularly, especially during the growing season, but allow the top of the soil to dry out slightly between waterings. Be mindful not to overwater, as clove trees do not like to have their roots sitting in stagnant water.
Temperature:
Cloves thrive in warm temperatures, so make sure to keep your plants in a warm area. The temperature should stay consistently between 70°F and 85°F (21°C – 29°C). If temperatures drop significantly, the plants may struggle to grow.
Fertilizing:
To support healthy growth, use a balanced, water-soluble fertilizer every 4-6 weeks during the growing season. Look for fertilizers that contain a balanced ratio of nitrogen (N), phosphorus (P), and potassium (K), which will help the plants grow strong and healthy.
Pruning:
As your clove trees grow, you may need to prune them to encourage strong, bushy growth. Prune back any dead or damaged branches, and remove any lower leaves to allow for better airflow around the plant. Pruning will help the tree develop a strong central stem and more compact growth.
5. Harvesting Cloves
Cloves are harvested from the flower buds of the clove tree. The buds will turn from green to pink and eventually to a light brown color when they are ready to be harvested. Timing is crucial when harvesting cloves; you want to collect the buds just before they open, as they will lose flavor and aroma once they bloom.
How to Harvest Cloves:
To harvest cloves, use sharp pruning shears or scissors to snip the flower buds off the tree. Take care not to damage the plant while harvesting, as the tree may continue producing new buds over time.
Once the buds have been collected, you’ll need to dry them to preserve their flavor. Place the harvested buds in a warm, dry, and well-ventilated area. Leave them to dry for several days until they turn a dark brown color and become firm to the touch.
6. Drying and Storing Cloves
After harvesting and drying your cloves, it’s important to store them properly to maintain their flavor and aroma.
Drying:
Make sure to dry the cloves thoroughly to avoid mold growth. Place them on a clean, dry surface, such as a paper towel or screen, and let them air dry in a warm location for several days. If you’re in a humid area, you can speed up the drying process by using a dehydrator or oven on a low setting.
Storage:
Once your cloves are completely dried, store them in an airtight container, away from heat, light, and moisture. Glass jars or vacuum-sealed bags are ideal for preserving the freshness of your cloves. Store the container in a cool, dry place, such as a pantry or cupboard.
Properly stored, your homegrown cloves will last for several months and continue to provide rich flavor for your culinary and medicinal needs.
Conclusion
Growing cloves at home is a rewarding and satisfying experience. With the right care and attention, you can cultivate these fragrant spice buds from seed to harvest in your own backyard or indoor garden. Whether you’re using them in your favorite recipes or enjoying their medicinal properties, homegrown cloves add a unique touch to any kitchen.
So, roll up your sleeves, gather your materials, and start your clove-growing journey today! Happy gardening!