
Cloves, one of the most treasured spices in the world, have been used for centuries for culinary, medicinal, and aromatic purposes. Derived from the dried flower buds of the clove tree (Syzygium aromaticum), this fragrant spice adds a warm, pungent flavor to both sweet and savory dishes. While cloves are commonly found on store shelves, there’s a certain satisfaction in growing and harvesting your own. In this guide, we’ll explore how to grow a clove plant at home, from seed to spice, and provide tips for nurturing this tropical beauty in your own garden or indoor space.
1. Understanding the Clove Plant
Before diving into the process of growing cloves, it’s essential to understand the plant itself. Clove trees are evergreen and can grow up to 30 feet tall in their natural tropical environment. Native to Indonesia’s Spice Islands, cloves thrive in warm, humid climates, making them a bit challenging for gardeners in colder regions. However, with the right conditions, patience, and care, clove trees can be grown at home, even indoors or in a greenhouse.
2. Ideal Growing Conditions
To successfully grow a clove plant, it’s important to replicate its native environment as much as possible:
- Temperature: Clove plants require a warm climate to thrive, ideally between 70°F and 85°F. In cooler climates, they can be grown indoors or in a greenhouse.
- Humidity: High humidity is crucial for clove plants. If you’re growing your plant indoors, ensure the air around it is moist, either by misting the plant or using a humidity tray.
- Soil: Clove plants prefer well-draining, fertile soil that is slightly acidic (pH 5.5-6.5). A mixture of loam and organic compost works well.
- Sunlight: Cloves require partial shade to grow. Too much direct sunlight can damage the leaves, so choose a spot that receives filtered or indirect sunlight.
- Watering: Keep the soil consistently moist, but be cautious not to waterlog it, as clove plants are sensitive to root rot.
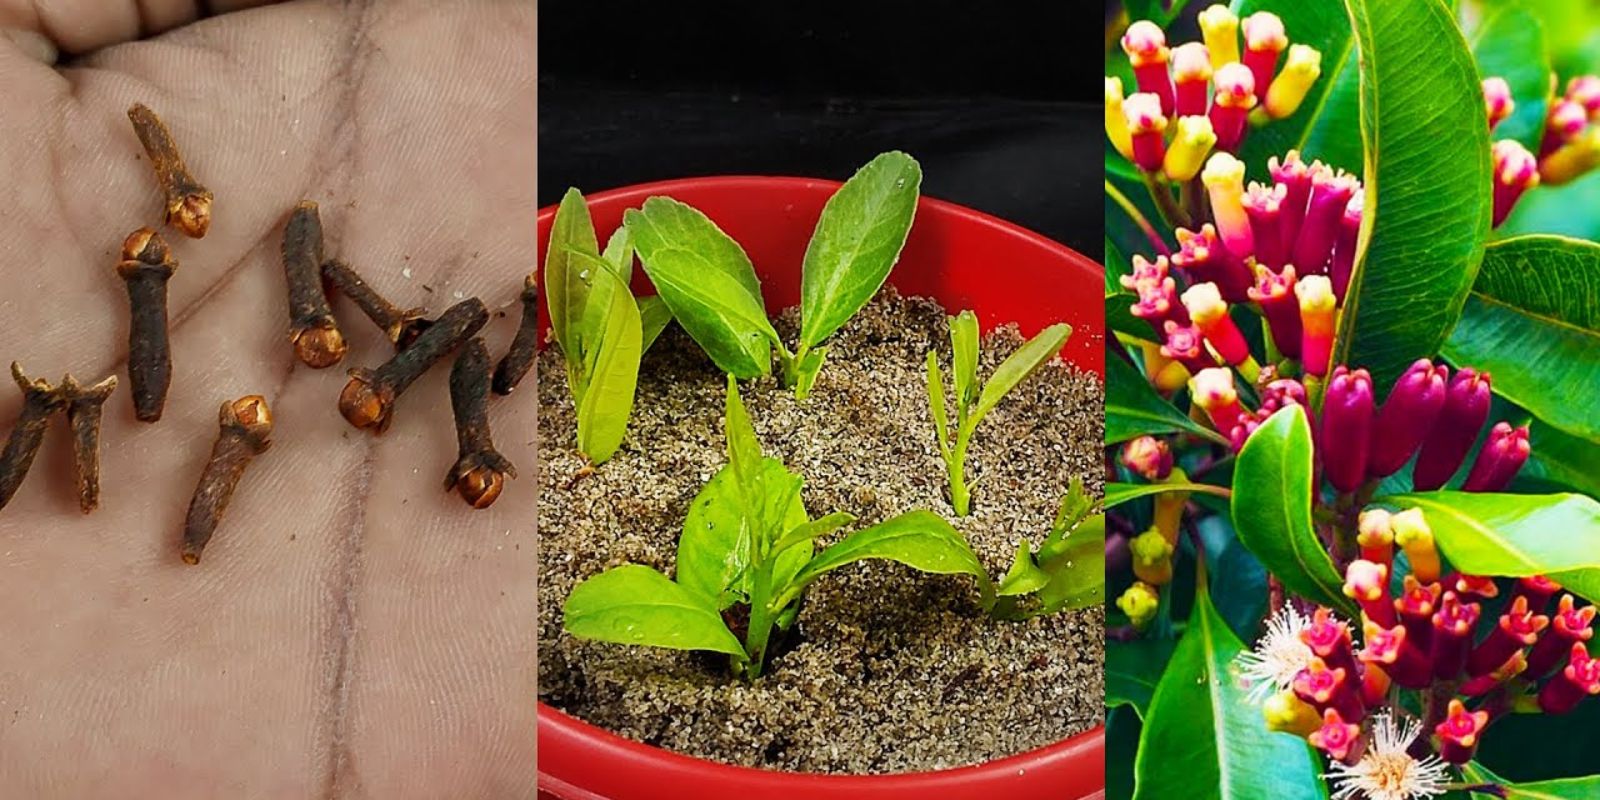
3. Getting the Seeds
One of the first steps in growing cloves is obtaining viable seeds. Unlike other plants, cloves from your spice rack won’t sprout because they’ve already been dried. Instead, you’ll need fresh clove seeds, which can often be found at specialty garden centers or online.
4. Preparing the Seeds for Planting
Once you’ve obtained fresh clove seeds, it’s time to prepare them for planting:
- Soaking the Seeds: Before planting, soak the seeds in warm water for 24 hours to soften the outer shell and speed up germination.
- Starting the Seeds Indoors: Clove seeds are slow to germinate and require consistent warmth and moisture. Plant the seeds about 1 inch deep in seed-starting trays or small pots filled with rich, well-draining soil. Keep the soil moist, and place the pots in a warm area, such as on a windowsill or near a heating vent.
5. Germination Process
Clove seeds can take several weeks, sometimes even up to six months, to germinate. During this time, it’s important to keep the environment warm and humid. Patience is key—although the germination process is slow, seeing the first green shoots emerge is a rewarding experience.
6. Transplanting Seedlings
Once the seedlings reach about 6-8 inches in height, they’re ready to be transplanted into larger pots or directly into your garden. If planting outdoors, ensure the temperature stays consistently warm and humid. When transplanting:
- Dig a hole large enough to accommodate the root system of the young plant.
- Ensure that the soil is well-draining and rich in organic matter.
- Water the plant thoroughly after transplanting to help it settle into its new environment.
7. Caring for Your Clove Plant
As the clove plant grows, regular care and attention are essential to ensure healthy development:
- Watering: Clove plants require consistent moisture, so water them regularly, especially during dry spells. However, avoid overwatering, as this can lead to root rot.
- Fertilizing: Feed the plant with a balanced organic fertilizer every two to three months to support growth. Clove plants benefit from compost, which can provide the necessary nutrients and improve soil structure.
- Pruning: Prune any dead or damaged branches to maintain the shape of the tree and promote healthy growth. Pruning can also help increase air circulation, reducing the risk of fungal diseases.
8. Pest and Disease Control
While clove plants are relatively resilient, they can still fall prey to pests and diseases:
- Pests: Common pests that may affect clove plants include aphids, scale insects, and mealybugs. Regularly inspect your plant for any signs of infestation and treat it with organic pest control methods, such as neem oil or insecticidal soap.
- Diseases: Clove plants are susceptible to fungal infections, particularly if the environment is too humid or the soil is waterlogged. To prevent diseases, ensure good air circulation around the plant, avoid overwatering, and remove any affected leaves or branches.
9. Waiting for Your First Harvest
Growing clove plants requires a great deal of patience, as the trees take several years to mature. It can take anywhere from six to ten years for a clove tree to produce its first flower buds, which will eventually become the cloves you harvest. The buds are harvested when they turn pink but are still unopened.
10. How to Harvest and Process Cloves
Once your clove tree begins producing flower buds, the harvest process is straightforward:
- Harvest the Flower Buds: Clove buds are picked just before they bloom, when they’re still pink and closed.
- Drying the Buds: Spread the harvested buds in a single layer in a dry, well-ventilated area. Let them air-dry until they turn dark brown and harden. This process usually takes a few days.
- Storing the Cloves: Once dried, store the cloves in an airtight container in a cool, dark place. Properly dried and stored cloves can last for several months, retaining their rich aroma and flavor.
11. Benefits of Growing Clove at Home
Growing clove plants at home offers multiple benefits, including:
- Fresh Spices: There’s nothing quite like the flavor and fragrance of freshly harvested cloves in your kitchen.
- Medicinal Uses: Cloves are known for their medicinal properties, such as soothing toothaches, improving digestion, and acting as an anti-inflammatory.
- Aesthetic Value: Clove trees are attractive evergreens that enhance the beauty of any garden or indoor space.
- Sustainability: Growing your own clove plant is an eco-friendly way to enjoy this popular spice without relying on commercial production.
12. Challenges of Growing Clove at Home
Despite the rewards, growing clove plants can be challenging:
- Time and Patience: Clove plants take years to mature and produce cloves, so they require long-term commitment.
- Climate Control: If you live in a region with a cooler climate, you’ll need to grow your clove plant indoors or in a greenhouse to provide the warm, humid environment it needs.
- Slow Growth: The clove plant’s slow growth rate can be frustrating for gardeners looking for quicker results.
Conclusion
Growing a clove plant at home is a rewarding journey that combines patience, skill, and the joy of harvesting your own spices. While it may take several years to see the fruits—or in this case, the flower buds—of your labor, the aromatic reward is well worth the wait. Whether you grow your clove plant indoors or outdoors, you’ll enjoy the aesthetic appeal of this evergreen tree while working toward a bountiful harvest of cloves for your kitchen or medicinal use.
Get Started Today!
Why not begin your clove-growing journey today? With a little patience and care, you can cultivate this valuable spice right in your own home. 🌿