
Chestnuts have long been cherished for their sweet, starchy nuts and their ability to thrive in temperate climates. Whether you’re growing chestnuts for personal enjoyment, culinary uses, or even for the potential income of harvesting, these hardy trees can be a valuable addition to any garden or orchard. If you’re thinking of adding chestnuts to your home garden, here’s a complete guide on how to grow chestnuts successfully, from planting seeds to harvesting the nuts.
Introduction to Growing Chestnuts
Chestnuts are deciduous trees belonging to the genus Castanea, known for their glossy, dark green leaves and large, edible nuts. These trees are typically grown for their nutritious, sweet-tasting nuts, which are a rich source of carbohydrates, fiber, and various vitamins. Unlike other nuts, chestnuts are low in fat and can be roasted, boiled, or even ground into flour. Whether you want to grow chestnuts in your backyard or establish a more extensive chestnut orchard, understanding the growing process is essential for a successful harvest.
Step 1: Selecting the Right Chestnut Variety
The first step to successfully growing chestnuts is choosing the correct variety. There are several different types of chestnuts, but the three primary ones include:
- American Chestnut (Castanea dentata): Once abundant in the eastern U.S., this species was nearly wiped out by chestnut blight in the early 1900s. Although there are efforts to restore it, the American chestnut is still relatively rare and more susceptible to disease.
- European Chestnut (Castanea sativa): Known for its sweet and larger nuts, the European chestnut is widely cultivated in Europe and other temperate regions. It’s less resistant to cold temperatures compared to the American variety.
- Chinese Chestnut (Castanea mollissima): This species is highly resistant to chestnut blight, making it one of the most popular varieties for modern chestnut cultivation. It produces smaller but still tasty and edible nuts.
When selecting the variety, consider your local climate, as chestnut trees generally prefer a temperate climate with cold winters. It’s also important to make sure the variety you choose is compatible with the pollination requirements, as chestnut trees require cross-pollination for optimal nut production.
Step 2: Planting Chestnut Seeds or Saplings
Once you’ve chosen your chestnut variety, it’s time to plant your chestnuts. Chestnuts can be propagated from seeds (nuts), but you can also buy young saplings from a nursery if you prefer a quicker route to harvest.
Planting Chestnut Seeds
If you’re planting chestnut seeds, you’ll need to follow these steps:
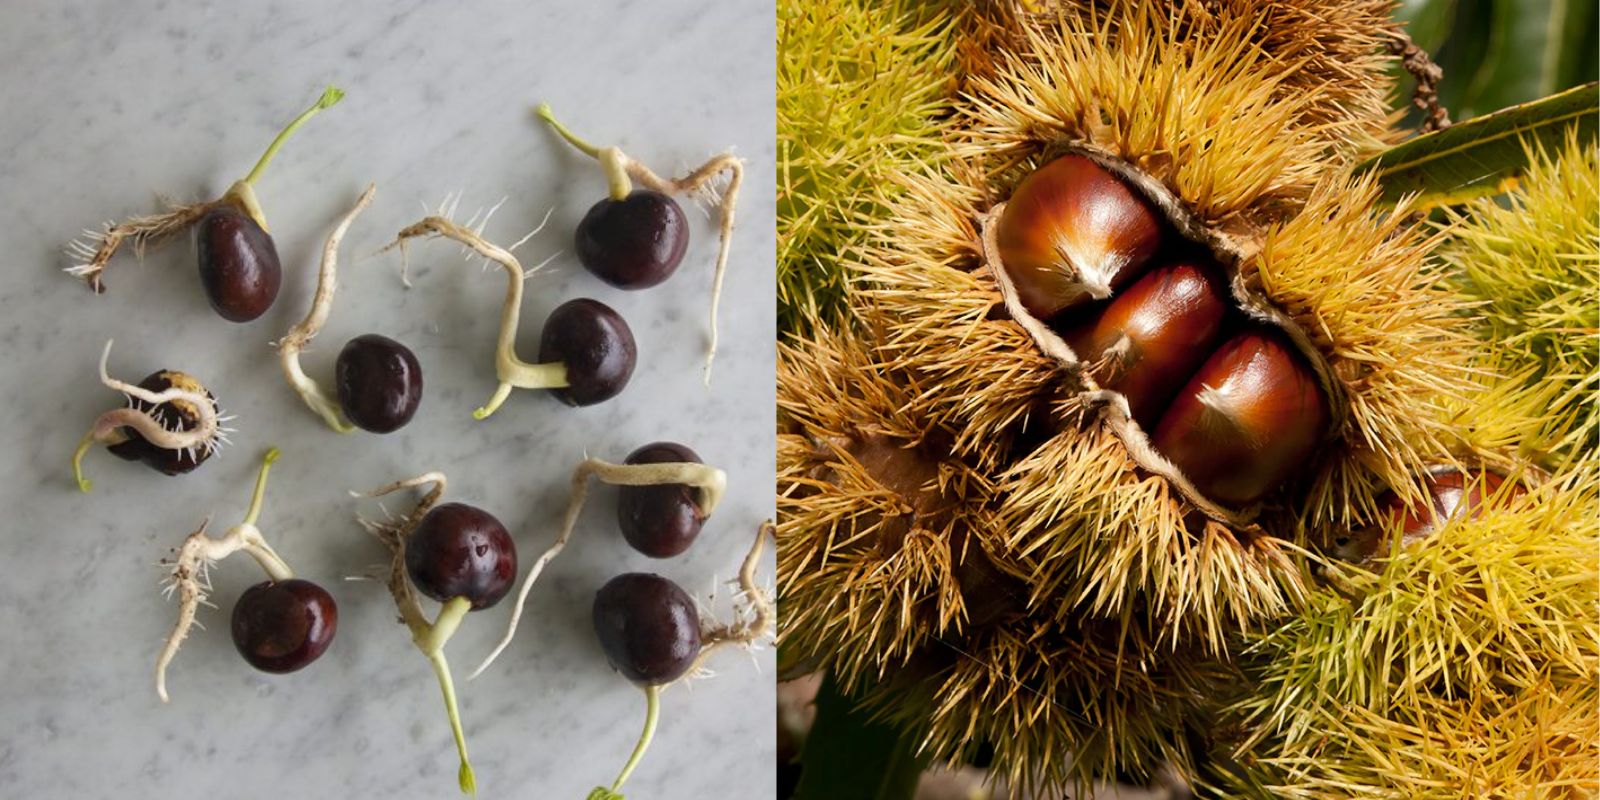
- Stratification: Chestnut seeds (nuts) need to be stratified to break dormancy. To stratify, place the seeds in a moist, cool environment for about 60-90 days before planting. You can place them in a plastic bag with damp peat moss or sand in the refrigerator. This process mimics the winter conditions that chestnuts experience in the wild.
- Choose a Planting Site: Chestnuts prefer well-drained, slightly acidic to neutral soils. Choose a site with full sun, as chestnut trees thrive in direct sunlight. The soil should be rich in organic matter and well-draining to prevent waterlogging.
- Plant the Seeds: Once stratified, plant the chestnut seeds in a hole about 2-3 inches deep. If planting multiple seeds, space them about 12 inches apart. Water the area well and ensure the seeds are covered lightly with soil.
Planting Chestnut Saplings
If you prefer to skip the seed process and start with young saplings, follow these steps:
- Choose Healthy Saplings: Purchase chestnut saplings from a reputable nursery that is known for offering healthy plants. Be sure the saplings are free from pests and diseases.
- Prepare the Planting Site: Dig a hole large enough to accommodate the sapling’s root system. Make sure the hole is at least twice as wide as the root ball.
- Plant the Sapling: Place the sapling into the hole, making sure that the top of the root ball is level with the surrounding soil. Fill the hole with soil and water generously.
- Mulching: Apply a layer of mulch around the base of the tree. This helps retain moisture, suppresses weeds, and maintains an even soil temperature.
Step 3: Care and Maintenance of Chestnut Trees
Once your chestnut seeds or saplings are planted, ongoing care is essential for ensuring healthy growth and a successful harvest. Here are key aspects to keep in mind:
Watering
Chestnut trees require regular watering, especially during their early stages of growth. However, they do not like to be waterlogged. The soil should remain consistently moist but not soaked. During dry periods, chestnuts should be watered deeply, ensuring the roots get adequate moisture. Once the trees are established, they can tolerate dry conditions better, but young trees need more attention.
Fertilizing
Chestnut trees benefit from annual fertilizing during the growing season to encourage strong growth. Use a balanced fertilizer with equal parts nitrogen, phosphorus, and potassium. Apply the fertilizer in early spring, just before new growth begins. If your soil is deficient in any particular nutrient, such as nitrogen, you can supplement accordingly.
Pruning
Pruning is important for chestnut trees to maintain a healthy shape and remove dead or damaged wood. Prune during the dormant season (winter or early spring) to avoid interfering with the tree’s growth cycle. Focus on removing any branches that cross each other or are growing inward toward the center of the tree.
Mulching
Applying mulch around the base of the tree helps retain moisture, regulate soil temperature, and reduce weed competition. Use organic materials like wood chips, bark, or compost to mulch the chestnut trees. Ensure the mulch is not piled up against the trunk to prevent rot.
Pest and Disease Management
Chestnut trees can fall victim to various pests, including caterpillars and aphids. Regularly check your trees for any signs of pest damage and treat with natural pest control methods like neem oil or insecticidal soap. Be aware of common diseases like chestnut blight, which is caused by the Cryphonectaria parasitica fungus. Choosing resistant varieties, such as Chinese chestnut, can help reduce the risk.
Step 4: Harvesting Chestnuts
Chestnuts generally start producing nuts 3-5 years after planting, depending on the variety and growing conditions. The nuts will be ready for harvesting in the fall, typically from September to November.
Here’s how to know when your chestnuts are ready to harvest:
- Look for the Spiky Husks: Chestnut trees produce large, spiky burrs that contain the nuts. When the burrs begin to split open and fall to the ground, the nuts are likely ready to be harvested.
- Check the Nuts: Once the burrs open, remove the chestnuts and check the nuts inside. Fresh chestnuts should have a glossy, dark brown appearance. If they are light brown or shriveled, they are not yet mature.
- Harvesting Method: Collect the fallen burrs and open them gently to extract the chestnuts. You can also pick the burrs directly from the tree with a long-handled tool if they are too high to reach.
Step 5: Storing and Enjoying Chestnuts
Once harvested, chestnuts can be stored for several months if handled properly. To store them:
- Remove the Husks: After harvesting, remove the spiky husks from the chestnuts. Be careful, as the husks can be sharp.
- Refrigeration: Chestnuts can be kept in a cool, dry place for up to two months. For longer storage, you can refrigerate or freeze them. To freeze chestnuts, pierce the shell with a knife and blanch them in boiling water for 2-3 minutes before freezing.
- Cooking with Chestnuts: Chestnuts are incredibly versatile and can be roasted, boiled, or used in baking. Roasting chestnuts is a popular method—simply cut an “X” on the flat side of the shell and roast them in an oven until tender.
Conclusion
Growing chestnuts is a rewarding experience that requires patience, care, and attention to detail. Whether you start with seeds or saplings, provide consistent care, and manage pests and diseases, you’ll be on your way to a fruitful chestnut harvest. In addition to their delicious nuts, chestnut trees offer a beautiful, hardy addition to any landscape.
Now that you know how to grow chestnuts, it’s time to start your journey to cultivating these nutritious, hearty trees in your own garden!
Happy Gardening! 🌰
#Chestnuts #HomeGardening #GrowYourOwnFood #NutTrees #GardeningCommunity #SustainableGardening #BackyardHarvest #GardeningTips #HarvestTime #PlantLovers