
Cardamom, often referred to as the “Queen of Spices,” is one of the most sought-after spices in the culinary world. Its warm, aromatic flavor makes it a staple in various dishes, especially in Indian, Middle Eastern, and Scandinavian cuisines. If you’re a gardening enthusiast or a spice lover, growing cardamom in your own garden can be a fun and rewarding experience. This guide will walk you through the entire process of how to grow cardamom, from selecting the right location to harvesting your spice.
Introduction to Cardamom
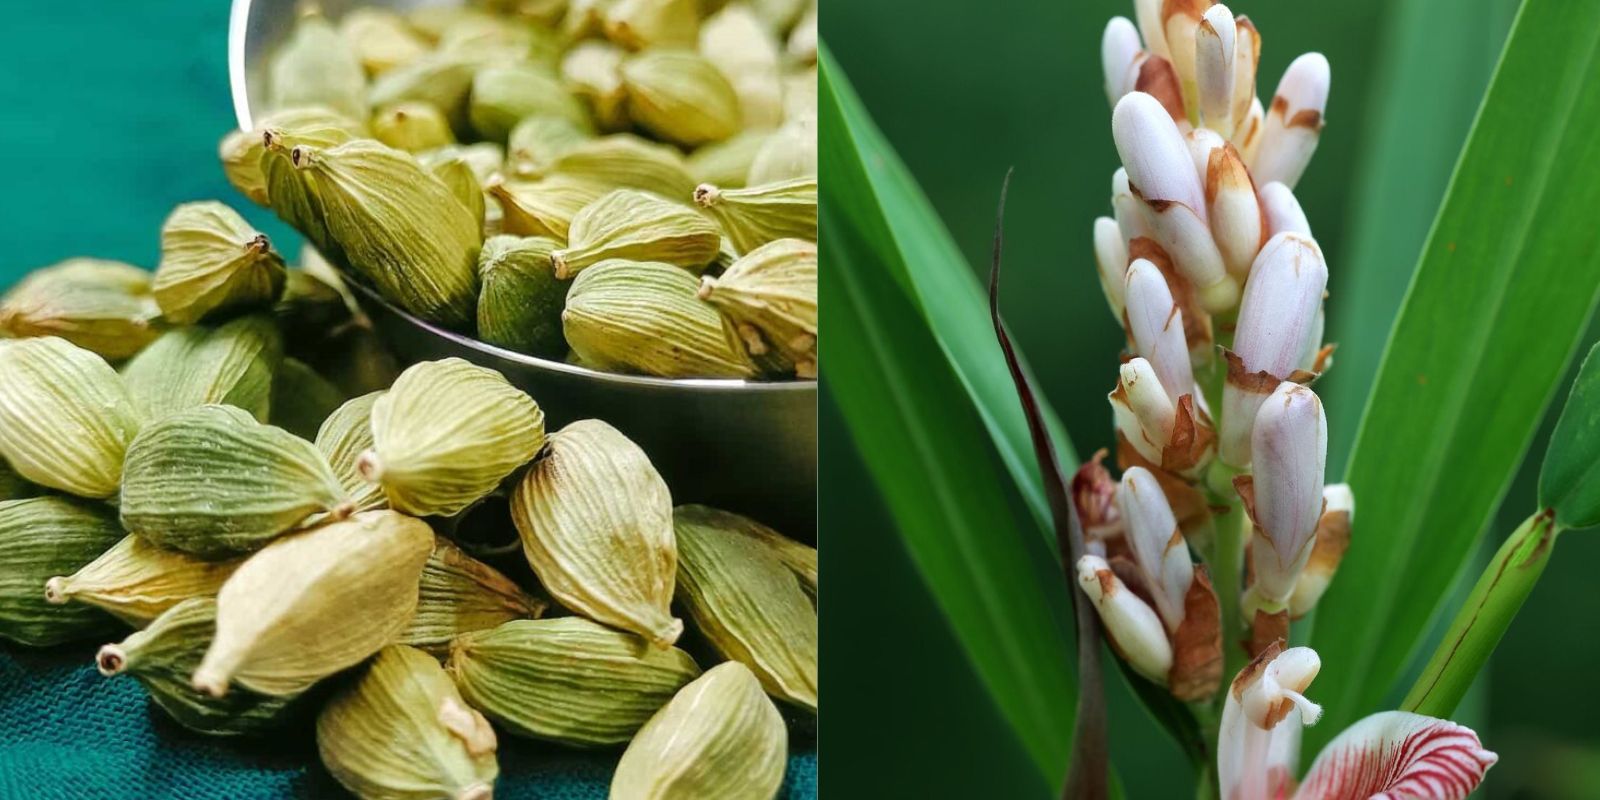
Cardamom, scientifically known as Elettaria cardamomum, is a perennial herb belonging to the ginger family. Native to the tropical regions of India, Sri Lanka, and Southeast Asia, cardamom thrives in warm, humid climates. The plant produces small, green pods containing aromatic seeds, which are used in cooking, baking, and even in traditional medicine. There are two primary types of cardamom: green cardamom (Elettaria cardamomum) and black cardamom (Amomum subulatum), but the green variety is the most commonly grown and used in gardens.
Growing cardamom is not a difficult task, but it does require patience and a specific environment to flourish. Whether you have a small garden, a balcony, or a dedicated greenhouse, growing cardamom is a satisfying way to enjoy homegrown spices that are otherwise expensive to buy.
Step 1: Choosing the Right Location
Cardamom is native to tropical regions with high humidity and temperatures ranging between 65°F (18°C) to 95°F (35°C). Therefore, when planning to grow cardamom, it’s crucial to recreate these conditions as much as possible. Here are some factors to consider when selecting the right location for your cardamom plant:
- Temperature: Cardamom requires consistent warmth. Growing cardamom outdoors is ideal for those in USDA hardiness zones 10-11, where temperatures remain warm year-round. If you live in cooler climates, you can still grow cardamom indoors in pots or greenhouses.
- Light: Cardamom plants prefer indirect light. They naturally grow under the canopy of tall trees in the wild, so a shaded or partially shaded spot is ideal. Avoid placing cardamom in direct sunlight, as this can scorch the leaves and hinder growth.
- Humidity: Cardamom loves humidity. Ensure the area has a moisture-rich atmosphere, especially if you’re growing it indoors. Misting the leaves or using a humidifier can help maintain the desired humidity levels.
Step 2: Preparing the Soil
Cardamom thrives in well-draining, rich, and slightly acidic soil. The soil pH should ideally range from 5.5 to 6.5. Proper soil preparation is key to the plant’s growth, as it helps the roots develop and absorb nutrients efficiently.
- Soil Composition: To create the perfect soil mix for cardamom, combine equal parts of loamy soil, organic compost, and perlite or sand. This mixture ensures good drainage while maintaining enough moisture to keep the roots hydrated.
- Fertilizing the Soil: Before planting, enrich the soil with organic matter. Use well-rotted compost or organic fertilizer to provide the plant with the necessary nutrients. Cardamom thrives in nutrient-rich soil, so adding organic material regularly will help your plant grow strong and healthy.
Step 3: Planting Cardamom Seeds
Cardamom can be propagated from seeds, though it can be a bit slow. Start by soaking the seeds in water for 24 hours before planting. This will help improve the germination rate and speed up the process. Once the seeds are prepared, you can plant them in pots or directly in the garden.
- Containers: If you’re growing cardamom indoors, plant the seeds in deep pots (at least 12 inches deep) to allow for proper root growth. If you’re growing cardamom outdoors, plant the seeds in rows or clusters in prepared soil.
- Planting Depth: Cardamom seeds should be planted about 1 inch deep. Keep the soil consistently moist, but avoid waterlogging, which can cause the seeds to rot.
- Spacing: Leave a spacing of about 3-4 inches between seeds when planting them in the ground or in containers to give the plants enough room to grow and spread.
Step 4: Caring for Cardamom Plants
After planting the seeds, the cardamom plant requires regular care to ensure healthy growth. Here’s a breakdown of the key factors to keep in mind while caring for your plant:
- Watering: Cardamom plants need consistent moisture, but they do not tolerate standing water. Water the plants regularly, ensuring the soil remains moist but not soggy. To promote better moisture retention, add mulch around the base of the plant. This also helps control weeds.
- Humidity: As mentioned, cardamom thrives in humid environments. If you’re growing the plant indoors, consider placing the pot on a tray filled with water and pebbles to increase humidity. You can also mist the leaves regularly to maintain moisture levels.
- Temperature: Cardamom is sensitive to cold temperatures. If growing outdoors, make sure to protect the plant from frost by bringing it indoors during the winter months or by using row covers.
Step 5: Fertilizing Your Cardamom Plants
Cardamom plants are heavy feeders and benefit from regular feeding to promote lush growth. Here’s how to fertilize your cardamom plant effectively:
- Organic Fertilizers: Use organic fertilizers like compost, worm castings, or organic plant food to feed your cardamom plant. Apply fertilizer every few months during the growing season (spring and summer).
- Liquid Fertilizers: If you’re growing cardamom in containers, you can also use liquid fertilizers. Dilute the fertilizer to half strength and apply it every 4-6 weeks to keep the plant healthy.
Step 6: Pruning and Managing Growth
Cardamom plants can grow up to 6 feet tall under ideal conditions. As the plant grows, it may become a little unruly. Pruning helps keep the plant compact, encourages new growth, and improves airflow.
- Pruning: Trim any dead or damaged leaves regularly to promote healthy new growth. Remove any yellowing or brown leaves at the base of the plant.
- Support: As cardamom is a tall plant, it may benefit from a support structure. You can stake the plant or provide a trellis to help it grow upright.
Step 7: Harvesting Cardamom Pods
Cardamom typically takes about 2-3 years to reach maturity and begin producing pods. Here’s how to harvest and process the cardamom pods:
- Harvesting: Once the cardamom flowers bloom, small green pods will form. Wait until the pods begin to turn yellow and ripen. At this stage, you can harvest them by gently pulling them from the plant. Be careful not to damage the plant while harvesting.
- Drying: After harvesting, the pods should be dried in a cool, well-ventilated area. Once dried, you can store them in an airtight container to preserve their flavor. If you want to use the seeds, you can break open the pods and remove the small, aromatic seeds inside.
Challenges in Growing Cardamom
While cardamom is relatively easy to grow in the right conditions, there are a few challenges that gardeners may encounter:
- Slow Growth: Cardamom can take a long time to mature. Be patient and continue providing the plant with the best care possible.
- Pests and Diseases: Like many other plants, cardamom can be susceptible to pests such as aphids, scale insects, and mealybugs. Regularly inspect your plant for any signs of infestations and treat them promptly with organic insecticides.
- Cold Sensitivity: Cardamom is very sensitive to cold weather, so it’s important to protect the plant from frost. If grown indoors, make sure the plant is placed in a warm location away from drafts.
Conclusion
Growing cardamom is a rewarding gardening project that provides both beauty and spice for your kitchen. While it requires some patience and attention, the result is well worth it—fresh, aromatic cardamom pods that can be used in a variety of culinary applications. By following the steps outlined in this guide, you’ll be well on your way to successfully growing your own cardamom plant and enjoying the satisfaction of homegrown spice.
If you’re up for the challenge, try growing cardamom in your garden or indoors today! You’ll not only have a beautiful plant, but you’ll also enjoy the taste and fragrance of freshly harvested spice. Happy gardening! 🌱