
Growing asparagus from seed is a gratifying and cost-effective way to establish a perennial vegetable bed that can provide you with fresh, homegrown spears for years. Although it requires patience and a bit of effort, the rewards are well worth it. In this comprehensive guide, we’ll cover everything you need to know to successfully grow asparagus from seed, including preparation, planting, care, and harvesting tips.
Introduction to Growing Asparagus from Seed
Asparagus is a perennial vegetable known for its tender and flavorful spears. Unlike many garden vegetables, asparagus is not typically grown from seeds by home gardeners due to the long establishment period. However, starting asparagus from seed can be an economical choice and allows you to choose from a wider variety of asparagus cultivars. Growing asparagus from seed requires a bit of foresight and patience, as the plants take 2-3 years to mature enough for harvest. But once established, they can produce delicious spears for up to 15 years or more.
1. Selecting Asparagus Seeds
The first step in growing asparagus from seed is selecting the right seeds. Here’s what to consider:
1.1. Choose Quality Seeds
- Source: Purchase seeds from a reputable supplier or nursery to ensure you get high-quality, viable seeds.
- Varieties: Choose varieties suited to your climate and soil conditions. Popular types include ‘Mary Washington,’ ‘Jersey Knight,’ and ‘Purple Passion.’
1.2. Understand the Types of Asparagus
- Male vs. Female Plants: Male asparagus plants tend to be more productive than female plants because they don’t produce berries, which can reduce energy for spear production.
- Hybrid Varieties: Hybrid varieties are often bred for improved disease resistance and better yields.
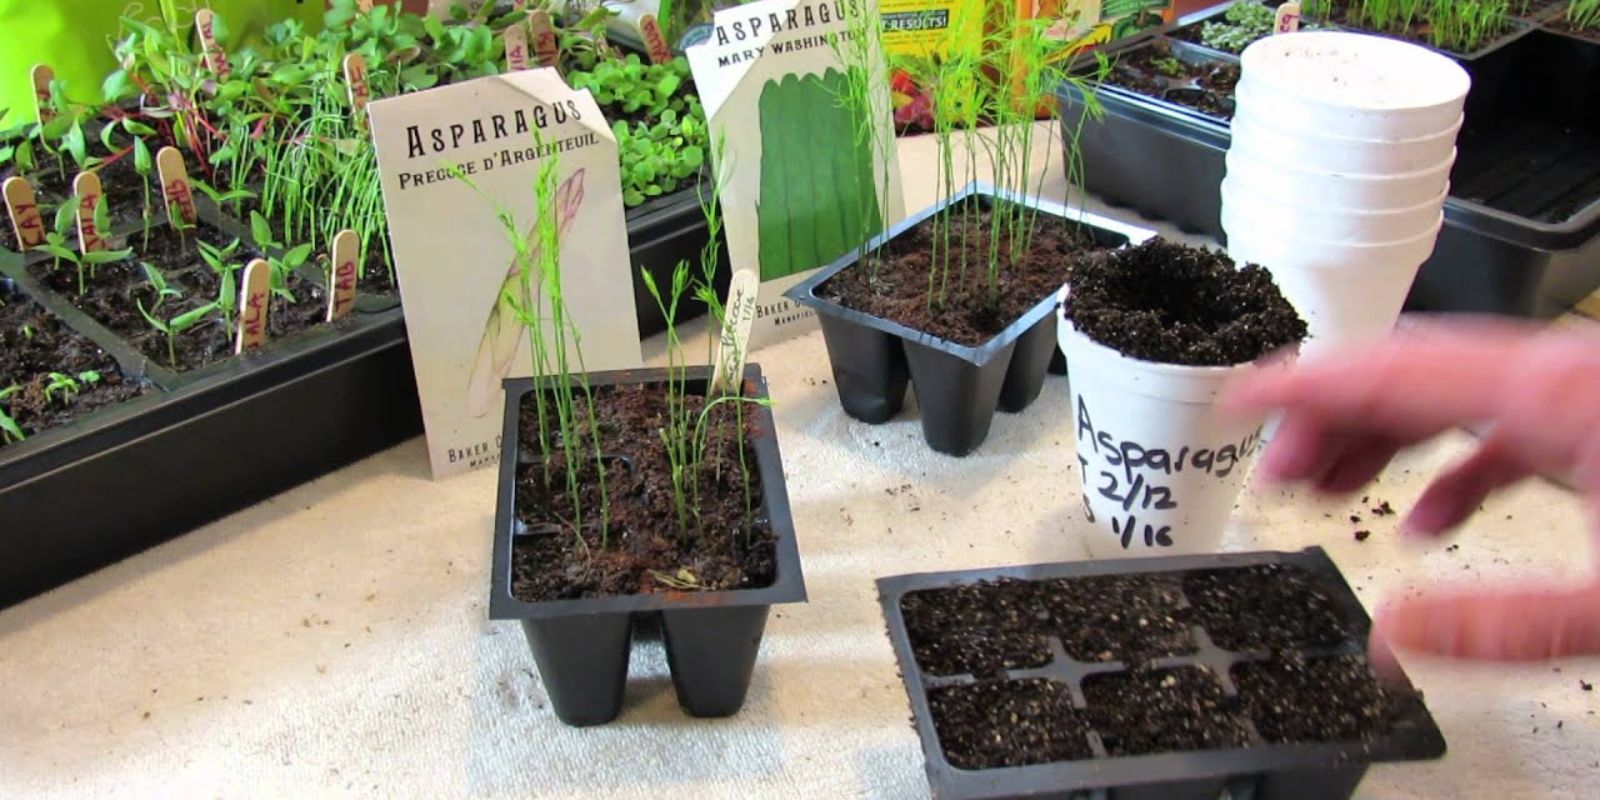
2. Starting Asparagus Seeds Indoors
Asparagus seeds require a long growing season, so starting them indoors is crucial. Here’s how to get started:
2.1. Timing
- When to Start: Begin seeds indoors 10-12 weeks before the last expected frost date in your area. This allows the seedlings to establish before being moved outdoors.
2.2. Seed Preparation
- Stratification: Asparagus seeds benefit from a period of cold stratification to improve germination rates. Place seeds in a damp paper towel, seal in a plastic bag, and refrigerate for 2-3 weeks before planting.
2.3. Planting Seeds
- Containers: Use seed trays or small pots filled with a seed-starting mix. Fill containers with the mix, water well, and let excess water drain.
- Sowing: Plant seeds 1/2 inch deep in the soil and space them about 1 inch apart. Cover lightly with soil.
2.4. Providing Optimal Conditions
- Light and Temperature: Place the seed trays in a warm, sunny location or under grow lights. Maintain temperatures between 70-75°F (21-24°C) for optimal germination.
- Moisture: Keep the soil consistently moist but not waterlogged. Use a spray bottle to mist the soil as needed.
3. Transplanting Seedlings Outdoors
After about 8-10 weeks, your asparagus seedlings should be ready for transplanting outdoors. Here’s how to prepare:
3.1. Preparing the Planting Site
- Soil: Choose a well-drained, sunny location for your asparagus bed. Asparagus thrives in rich, loamy soil with a pH between 7.0 and 8.0. Improve soil fertility by incorporating compost or well-rotted manure.
- Bed Preparation: Create raised beds or trenches to improve drainage. Space beds 4 feet apart to allow for adequate airflow.
3.2. Transplanting Seedlings
- Timing: Transplant seedlings in early spring, as soon as the soil can be worked and temperatures are consistently above freezing.
- Spacing: Space seedlings 12-18 inches apart in the planting bed. Make holes that are deep enough to accommodate the root system and gently spread the roots out before covering with soil.
- Watering: Water the seedlings thoroughly after planting to help them establish roots.
4. Caring for Your Asparagus Bed
Proper care is essential for the successful establishment of your asparagus bed. Follow these tips to keep your plants healthy and productive:
4.1. Watering
- Frequency: Keep the soil consistently moist but not waterlogged. Asparagus requires regular watering, especially during dry periods. Aim for about 1 inch of water per week.
- Techniques: Use a soaker hose or drip irrigation system to deliver water directly to the roots and minimize water on the foliage.
4.2. Mulching
- Benefits: Apply a layer of mulch around your asparagus plants to help retain moisture, regulate soil temperature, and suppress weeds.
- Types: Organic mulches like straw, shredded leaves, or grass clippings work well. Apply a 2-4 inch layer of mulch around the plants.
4.3. Fertilizing
- Types of Fertilizer: Asparagus benefits from balanced fertilizers with equal parts nitrogen, phosphorus, and potassium. Alternatively, use compost or well-rotted manure to enrich the soil.
- Timing: Fertilize in early spring as new growth begins and again after the harvest season to promote healthy growth.
4.4. Weed and Pest Control
- Weeding: Regularly remove weeds to prevent competition for nutrients and water. Hand weed or use a hoe to keep the area around your asparagus bed clear.
- Pests and Diseases: Monitor for common pests like asparagus beetles and diseases such as rust or fusarium wilt. Use organic control methods and ensure good garden hygiene.
5. Harvesting and Maintaining Your Asparagus Bed
Asparagus takes time to mature, but with proper care, it will reward you with delicious spears for many years.
5.1. Harvesting
- Timing: Do not harvest spears during the first two years after planting to allow the plants to establish. In the third year, begin harvesting when spears are about 6-8 inches tall and before they begin to fern out.
- Technique: Use a sharp knife or garden shears to cut spears at ground level. Avoid breaking the spears to prevent damage to the plant.
5.2. Post-Harvest Care
- Fertilization: Continue to fertilize after the harvest season to support the plants’ recovery and prepare them for the next growing season.
- Cutting Back: After the harvest season, allow the asparagus ferns to grow and turn yellow. Cut back the ferns in late fall or early spring before new growth begins.
6. Tips for a Successful Asparagus Garden
6.1. Patience and Planning
- Time: Understand that asparagus requires patience and long-term commitment. It takes 2-3 years to begin harvesting, but the investment in time and effort pays off with years of delicious spears.
6.2. Crop Rotation
- Benefits: Practice crop rotation by planting asparagus in a different bed or section of the garden each year to reduce pest and disease risks.
6.3. Winter Care
- Protection: In colder climates, apply a layer of mulch or straw over the asparagus bed in winter to protect the crowns from extreme temperatures.
Conclusion
Growing asparagus from seed is a rewarding gardening endeavor that allows you to enjoy fresh, flavorful spears for many years. By following the steps outlined in this guide—from selecting quality seeds and starting them indoors to transplanting, caring for, and harvesting your asparagus—you’ll be well on your way to establishing a productive asparagus bed. Although it requires patience, the long-term benefits of growing your own asparagus make the effort worthwhile.
Ready to get started on your asparagus journey? Plant your seeds today and look forward to a thriving asparagus bed that will provide you with delicious, homegrown spears for years to come! 🌱🍽️🌟
Feel free to adapt these guidelines to your specific climate and soil conditions. Happy gardening and enjoy the fruits of your labor! 🌿