
Introduction: The Rewards of Growing Garlic
Garlic (Allium sativum) is not only a kitchen staple, known for its rich flavor and health benefits, but it is also one of the easiest and most rewarding crops to grow at home. Whether you are a novice gardener or a seasoned pro, cultivating garlic is an experience that offers fresh, flavorful bulbs and the satisfaction of growing your own food.
Garlic grows well in many climates and is an ideal crop for those who want to enjoy a homegrown harvest, even if they only have a small garden space. The process is relatively straightforward, and the results are well worth the effort. By following the proper steps, you can enjoy a thriving garlic crop year after year.
In this article, we will walk you through everything you need to know to successfully grow garlic, from selecting the right variety to harvesting and storing your crop. Let’s dig into the essential steps to cultivate a thriving garlic crop!
Step 1: Choose the Right Garlic Variety
The first step in growing garlic is selecting the right variety for your location and climate. There are two main types of garlic:
- Hardneck Garlic: Known for its robust flavor and larger cloves, hardneck garlic thrives in colder climates and is typically grown in the fall. It produces a flower stalk (scapes) that can be harvested for culinary use, and its bulbs tend to have fewer, larger cloves.
- Softneck Garlic: This type is best suited for milder climates and can be planted in both fall and early spring. Softneck garlic produces more cloves per bulb and has a longer shelf life, making it ideal for storage. It is the garlic variety most commonly found in grocery stores.
Consider your climate when choosing which variety to plant. Hardneck garlic is ideal for northern climates where winters are cold, while softneck garlic is better suited for warmer regions.
Step 2: Prepare the Soil for Planting
Garlic grows best in loose, well-drained, and fertile soil. Before planting your garlic cloves, it’s essential to prepare the soil properly. Here’s how:
- Choose the Right Location: Garlic needs a sunny spot that receives at least 6 hours of direct sunlight per day. A raised bed, garden plot, or large container can work well for garlic, as long as it has good drainage.
- Soil Preparation: Garlic prefers slightly acidic to neutral soil with a pH level of 6.0 to 7.0. To prepare the soil, loosen it to a depth of about 8–10 inches and remove any weeds or debris. Incorporate compost or well-rotted manure into the soil to improve fertility and drainage. This will provide the garlic with the nutrients it needs for healthy growth.
- Drainage: Garlic is sensitive to waterlogged soil, which can lead to rot. If your garden has heavy clay soil, consider adding organic matter, like compost or sand, to improve drainage.
Step 3: Planting Garlic Cloves
Once your soil is prepared, it’s time to plant the garlic cloves. Follow these steps for optimal planting:
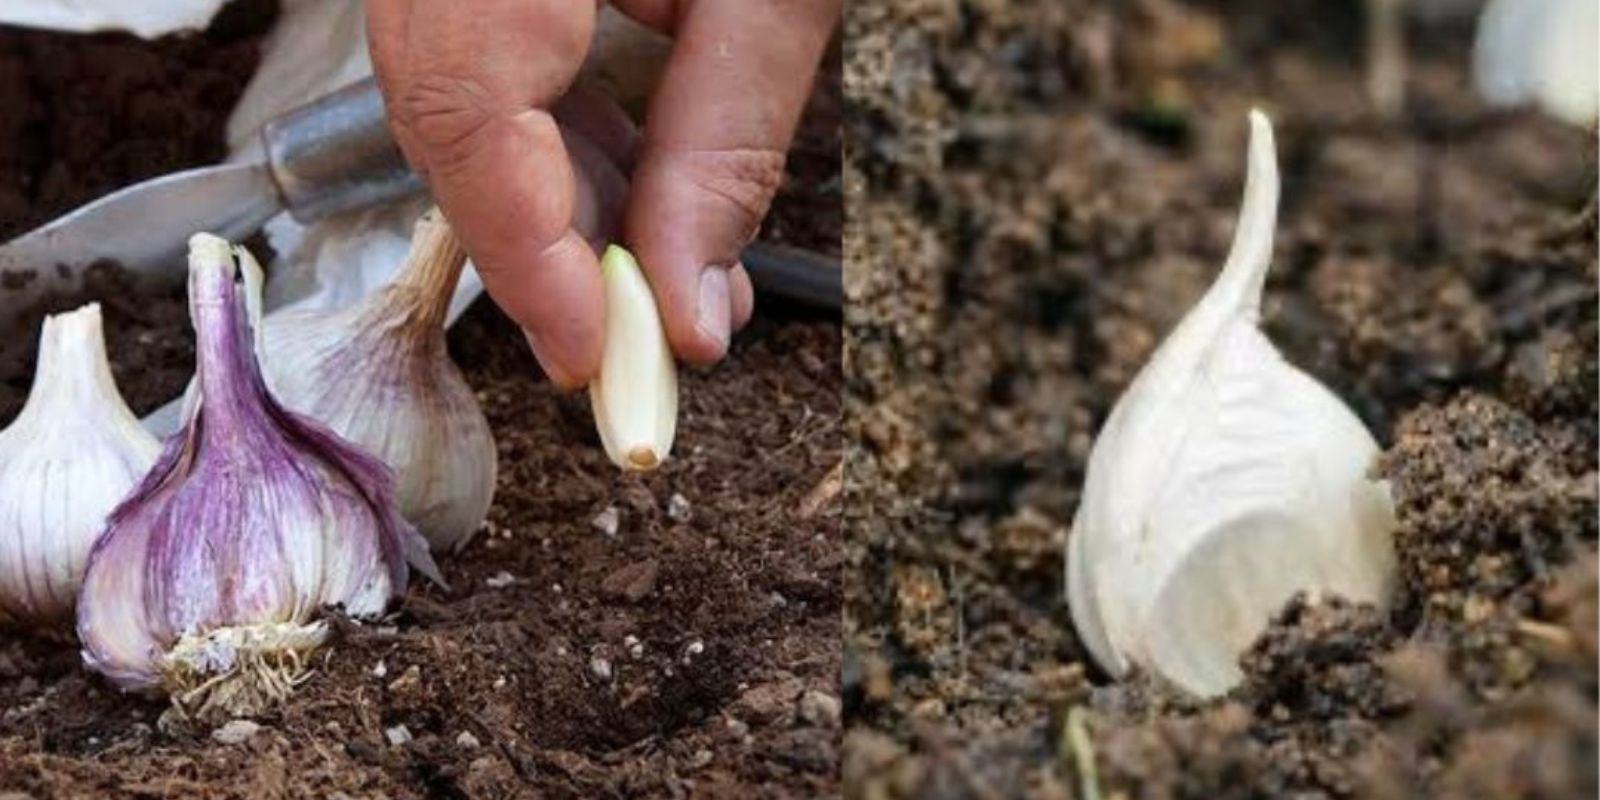
- Separate the Cloves: Start with fresh, high-quality garlic bulbs from a reputable source. Do not use garlic from the grocery store, as it may carry diseases. Separate the garlic bulb into individual cloves, keeping the papery skins intact. Each clove will grow into a full bulb of garlic.
- Plant the Cloves: Choose the largest and healthiest cloves for planting, as they will produce the best bulbs. Plant the cloves with the pointed side facing up, and the flat side facing down. Space the cloves about 6 inches apart in rows, with each clove planted about 2 inches deep.
- Row Spacing: If you’re planting in rows, space them about 12 inches apart to give the garlic plenty of room to grow. Garlic needs space for its roots to spread out and for proper air circulation.
- Watering: After planting, water the cloves thoroughly to settle the soil around them. Keep the soil consistently moist but not waterlogged during the growing season. Garlic needs regular watering, especially in dry periods, but ensure that the soil drains well to avoid rot.
Step 4: Care and Maintenance
Once your garlic is planted, proper care and maintenance are crucial to a successful harvest. Here are some essential tips to ensure your garlic crop thrives:
- Mulching: Cover the soil with a 3-inch layer of mulch, such as straw, leaves, or grass clippings, after planting. Mulching helps retain moisture, suppresses weeds, and keeps the soil temperature consistent. It’s especially important in colder climates to insulate the garlic during winter.
- Weed Control: Weeds can compete with your garlic for nutrients and water. Regularly remove weeds around the garlic plants by hand or with a hoe. Be gentle when weeding to avoid damaging the garlic’s shallow root system.
- Fertilization: Garlic is a heavy feeder, so it may benefit from additional fertilization during the growing season. Apply a balanced, organic fertilizer or compost in the early spring when the shoots start to emerge. Avoid using high-nitrogen fertilizers, as they can promote excessive leaf growth at the expense of bulb development.
- Watering: Garlic needs consistent moisture, particularly during the bulbing phase. Water regularly but avoid overwatering. Ensure that the soil is well-drained to prevent root rot. Watering early in the day allows the plants to dry off before evening, reducing the risk of disease.
Step 5: Harvesting Garlic
Garlic takes about 8–9 months to mature, depending on the variety and climate. Harvesting at the right time is key to getting high-quality bulbs. Here’s how to know when your garlic is ready to harvest:
- Signs of Maturity: Garlic is typically ready to harvest when the lower leaves begin to yellow and die back, while the upper leaves remain green. The bulbs will have reached their full size, and the skins will be firm. The garlic will still be soft inside, but the outer skins should be dry and papery.
- Harvesting: Gently lift the garlic bulbs from the soil using a garden fork or shovel, being careful not to damage the bulbs. Avoid pulling them by the stalk, as it can break. Shake off any excess soil but don’t wash the bulbs. Leave the roots and stem intact until the garlic is fully cured.
Step 6: Curing and Storing Garlic
After harvesting, it’s important to properly cure your garlic to extend its shelf life and enhance its flavor. Here’s how to cure and store your garlic:
- Curing: Hang the garlic bulbs in a warm, dry place with good airflow, such as a shed, garage, or porch. You can tie the bulbs together in bunches and hang them from strings or wire. Allow them to cure for 2-3 weeks, or until the outer skins are completely dry and the necks of the garlic are firm.
- Cleaning: After curing, trim the roots and cut the stalks to about 1 inch. Clean any remaining soil from the garlic, but avoid peeling off the skins. The outer skins protect the garlic during storage.
- Storage: Store your cured garlic in a cool, dry place, such as a pantry or cellar. Garlic can be stored in mesh bags, baskets, or containers that allow for air circulation. Properly cured and stored garlic can last for several months.
Conclusion: A Thriving Garlic Crop Starts with the Right Care
Growing garlic is a satisfying and relatively low-maintenance process, making it an excellent crop for both beginner and experienced gardeners. By following these simple steps—from selecting the right variety and preparing the soil to planting, caring for, and harvesting the bulbs—you can enjoy a thriving garlic crop year after year.
Not only will you enjoy the fresh taste of homegrown garlic, but you’ll also experience the sense of accomplishment that comes with growing your own food. So, whether you’re planting garlic in your backyard or on your balcony, take the time to care for your crop, and it will reward you with delicious, healthy garlic bulbs to use in your kitchen.
Start planting your garlic today and experience the joy of growing this wonderful, versatile crop!