
Grafting is one of the oldest and most effective horticultural techniques for propagating trees, improving fruit production, and even preserving rare or heirloom varieties. By grafting, you can combine the best traits of two trees—such as disease resistance from the rootstock and superior fruit quality from the scion. Whether you’re a seasoned gardener or a beginner, learning how to graft trees can greatly enhance your gardening experience, making it easier to grow your favorite varieties and keep your garden thriving.
In this article, we will cover everything you need to know about tree grafting, including the types of grafting techniques, tools required, and a step-by-step guide to graft trees correctly and efficiently. We’ll also explore the common mistakes to avoid, and tips on how to care for your grafted trees to ensure success.
What is Grafting?
Grafting is a horticultural technique where parts of two different plants (often trees) are joined together so that they grow as one. The part of the tree that provides the root system is known as the rootstock, while the top part, which produces the desired fruit or flowers, is called the scion. The goal is for the rootstock and scion to successfully unite and grow as a single plant, utilizing the strengths of both.
There are several reasons why grafting is so beneficial:
- Preserving Varieties: Grafting allows gardeners to preserve specific varieties of trees, especially those that are difficult to propagate from seeds.
- Faster Fruit Production: When grafting, you can speed up the fruiting process since you are starting with a more mature rootstock.
- Disease Resistance: Rootstocks are often chosen for their resistance to certain diseases or pests, which can protect the scion.
- Improved Growth: The combination of a strong root system and a healthy scion can lead to improved overall growth and fruit production.
While grafting may seem complex at first, with a little practice, it becomes a valuable skill for gardeners looking to expand their orchards or propagate their favorite trees.
Types of Tree Grafting Techniques
There are several different grafting methods, each suitable for different types of trees or growth situations. The most common grafting techniques are:
- Whip-and-Tongue Graft
- Best for: Grafting young trees or small branches with similar diameters.
- How it works: Both the scion and rootstock are cut in a similar shape with a “tongue” cut that interlocks, helping to align the cambium layers (the green layer beneath the bark). This is one of the most secure grafting methods and is often used for fruit trees.
- Cleft Graft
- Best for: Grafting larger rootstocks or when the rootstock and scion have significantly different diameters.
- How it works: A vertical slit is made in the rootstock, and a wedge-shaped scion is inserted into the split. The scion’s cambium layer should align with the cambium layer of the rootstock for a successful graft.
- Bark Graft
- Best for: Grafting mature trees with thicker bark.
- How it works: The bark of the rootstock is lifted, and the scion is inserted under the bark. This method is particularly useful for larger trees and for grafting trees onto older rootstocks.
- Side-Veneer Graft
- Best for: Grafting small scions onto a branch or trunk of a rootstock.
- How it works: A cut is made on the side of the rootstock, where the scion is placed in a shallow slit with the cambium layers aligned. This is a popular method for ornamental trees and shrubs.
- T-budding
- Best for: Propagating a tree using a bud rather than a whole scion.
- How it works: A “T”-shaped cut is made in the rootstock, and a bud from the scion is inserted into the slit. This method is commonly used to propagate fruit trees.
Each grafting technique has its advantages, so it’s important to select the one that best suits the type of tree you are working with and the desired outcome.
Tools and Materials Needed for Grafting
Before you start grafting, it’s essential to have the right tools on hand. Here’s a list of the basic materials and tools required:
- Sharp Knife or Grafting Tool: A clean, sharp knife or specialized grafting tool is essential for making smooth, clean cuts. Grafting knives are designed to make precise cuts that help the scion and rootstock unite successfully.
- Grafting Tape or Rubber Bands: These are used to secure the scion to the rootstock and hold them together while the graft heals.
- Grafting Wax or Parafilm: Used to seal the graft to prevent moisture loss and protect the graft from pests and diseases.
- Rootstock: The rootstock is the base plant that provides the root system for the graft. It should be healthy and compatible with the scion.
- Scion: The part of the tree you want to propagate. Select a healthy, disease-free scion with several buds.
- Sterilizing Solution: A solution such as rubbing alcohol or bleach to sterilize your tools before use to prevent cross-contamination.
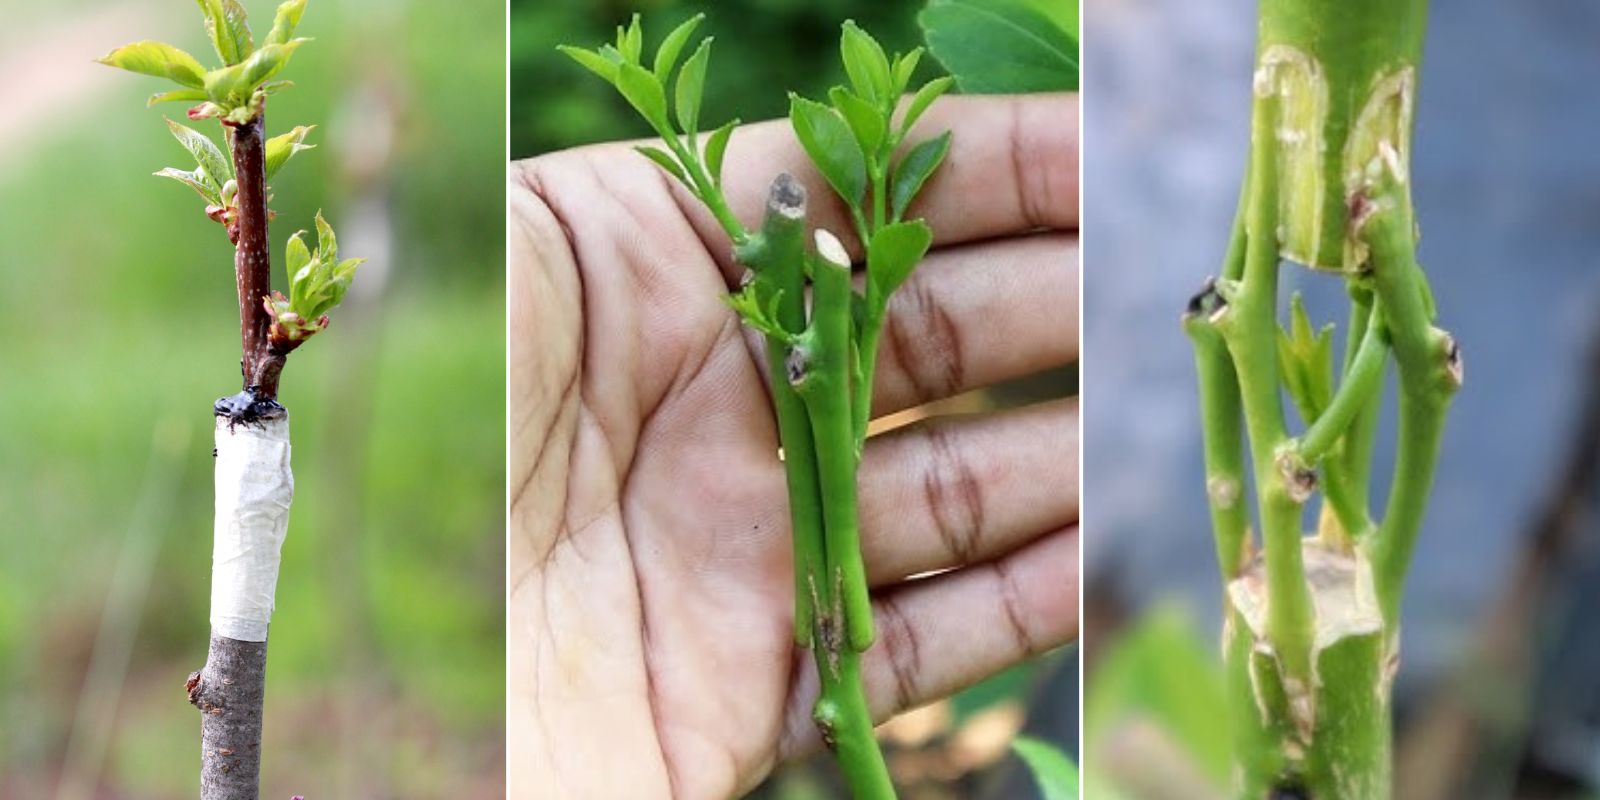
Step-by-Step Guide to Graft Trees Correctly and Efficiently
Now that you’re familiar with the different grafting techniques and the tools required, let’s dive into the step-by-step process of grafting trees correctly.
Step 1: Select the Right Rootstock and Scion
Start by choosing a compatible rootstock and scion. The rootstock should be compatible with the scion in terms of growth habits and disease resistance. Ideally, the rootstock should be a variety that is known for its hardiness or resistance to pests or diseases. The scion should be a healthy, disease-free branch with at least two or three buds.
Step 2: Prepare the Rootstock and Scion
Once you’ve selected your rootstock and scion, it’s time to make the cuts. For a whip-and-tongue graft, use a sharp grafting knife to make an angled cut on both the rootstock and scion, ensuring the cambium layers will align when joined. If you’re using a cleft graft, make a vertical slit in the rootstock and a wedge-shaped cut on the scion. For a side-veneer graft, make a shallow cut on the side of the rootstock and insert the scion.
Step 3: Align the Cambium Layers
The key to successful grafting is aligning the cambium layers of the scion and rootstock. The cambium is the layer of tissue just beneath the bark that transports nutrients and promotes growth. When the cambium layers of both the scion and rootstock are aligned, the graft will unite, and the tree will begin to grow as one.
Step 4: Secure the Graft
Once the scion and rootstock are aligned, use grafting tape, rubber bands, or special grafting clips to hold them securely together. This helps ensure that the graft remains stable while it heals and establishes a connection. Make sure the scion is firmly attached but not too tight, as this can hinder growth.
Step 5: Seal the Graft
After securing the graft, seal the joint with grafting wax or parafilm to protect it from moisture loss, insects, and pathogens. Sealing the graft will help keep the scion and rootstock united during the healing process.
Step 6: Care for the Graft
Place the grafted tree in a shaded, humid environment to promote healing. Keep the graft moist and check it regularly for signs of growth or potential issues such as infections. After several weeks, you should see signs that the scion has successfully fused with the rootstock.
Step 7: Remove the Grafting Tape
Once the graft has successfully united, typically after 4-6 weeks, you can begin to remove the grafting tape or rubber bands. Continue to monitor the grafted tree for any signs of stress or problems, and provide proper care, such as watering and fertilizing, to ensure the tree thrives.
Common Mistakes to Avoid
While grafting is a relatively straightforward process, there are a few common mistakes to avoid:
- Improper Tool Use: Always use sharp, clean tools to make clean cuts. Dull or unsterilized tools can cause injury to the tree and introduce disease.
- Incorrect Alignment of Cambium Layers: The cambium layers must align perfectly for a successful graft. If they do not meet, the graft will fail.
- Not Sealing the Graft: Failing to seal the graft properly can lead to moisture loss and infection.
- Too Much Pressure on the Graft: While it’s important to secure the graft, be careful not to over-tighten it, as this can disrupt the union between the scion and rootstock.
Conclusion
Grafting is a rewarding and valuable skill for gardeners looking to propagate trees, preserve rare varieties, or boost fruit production. By following the correct techniques and paying attention to detail, you can successfully graft trees and create new, healthy plants that will thrive in your garden. With practice and patience, grafting will become a key part of your gardening toolkit, helping you grow a beautiful, productive orchard or garden.
Happy grafting! 🌳
#TreeGrafting #PlantPropagation #GardeningTips #DIYGardening #TreeCare #FruitTrees #GraftingTechniques #GardeningCommunity #UrbanGardening #GreenThumb #HomeGarden