
Bean sprouts are a popular, nutritious addition to various dishes around the world. They are packed with vitamins, minerals, and enzymes that make them an excellent choice for a healthy, raw snack or a delicious topping for salads, soups, and stir-fries. If you’re looking to grow your own bean sprouts but don’t have access to specialized sprouting equipment, don’t worry – you can easily create plump, white bean sprouts at home using plastic bottles. This DIY method is simple, cost-effective, and efficient, allowing you to enjoy fresh, home-grown sprouts in just a few days. In this article, we’ll walk you through everything you need to know to start growing bean sprouts at home using plastic bottles.
Why Grow Bean Sprouts at Home?
Before we dive into the step-by-step process, let’s take a moment to discuss why growing bean sprouts at home is a great idea. Here are some benefits:
- Freshness and Nutritional Value: Bean sprouts are at their peak of nutrition when they are freshly grown. They are a rich source of protein, fiber, vitamins A, B, and C, as well as essential minerals like iron and potassium.
- Cost-Effective: Bean sprouts are inexpensive to buy, but growing them at home is even more affordable. Once you have your setup, you can continuously grow fresh sprouts without needing to purchase them from the store.
- Eco-Friendly: Growing sprouts at home reduces waste associated with packaging and transportation. Plus, using a plastic bottle for sprouting is a great way to repurpose an item that would otherwise go to waste.
- Convenience: You can easily grow bean sprouts indoors in a small space, such as your kitchen or balcony. All you need is a plastic bottle, some beans, and water.
Now that you know why growing bean sprouts is a good idea, let’s get started with the process.
What You’ll Need
Before you can begin growing your own bean sprouts, you’ll need a few simple materials:
- Plastic Bottle: A clean, empty plastic bottle is the star of this method. Any bottle will work, but it’s best to choose one that is transparent so you can monitor the progress of the sprouts. A 1-liter or 2-liter bottle is ideal for small batches, but you can use larger bottles if you wish to grow more sprouts.
- Beans: Mung beans, lentils, chickpeas, and other types of beans can be sprouted. Mung beans are the most common for sprouting, but feel free to experiment with different types of beans depending on your taste preferences.
- Scissors or Knife: You’ll need something to cut the plastic bottle. Make sure the tool is sharp enough to make clean cuts.
- Water: Clean water is essential for soaking and rinsing the beans.
- A Tray or Plate: To place the plastic bottle on while the beans are growing, so that any excess water can drain away.
- A Dark, Warm Place: Beans need warmth and darkness to sprout successfully. A cupboard or pantry is a perfect location for sprouting.
Step-by-Step Guide to Growing Bean Sprouts in Plastic Bottles
1. Prepare the Plastic Bottle
The first step is to prepare your plastic bottle. Use a pair of scissors or a sharp knife to carefully cut the bottle in half or slightly below the neck, leaving the bottom section as the base. You’ll need a top section to serve as a lid that can be removed to check on the sprouts as they grow.
2. Soak the Beans
Once your bottle is prepared, it’s time to soak your beans. You can sprout a variety of beans, but mung beans are particularly easy to grow and will provide you with crisp, tender sprouts in just a few days. Rinse your beans thoroughly to remove any dust or debris, then place them in a bowl of water to soak.
Allow the beans to soak for 8–12 hours, or overnight. Soaking is crucial because it softens the outer shell and helps speed up the sprouting process. It also rehydrates the beans, making them ready to germinate.
3. Prepare for Drainage
Once the beans have been soaked, place the bottle’s bottom section (the part you’ve cut off) on a tray or plate to catch any excess water. This setup will allow the water to drain away easily while providing the necessary airflow for the beans to sprout.
You will need to punch a few small holes in the bottom of the plastic bottle to allow for proper drainage. This can be done with a small nail or a pair of scissors. Be careful not to make the holes too large, as you still want to keep the moisture inside the bottle while allowing for drainage.
4. Place the Beans in the Bottle
After draining the beans, place them inside the plastic bottle. Gently shake the beans to distribute them evenly. You don’t need to pack them too tightly, but you want enough beans in the bottle to ensure a healthy sprout growth.
Make sure that the beans are lying flat inside the bottle, and the sprouting process will begin shortly. The ideal temperature for sprouting beans is between 65°F and 75°F (18°C – 24°C), so choose a warm, dark location, such as a pantry or cupboard, to place your sprouting setup.
5. Rinse and Drain Regularly
Once the beans are in the bottle, you’ll need to rinse them twice a day to keep them moist and promote healthy growth. To do this, simply remove the top section of the bottle, pour fresh water into the bottom, swirl it around to rinse the beans, and then drain the water out through the small holes in the bottom of the bottle.
It’s important to drain the beans thoroughly to prevent mold growth. You can prop the bottle at an angle so that the water drains out completely.
6. Monitor Growth
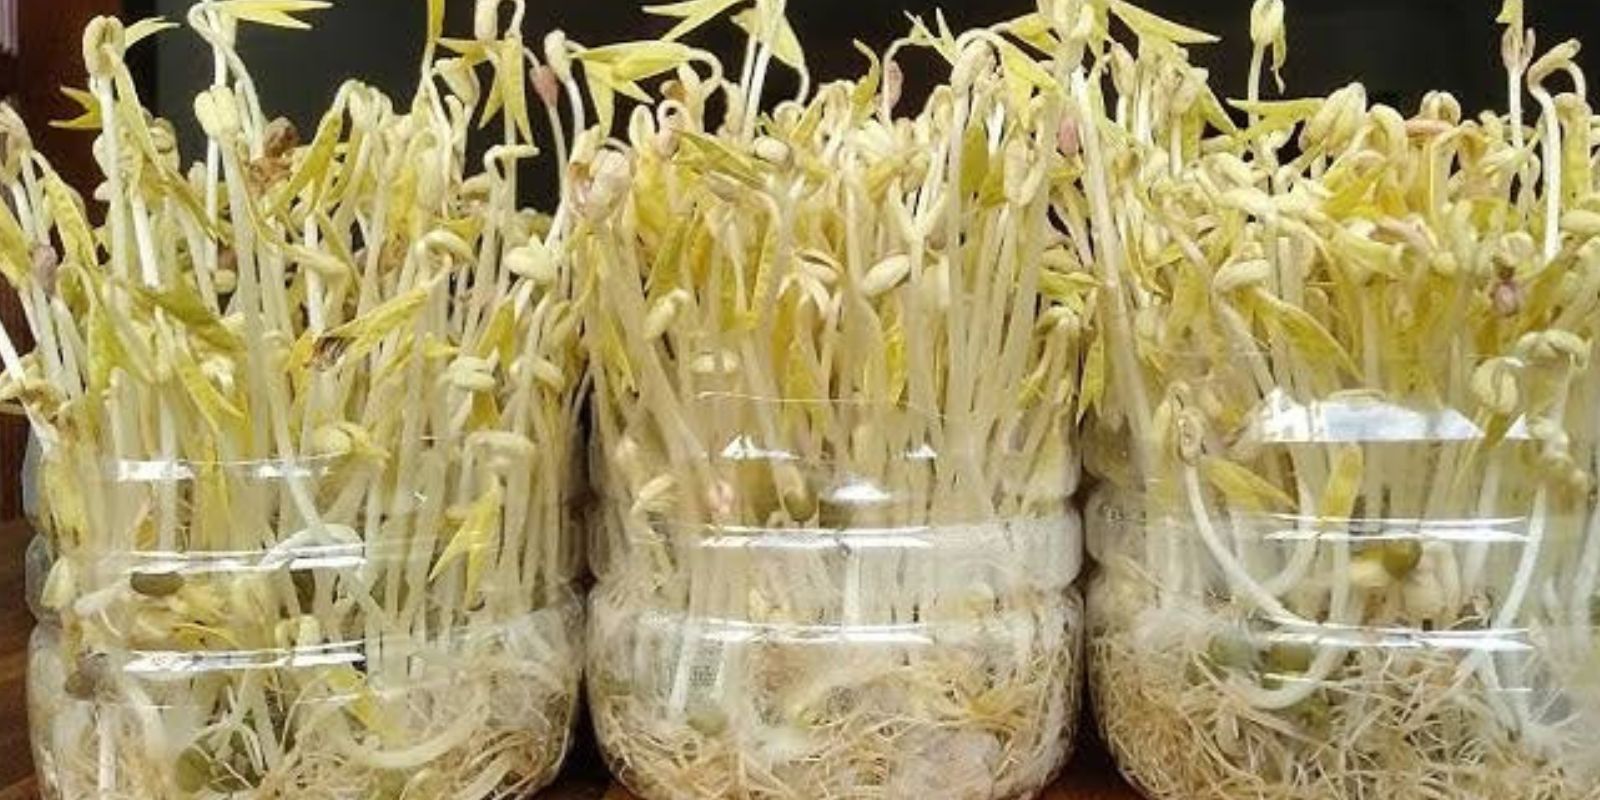
As the days go by, you will begin to see the beans sprouting. The beans should begin to develop small white roots and tiny green shoots within 2–3 days, and after 4–6 days, they will be ready to harvest. You’ll notice that the sprouts will grow longer as they seek out light, so be sure to keep them in a dark area until they are ready to be exposed to indirect light for a final burst of growth.
7. Harvesting the Sprouts
Once your bean sprouts have reached the desired length and are firm, it’s time to harvest them. Simply remove them from the bottle and rinse them one last time to clean off any remaining residue.
If you have grown more sprouts than you need, you can store them in an airtight container in the refrigerator for up to a week.
8. Enjoy Your Home-Grown Bean Sprouts
Now that your bean sprouts are ready, enjoy them fresh on salads, sandwiches, wraps, stir-fries, or any other dish you love. Fresh bean sprouts are an excellent addition to any meal, and they add a delightful crunch to your food. Plus, you can feel proud knowing that you grew them yourself in the comfort of your own home!
Conclusion
Growing bean sprouts at home using plastic bottles is a simple, eco-friendly, and cost-effective way to enjoy fresh, nutritious sprouts. With minimal equipment and just a little bit of care, you can produce plump, white bean sprouts in as little as 4–6 days. Whether you’re new to gardening or simply looking for a quick and easy way to add some healthy greens to your diet, this DIY sprouting method is perfect for you.
Start your sprouting journey today and enjoy the benefits of home-grown, fresh, and nutritious sprouts. Happy gardening!