
Introduction
Fruit vinegar is a delightful, tangy, and probiotic-rich ingredient that enhances dressings, marinades, and even health drinks. Brewing your own fruit vinegar at home is not only simple but also a great way to use up excess fruit while embracing sustainability. Unlike store-bought versions, homemade vinegar is free from artificial preservatives and packed with beneficial enzymes.
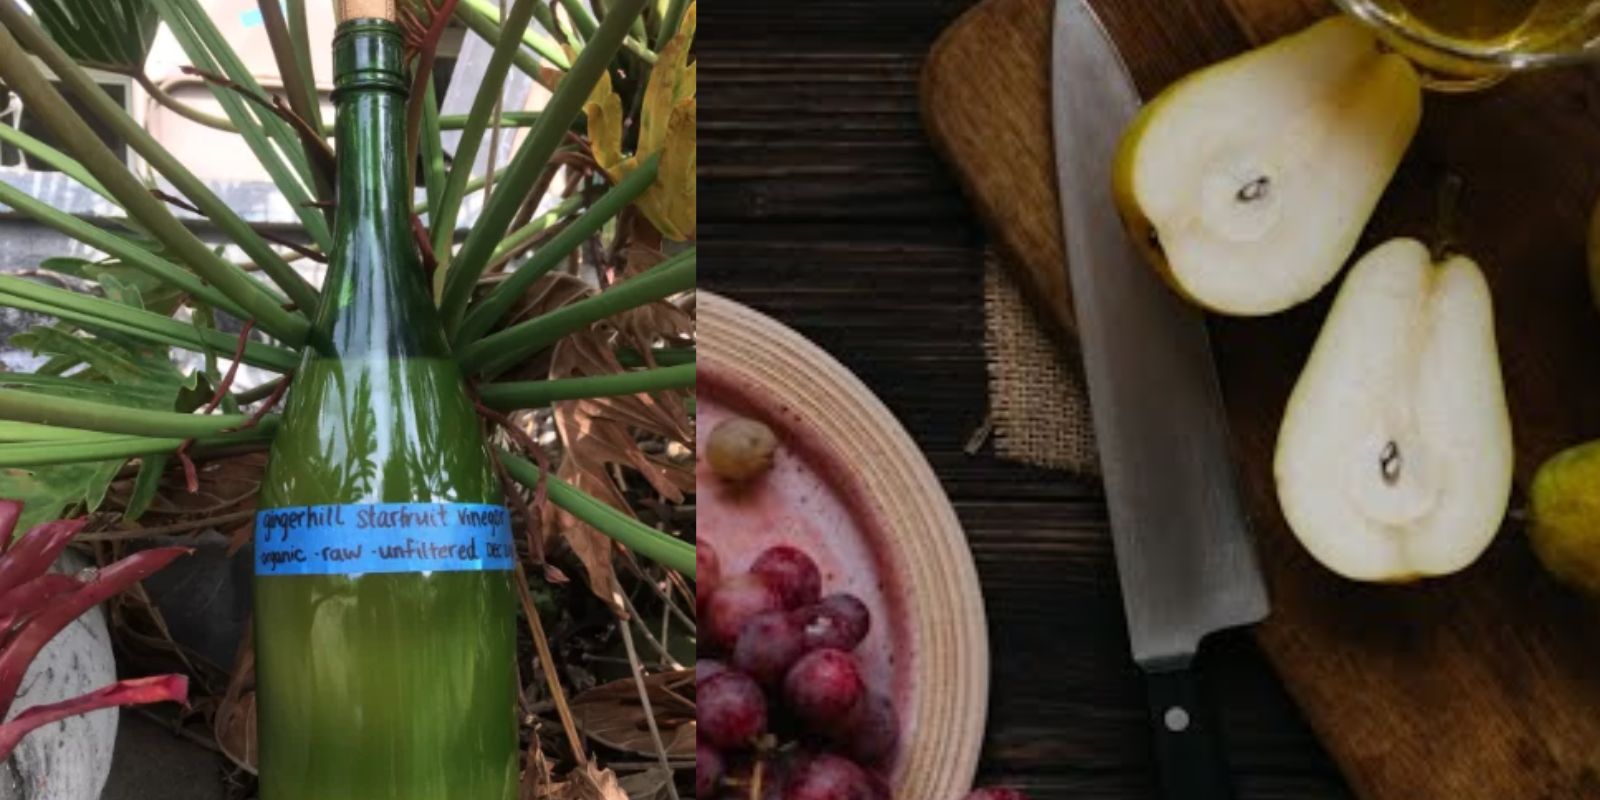
At Gingerhill Farm Retreat, natural and sustainable food practices are encouraged, and fruit vinegar is a great example of transforming fresh, organic produce into something valuable and delicious. This guide will walk you through the process, ensuring you achieve a flavorful and healthy homemade fruit vinegar.
Benefits of Homemade Fruit Vinegar
Before diving into the brewing process, let’s look at some benefits of making fruit vinegar at home:
- Rich in Probiotics: Fermented vinegar contains beneficial bacteria that support gut health.
- Preservative-Free: No additives or artificial preservatives, just pure goodness.
- Cost-Effective: Utilize overripe or excess fruit to create something valuable.
- Sustainability: Reduce food waste and make the most of seasonal produce.
- Versatile Usage: Perfect for salad dressings, marinades, beverages, and cleaning purposes.
Now, let’s get started on how you can make your own fruit vinegar.
Ingredients and Supplies
To brew fruit vinegar, you will need:
- Fresh Fruit: Apples, berries, mangoes, peaches, or any other fruit of your choice.
- Sugar: Cane sugar, honey, or maple syrup to feed the fermentation process.
- Water: Filtered or dechlorinated water.
- A Large Jar: Glass or ceramic works best; avoid metal or plastic.
- A Cloth or Coffee Filter: To cover the jar while allowing airflow.
- A Rubber Band or String: To secure the cloth over the jar.
- A Strainer or Cheesecloth: For filtering out solids after fermentation.
Step-by-Step Guide to Brewing Fruit Vinegar
Step 1: Prepare the Fruit
- Wash the fruit thoroughly to remove any dirt or pesticides.
- Chop the fruit into small pieces. If using apples or pears, keep the cores and skins, as they contain natural yeasts that help fermentation.
- Avoid using moldy or rotten fruit, as it can spoil the entire batch.
Step 2: Mix the Ingredients
- Place the chopped fruit into a clean glass or ceramic jar, filling it about halfway.
- Add 1-2 tablespoons of sugar per cup of water. The sugar fuels the fermentation, helping beneficial bacteria convert the fruit into vinegar.
- Pour filtered water into the jar, ensuring the fruit is fully submerged.
- Stir gently to dissolve the sugar.
Step 3: Cover and Begin Fermentation
- Cover the jar with a breathable cloth or coffee filter and secure it with a rubber band.
- Place the jar in a warm, dark place (60–80°F) to allow fermentation.
- Stir the mixture daily to prevent mold from forming on the surface.
Step 4: The Initial Fermentation (2-4 Weeks)
- Over time, bubbles will form, indicating fermentation is occurring.
- After 2 to 4 weeks, the fruit will sink to the bottom, and the liquid will start smelling slightly alcoholic.
- At this point, strain out the fruit using a cheesecloth or fine mesh strainer.
Step 5: Secondary Fermentation (2-4 Weeks)
- Transfer the strained liquid back into the jar.
- Cover it again with a breathable cloth and let it sit for another 2-4 weeks.
- The alcohol content will further break down into acetic acid, turning the liquid into vinegar.
- Taste the vinegar periodically. Once it reaches the desired tangy taste, it is ready.
Step 6: Bottling and Storing
- Once your vinegar is fully fermented, transfer it into a clean, airtight bottle.
- Store it in a cool, dark place or refrigerate for longer shelf life.
- Your homemade fruit vinegar is now ready to use!
Tips for the Best Homemade Fruit Vinegar
- Use organic fruit whenever possible to avoid pesticides and chemicals.
- Avoid metal containers during fermentation, as vinegar can react with metal and alter the taste.
- Adjust sugar levels based on the sweetness of the fruit; sweeter fruits may require less sugar.
- Be patient! Fermentation takes time, but the end result is worth it.
- If mold forms, discard the batch and start over.
Ways to Use Your Homemade Fruit Vinegar
Your homemade vinegar is incredibly versatile! Here are some great ways to use it:
- Salad Dressings: Mix with olive oil, mustard, and herbs for a fresh, zesty dressing.
- Marinades: Use it to tenderize meat or enhance flavors in vegetable dishes.
- Refreshing Drinks: Dilute with water and a little honey for a probiotic-rich beverage.
- Preserving Vegetables: Use it for pickling cucumbers, onions, or peppers.
- Natural Cleaner: A diluted vinegar solution can be used to clean kitchen surfaces.
Conclusion
Brewing fruit vinegar at home is an easy and rewarding process that enhances your kitchen with fresh, homemade flavors. It’s a sustainable way to reduce food waste while reaping the health benefits of natural fermentation. Whether you use it in your favorite recipes, as a health tonic, or for eco-friendly cleaning, homemade fruit vinegar is a valuable addition to any home.
Are you ready to give it a try? Let us know in the comments how your first batch turns out! 🍏🍇🍊 #DIYVinegar #FermentationFun #OrganicLiving #SustainableKitchen #GingerhillFarm #HealthyGut #HomemadeGoodness