
Growing your own food at home can be an incredibly rewarding experience. Whether you have a small garden or a large backyard, the opportunity to grow fresh, healthy ingredients right at your doorstep is something to be cherished. Peanuts, often seen as a simple snack, can actually be grown in your own garden, and it all starts with something as simple as a handful of raw peanuts purchased from the store.
Yes, you can grow peanuts from the very same nuts you buy for eating. In this comprehensive guide, we’ll take you through every step necessary to successfully grow peanuts from store-bought raw peanuts, including soil preparation, planting techniques, care tips, and harvesting methods. Get ready to enjoy your own homegrown peanuts in as little as 4-5 months!
Why Grow Peanuts at Home?
Peanuts are not only delicious but also packed with nutrients, including protein, healthy fats, and essential vitamins and minerals. Growing peanuts can be a fun and educational gardening project for all ages. Plus, it allows you to enjoy the satisfaction of eating food you’ve grown yourself. While peanuts are typically grown in warmer climates, with a bit of effort, they can be grown in many different regions, making them an accessible crop for home gardeners.
Step 1: Selecting the Right Peanuts
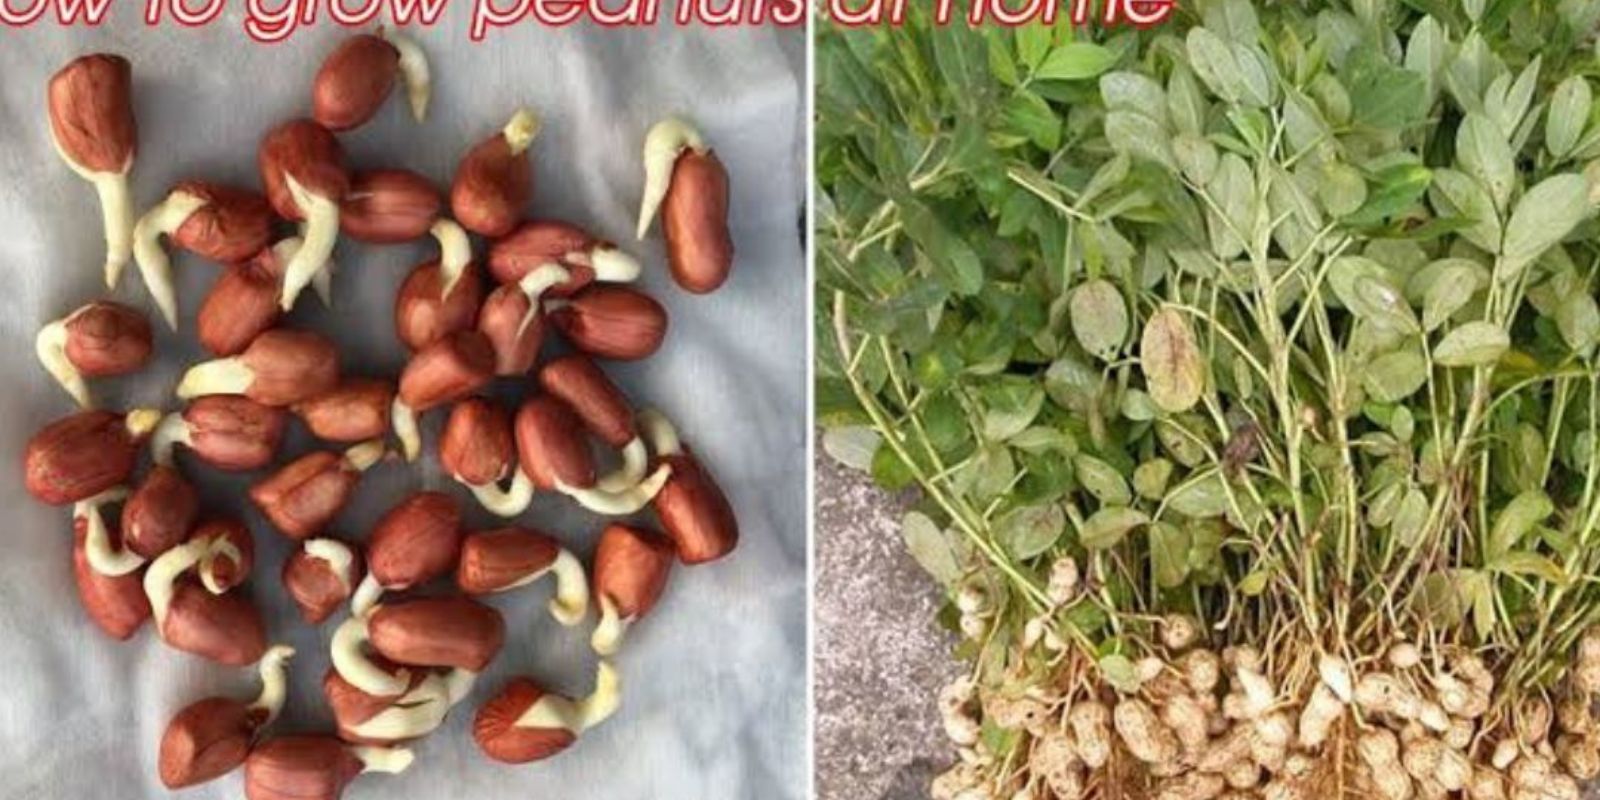
To begin, you must select raw peanuts, as roasted peanuts will not sprout. When buying peanuts, make sure they are unseasoned and unsalted. You can easily find raw peanuts in the shell or shelled, but for planting, it’s best to choose peanuts that are still in their shells. The shell helps protect the peanut during the initial germination process.
Look for peanuts that are fresh, plump, and free from any signs of mold or damage. Fresh peanuts have a better chance of germination, so make sure they are in good condition.
Step 2: Preparing the Soil
Peanuts thrive in loose, well-draining soil. They require good drainage because standing water can cause root rot. The ideal soil for peanuts is sandy, loamy, and rich in organic matter. If you have heavy clay soil, consider adding sand and compost to improve drainage and fertility. Peanuts also prefer slightly acidic soil, with a pH level between 5.8 and 6.2.
To start, loosen the soil to a depth of about 6-8 inches, ensuring it’s free from rocks and other debris. If you’re planting in containers, use a mix that drains well, such as cactus or succulent soil, or create your own by mixing equal parts of compost, sand, and perlite.
Step 3: Finding the Perfect Spot for Sunlight
Peanut plants are native to warm climates, and they require a full-sun location to thrive. Ensure that your planting area receives at least 6 to 8 hours of direct sunlight each day. If you’re planting in containers, place the pots in a sunny spot, such as a south-facing balcony or patio.
Peanuts grow best in temperatures between 70°F and 86°F (21°C – 30°C), so try to plant them when the weather has warmed up, especially in regions with cooler climates.
Step 4: Planting Peanuts
Once you’ve prepared the soil and selected a sunny location, it’s time to plant your peanuts. The process is fairly straightforward:
- Shell the Peanuts:
Gently remove the peanuts from their shells. If you’re planting multiple peanuts, it’s best to plant 2-3 peanuts per hole to increase the chances of successful germination. - Plant the Peanuts:
Plant the peanuts about 2-3 inches deep into the soil. Space the holes about 6-8 inches apart to allow for adequate root growth. If you’re planting in rows, space the rows about 24 inches apart. - Water the Seeds:
After planting, water the soil gently to help settle it around the peanuts. Ensure that the soil remains consistently moist, but not soggy, during the germination process. At this stage, avoid over-watering as peanuts can rot if left in overly wet conditions.
Step 5: Caring for Your Peanut Plants
Once your peanuts are planted, the next step is to ensure they receive proper care. Peanuts are relatively low-maintenance, but a few essential care tips can help maximize your chances of success.
Watering
Peanut plants are fairly drought-tolerant once established, but they need consistent moisture during their growing season. Water the plants regularly, but be sure not to overwater. The soil should stay moist, but never waterlogged. The ideal method is to water deeply, allowing the moisture to reach the roots without saturating the soil.
Fertilization
Peanut plants are nitrogen-fixing, meaning they can pull nitrogen from the air to fertilize themselves. However, adding a balanced fertilizer in the early stages of growth can promote healthy development. A light application of compost or organic fertilizer can also be beneficial, especially in soils that are low in nutrients.
Mulching
Applying a layer of mulch around the base of your plants can help retain moisture and keep the soil temperature consistent. Use straw, grass clippings, or shredded leaves as mulch to prevent weeds and maintain optimal growing conditions.
Managing Pests and Diseases
Peanut plants are relatively resistant to pests, but they may occasionally attract insects like aphids or caterpillars. Use organic insecticides or simple DIY solutions, like neem oil or insecticidal soap, to keep these pests under control.
Step 6: Harvesting Peanuts
One of the most exciting parts of growing peanuts is harvesting them. After planting, it typically takes about 4-5 months for your peanut plants to mature and be ready for harvest. Here’s how you can tell when it’s time to dig up your peanuts:
- Signs of Maturity:
The leaves of the peanut plant will start to turn yellow, and the plant will look a bit droopy. This is a clear indicator that the peanuts have matured and are ready for harvest. - Digging Up the Plants:
To harvest your peanuts, gently loosen the soil around the roots using a garden fork or shovel. Carefully pull up the plant, taking care not to damage the peanuts. - Extracting the Peanuts:
Once you’ve removed the plant, pull the peanuts from the roots. You may need to shake the plant gently to release any remaining peanuts.
Step 7: Drying the Peanuts
After harvesting your peanuts, it’s important to let them dry properly to prevent mold and ensure they are safe to eat. To dry your peanuts:
- Hang the Plants:
Hang the entire plant upside down in a dry, well-ventilated area for 1-2 weeks. This allows the peanuts to dry completely. - Remove the Peanuts from the Shell:
Once dried, you can remove the peanuts from their shells and store them in an airtight container. If you’re not planning to eat them right away, you can store the peanuts for later use.
Tips for Success
- Patience: Growing peanuts from store-bought nuts takes time and patience. It can take a few months to see the fruits of your labor, so be prepared to wait.
- Avoid Overcrowding: Ensure your plants have enough space to spread out. If you’re growing in containers, consider using larger pots to prevent overcrowding.
- Climate Considerations: If you live in a cooler climate, it may be helpful to start your peanuts indoors and transplant them outside once the weather warms up.
Conclusion
Growing peanuts from store-bought nuts is not only fun and rewarding, but it also gives you a chance to connect with your food in a whole new way. Whether you’re cultivating them for snacks or using them in your favorite dishes, homegrown peanuts are a delicious and sustainable addition to your garden. With the right soil, proper care, and a little bit of patience, you’ll be enjoying the fruits of your labor in no time!
So why wait? Start planting your peanuts today and reap the benefits of homegrown happiness!