
Sweet potatoes are a delicious, nutritious, and versatile crop that can be grown successfully in various settings, including small spaces. One innovative method is to grow them in soil bags, which offers the advantages of easy management, space efficiency, and the ability to control soil quality. This article will guide you through the steps to grow sweet potatoes in soil bags, revealing the secrets to achieving an abundant harvest.
Why Grow Sweet Potatoes in Soil Bags?
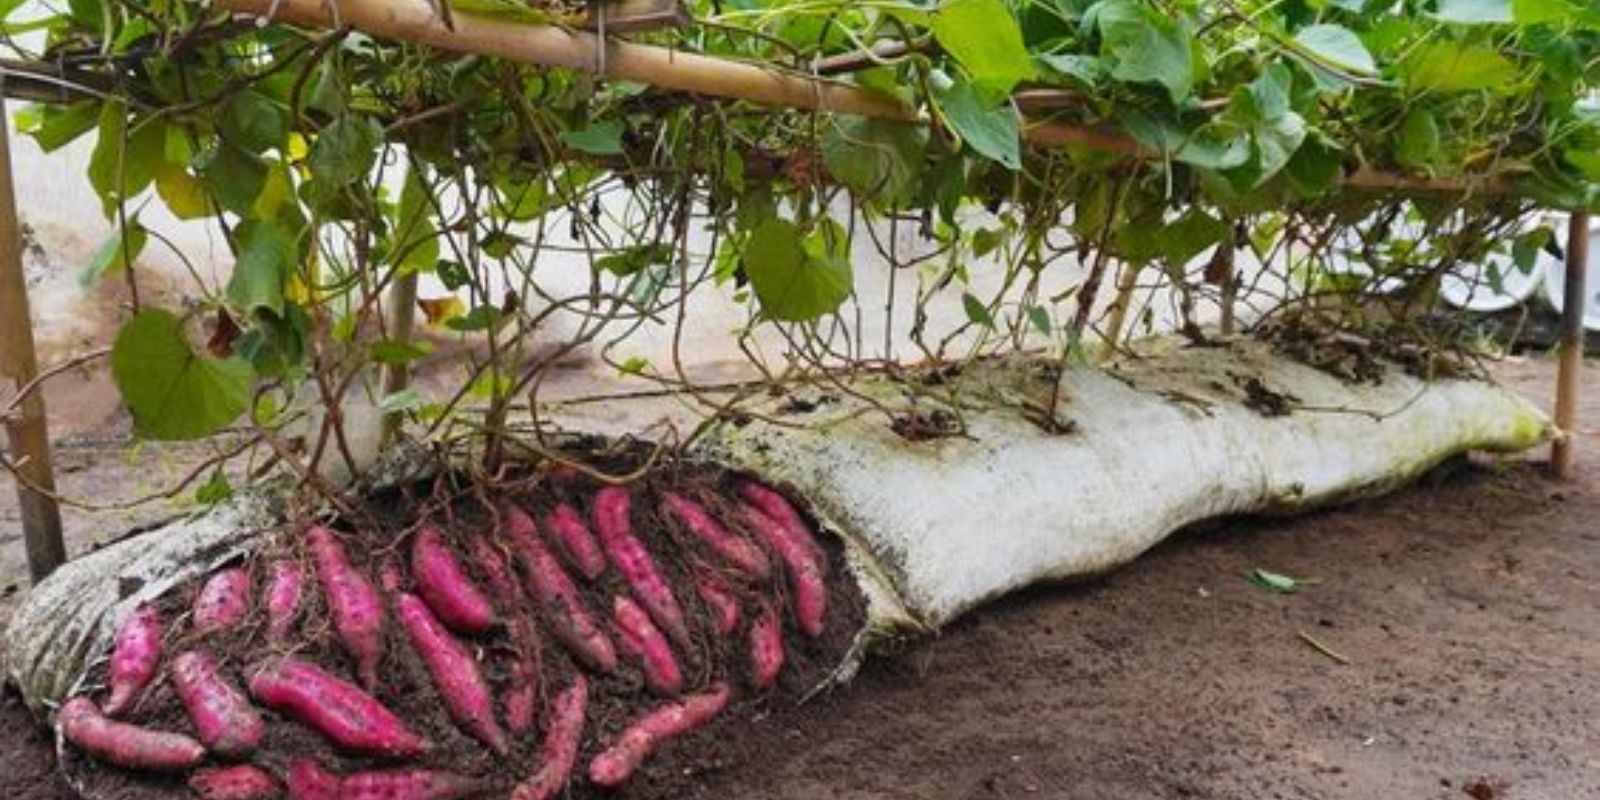
Growing sweet potatoes in soil bags is an excellent option for gardeners with limited space or poor soil conditions. This method allows you to control the growing environment more effectively, providing optimal conditions for the plants to thrive. Soil bags are portable, can be placed on patios, balconies, or any sunny spot, and make harvesting easier by simply dumping out the contents.
Selecting the Right Soil Bag
The first step in growing sweet potatoes in soil bags is selecting the appropriate bag. Choose bags made of durable, breathable fabric that can hold a significant amount of soil. The bags should be at least 15 gallons in size to provide enough space for the roots and tubers to develop. Larger bags will support more slips and potentially yield a greater harvest.
Preparing the Soil
Sweet potatoes require loose, well-draining soil rich in organic matter. Start by filling the soil bags with a mixture of high-quality potting soil and compost. A good ratio is 2 parts potting soil to 1 part compost. This mixture provides the necessary nutrients and structure for healthy root development. Adding perlite or sand can further improve drainage, which is crucial to prevent waterlogging and root rot.
Planting Sweet Potato Slips
Sweet potatoes are typically grown from slips, which are shoots grown from mature sweet potatoes. You can either purchase slips or grow your own by placing a mature sweet potato in water until it sprouts. Once the slips are about 6 inches long, they are ready to be planted.
To plant the slips:
- Create Holes: Make holes in the soil about 12 inches apart, as sweet potato plants need space to grow and spread.
- Planting Depth: Insert the slips into the holes, burying them halfway (about 3 inches) into the soil. Cover the base of the slips with soil, ensuring that at least two leaves are above the soil surface.
- Firm the Soil: Gently press the soil around the slips to secure them in place.
Watering and Care
Sweet potatoes thrive in warm, humid conditions and require consistent moisture, especially during the early stages of growth. Water the soil bags thoroughly after planting, ensuring the soil is evenly moist but not waterlogged. As the plants grow, maintain a regular watering schedule, keeping the soil consistently moist but allowing it to dry out slightly between waterings. Overwatering can lead to root rot, so it’s crucial to find a balance.
Mulching the soil surface can help retain moisture and regulate soil temperature. Use organic mulch like straw, leaves, or grass clippings. This practice also helps suppress weeds, which can compete with the sweet potatoes for nutrients and water.
Fertilizing
While sweet potatoes are not heavy feeders, providing additional nutrients can enhance growth and yield. A balanced, slow-release fertilizer is ideal, applied according to the manufacturer’s instructions. Alternatively, you can use a liquid fertilizer every few weeks during the growing season. Be cautious not to over-fertilize, as excessive nitrogen can lead to lush foliage but fewer tubers.
Managing Pests and Diseases
Growing sweet potatoes in soil bags reduces the risk of soil-borne pests and diseases, but it’s still essential to monitor your plants regularly. Common pests include aphids, beetles, and caterpillars, which can be managed with insecticidal soap or natural predators like ladybugs. For fungal diseases such as blight or rot, ensure good air circulation around the plants and avoid overhead watering.
Harvesting Sweet Potatoes
Sweet potatoes are typically ready to harvest 90 to 120 days after planting, depending on the variety and growing conditions. The best indicator of harvest time is when the leaves and stems begin to yellow and die back. To harvest, carefully dump out the contents of the soil bag or gently dig through the soil to avoid damaging the tubers.
Once harvested, sweet potatoes need to be cured to develop their sweetness and extend shelf life. Curing involves placing the tubers in a warm, humid environment (around 80-85°F and 85-90% humidity) for about 10 days. After curing, store the sweet potatoes in a cool, dry place.
Tips for Success
- Sunlight: Sweet potatoes require full sun to thrive. Ensure your soil bags are placed in a location that receives at least 6-8 hours of direct sunlight daily.
- Variety Selection: Choose sweet potato varieties suited to your climate and growing conditions. Some varieties are more resistant to pests and diseases.
- Rotation: Avoid planting sweet potatoes in the same soil bags or soil as previous years to prevent the buildup of pests and diseases.
Conclusion
Growing sweet potatoes in soil bags is a practical and rewarding method for home gardeners, offering the benefits of controlled growing conditions and ease of management. By following the steps outlined above—selecting the right bag, preparing the soil, planting slips, and providing proper care—you can enjoy a bountiful harvest of sweet, nutritious tubers. Whether you’re a seasoned gardener or a beginner, this method can bring the joy of gardening and the delicious taste of home-grown sweet potatoes right to your doorstep.
Have you tried growing sweet potatoes in soil bags? Share your experiences or ask questions below! Let’s grow together and enjoy the rewards of a thriving garden!