
Introduction
Potatoes are a staple in many diets around the world, known for their versatility and rich flavor. However, if you live in an apartment, have a small garden, or simply want to make the most of limited space, traditional potato planting methods might seem impractical. Enter the revolutionary method of growing potatoes in bags—a space-efficient, accessible, and highly effective way to cultivate your own fresh spuds right at home. This article will guide you through the process of growing potatoes in bags, offering tips and techniques to ensure a bountiful harvest.
Benefits of Growing Potatoes in Bags
Before diving into the how-tos, let’s explore why growing potatoes in bags is a fantastic option:
- Space Efficiency: Ideal for small spaces, including balconies, patios, and urban gardens, where ground space is limited.
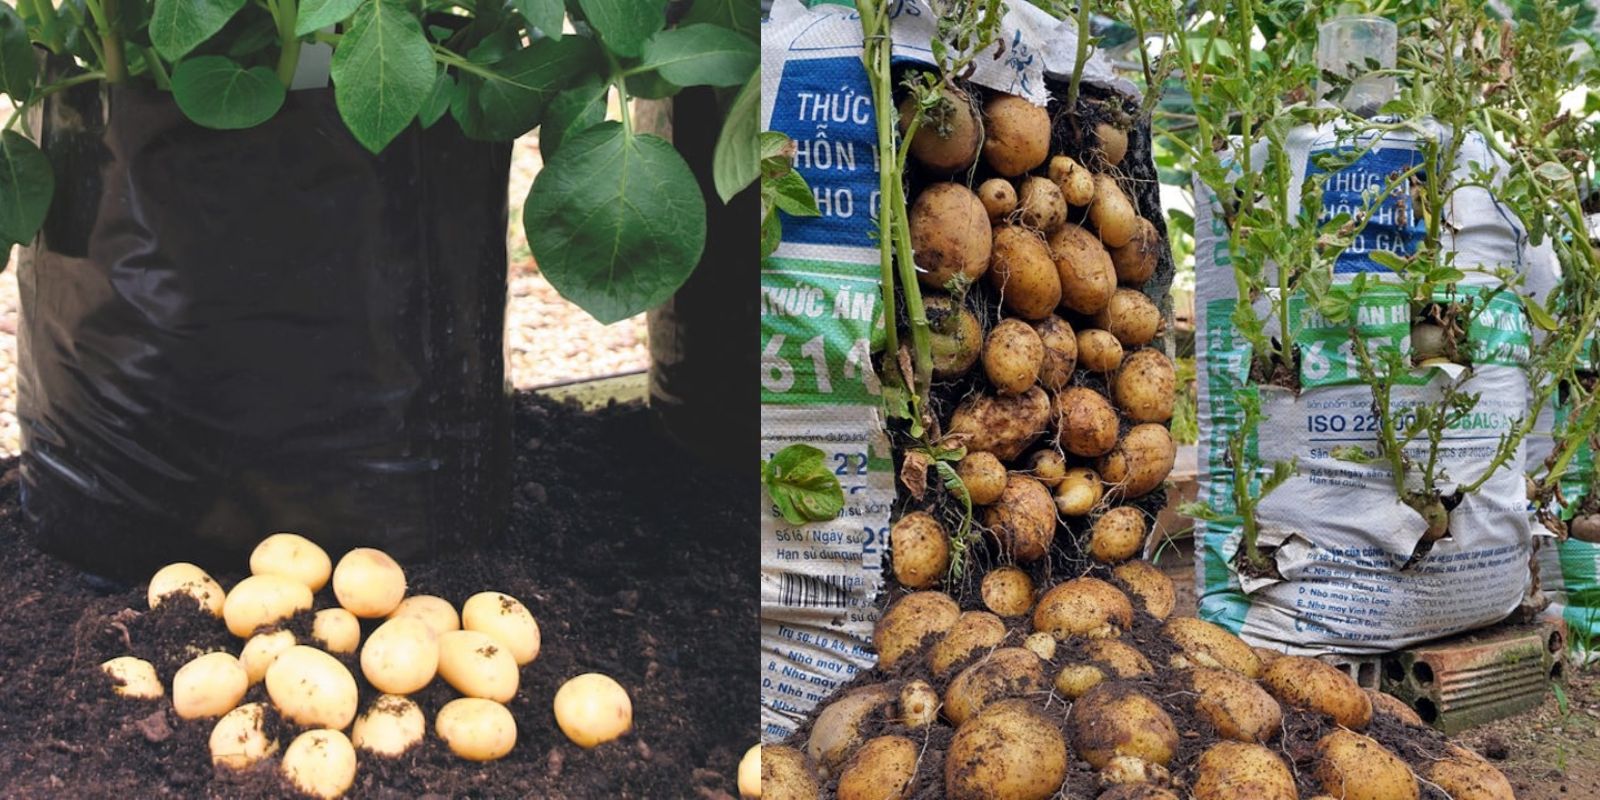
- Ease of Harvesting: Bag growing simplifies the harvesting process by allowing you to lift the bag and access your potatoes without disturbing the soil.
- Disease Management: Growing potatoes in bags reduces the risk of soil-borne diseases, as you’re using fresh potting mix.
- Better Drainage: The breathable fabric of the bags ensures excellent drainage, preventing waterlogging and root rot.
Choosing the Right Bag
Selecting the right bag is crucial for successful potato cultivation:
- Material: Opt for sturdy, breathable fabric bags designed for gardening. These bags are typically made from materials like polyester or felt that allow for air circulation.
- Size: Choose bags that are at least 10-15 gallons in capacity. Larger bags offer more room for root development and can yield a greater harvest.
- Drainage: Ensure the bag has adequate drainage holes to prevent excess moisture buildup. Good drainage is essential for healthy potato growth.
Preparing the Soil
The success of your potato crop depends largely on the quality of the soil:
- Soil Mix: Use a high-quality potting mix or create a blend of compost and garden soil. The mix should be loose and well-draining to promote healthy tuber development.
- Additives: Incorporate perlite or sand into the soil mix to improve drainage and aeration. This helps prevent the soil from becoming too compacted, which can hinder tuber growth.
- Preparation: Fill the bag with the prepared soil mix, leaving about 4-6 inches of space at the top. This allows room for adding more soil as the plants grow.
Planting Seed Potatoes
Proper planting is key to a successful potato crop:
- Seed Potatoes: Choose seed potatoes from a reputable source. These are specifically grown to be disease-free and are different from grocery store potatoes.
- Cutting: If using larger seed potatoes, cut them into pieces with at least one eye (bud) per piece. Allow the cut surfaces to dry for 24 hours to reduce the risk of rot.
- Planting Depth: Place the seed potatoes (or pieces) about 4-6 inches deep in the soil. Space them evenly if planting multiple potatoes in one bag.
Caring for Your Potato Plants
After planting, proper care will ensure a successful harvest:
- Watering: Keep the soil consistently moist but not waterlogged. Water the plants thoroughly when the top inch of soil feels dry. Avoid overwatering, as it can lead to root rot.
- Sunlight: Place the bags in a sunny location where they will receive at least 6-8 hours of sunlight daily. Potatoes need plenty of light to grow strong and healthy.
- Fertilization: Feed the plants with a balanced, organic fertilizer or a specific potato fertilizer to provide essential nutrients. Follow the application instructions to avoid over-fertilization.
Adding More Soil
As your potato plants grow, you’ll need to add more soil to encourage tuber formation:
- Hilling: Once the plants are about 6 inches tall, add more soil to the bag, covering the stems but leaving the top leaves exposed. This process, known as “hilling,” encourages the plants to produce more tubers.
- Ongoing Care: Continue to add soil as the plants grow, ensuring the tubers are covered. This prevents the potatoes from being exposed to light, which can cause them to turn green and become toxic.
Managing Pests and Diseases
While growing potatoes in bags reduces some risks, it’s still important to monitor for pests and diseases:
- Common Pests: Watch for pests such as aphids, spider mites, and potato beetles. Use organic insecticidal soap or neem oil to manage infestations.
- Disease Prevention: To prevent common diseases like blight, ensure good air circulation around the plants and avoid overhead watering. Remove any diseased foliage promptly.
Harvesting Your Potatoes
Harvesting is one of the most rewarding parts of growing potatoes in bags:
- Timing: Potatoes are typically ready for harvest 2-3 weeks after the plants have flowered. The foliage will begin to die back, indicating that the tubers are mature.
- Harvesting Method: Gently open the bag and sift through the soil to find the potatoes. Handle them carefully to avoid bruising or damage.
- Storage: Store harvested potatoes in a cool, dark, and well-ventilated area. Avoid exposing them to light to prevent sprouting and green skin.
Conclusion
Growing potatoes in bags is a fantastic way to enjoy fresh, home-grown produce even in limited spaces. By selecting the right bag, preparing the soil, and providing proper care, you can cultivate a thriving potato crop right in your urban garden or small space. This method not only maximizes your gardening space but also simplifies the harvesting process, making it accessible and enjoyable for all levels of gardeners.
Ready to start growing your own potatoes? Share your gardening journey and tips using #PotatoGrowing #ContainerGardening #UrbanGardening #GrowYourOwnFood and inspire others to embrace the convenience and benefits of potato cultivation in bags. Happy gardening! 🥔🌱🏡