
In the world of home gardening, few things are as rewarding as the ability to harvest fresh greens right from your backyard. Mesclun—a vibrant mix of young salad greens—offers a variety of flavors and textures that can elevate any meal. Not only is mesclun easy to grow, but it also thrives in various conditions, making it perfect for novice and seasoned gardeners alike. This comprehensive guide will take you through everything you need to know to successfully grow mesclun in your home garden.
What is Mesclun?
Mesclun is a French term that refers to a mix of young salad greens, often including lettuce, arugula, spinach, and other leafy vegetables. The beauty of mesclun lies in its variety, allowing you to enjoy different flavors and textures in a single harvest. It’s commonly used in salads, sandwiches, and garnishes, making it a versatile addition to your culinary repertoire.
Benefits of Growing Mesclun
- Fast Growth: Mesclun greens grow quickly, allowing you to enjoy a harvest in as little as three to four weeks after planting.
- Nutrient-Rich: Leafy greens are packed with vitamins and minerals, contributing to a healthy diet.
- Space-Efficient: Mesclun can be grown in small spaces, making it ideal for container gardening or small garden beds.
- Continuous Harvest: With proper care, you can have multiple harvests throughout the growing season.
Choosing the Right Seeds
When it comes to growing mesclun, selecting the right seeds is crucial. You can either purchase pre-mixed mesclun seed packets or create your own blend. Here are some popular options to include in your mesclun mix:
- Lettuce Varieties: Butterhead, Romaine, and Looseleaf are great options that add texture.
- Arugula: Known for its peppery flavor, arugula adds a nice kick to your mix.
- Spinach: A nutrient powerhouse, spinach adds a mild, earthy taste.
- Mustard Greens: These provide a spicy flavor that can liven up your salads.
- Asian Greens: Varieties like mizuna and tatsoi can introduce unique flavors and textures.
Preparing the Soil
The success of your mesclun garden starts with soil preparation. Here’s how to ensure your soil is ready for planting:
1. Choose the Right Location
Select a location that receives at least 4-6 hours of sunlight per day. Mesclun thrives in full sun but can tolerate partial shade, especially in warmer climates.
2. Test Your Soil
Before planting, test your soil to determine its pH and nutrient levels. Mesclun prefers a slightly acidic to neutral pH (around 6.0 to 7.0). You can purchase a soil test kit at your local garden center.
3. Amend the Soil
Based on your soil test results, amend your soil as needed. Incorporate well-rotted compost or aged manure to improve fertility and drainage. Aim for a loamy texture that retains moisture but allows excess water to drain away.
Sowing the Seeds
Once your soil is prepared, it’s time to sow the seeds. Here’s how to do it effectively:
1. Timing
Mesclun can be planted in early spring and fall, making it a cool-season crop. For a continuous harvest, consider sowing seeds every couple of weeks.
2. Seed Sowing Techniques
- Broadcasting: Scatter the seeds evenly over the soil surface for a more natural, mixed look.
- Row Planting: If you prefer, you can plant seeds in rows, spacing them about 6 inches apart.
3. Covering the Seeds
Lightly cover the seeds with about 1/4 inch of soil. Press down gently to ensure good seed-to-soil contact.
4. Watering
Gently mist the area to keep the soil moist without displacing the seeds. Avoid overwatering, which can lead to seed rot.
Caring for Your Mesclun Greens
Once your seeds are sown, proper care is essential for a successful harvest. Here are some key aspects to consider:
1. Watering
Keep the soil consistently moist, especially during dry spells. Water deeply but infrequently to encourage deep root growth. A soaker hose or drip irrigation system can be beneficial.
2. Thinning Seedlings
As your seedlings begin to grow, thin them out to prevent overcrowding. Once they reach about 2 inches tall, thin them to allow adequate space between each plant. You can use the thinned seedlings in your salads!
3. Fertilizing
While mesclun doesn’t require heavy fertilization, a light application of a balanced fertilizer (such as a 10-10-10 NPK mix) every few weeks can promote healthy growth. Be careful not to over-fertilize, as this can lead to excessive leaf growth and reduced flavor.
4. Pest Management
Watch for common pests like aphids and slugs. Use organic pest control methods such as insecticidal soap or neem oil to keep your plants healthy. Additionally, encourage beneficial insects like ladybugs to help control pests naturally.
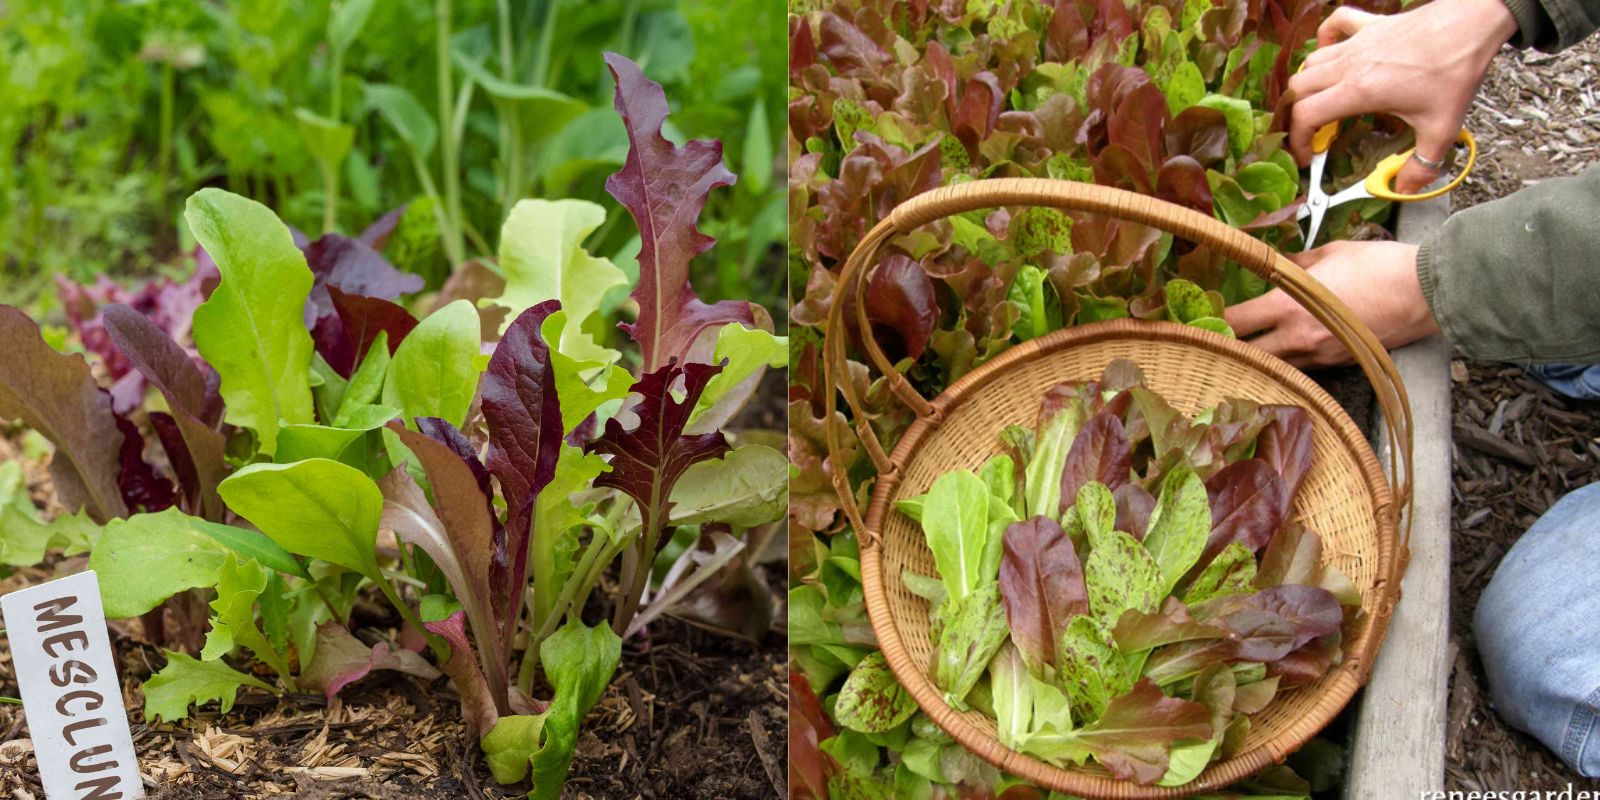
Harvesting Mesclun
One of the best parts about growing mesclun is the quick turnaround time. Here’s how to know when to harvest:
1. Timing
Most mesclun varieties can be harvested about 3-4 weeks after sowing, when the leaves are young and tender. You can begin to harvest once the plants are at least 4-6 inches tall.
2. Harvesting Method
- Cut-and-Come-Again: Use scissors to snip off the outer leaves, allowing the inner leaves to continue growing. This method encourages continuous harvesting and prolongs the life of your plants.
- Whole Plant: If you prefer, you can also pull out the entire plant. This method is best for smaller batches.
3. Post-Harvest Care
After harvesting, rinse the greens in cool water and dry them gently. Store your mesclun in a perforated plastic bag in the refrigerator, where it can stay fresh for about a week.
Tips for Success
- Experiment with Varieties: Try different seed blends to discover your favorite flavors and textures.
- Rotate Your Crops: Practice crop rotation by planting mesclun in different areas of your garden each year to prevent soil depletion and pest buildup.
- Succession Planting: To maintain a steady supply of fresh greens, practice succession planting by sowing seeds every few weeks.
Common Challenges and Solutions
1. Leggy Seedlings
If your seedlings are tall and spindly, they may not be receiving enough light. Consider moving them to a sunnier spot or supplementing with grow lights.
2. Bolting
In hot weather, mesclun greens can bolt, producing flowers and becoming bitter. To prevent this, plant in cooler months or provide shade during hot spells.
3. Poor Germination
If your seeds aren’t germinating, check the soil moisture and temperature. Mesclun seeds prefer soil temperatures between 60-75°F.
Conclusion
Growing mesclun in your home garden is an enjoyable and rewarding endeavor. With a few simple steps, you can cultivate a delicious mix of salad greens that will elevate your meals and contribute to a healthy lifestyle. Not only does mesclun offer a quick turnaround for home gardeners, but it also provides an opportunity to experiment with various flavors and textures.
By following the guidelines outlined in this article, you can create a thriving mesclun garden that supplies fresh greens throughout the growing season. So grab your seeds, prepare your soil, and start your journey to delicious homegrown salads today!