
Hydrangeas are beloved for their lush blooms and vibrant colors, making them a favorite in many gardens. Growing hydrangeas from cuttings is not only an enjoyable activity but also a rewarding way to propagate these beautiful plants, ensuring that your garden remains vibrant year after year. In this detailed guide, we will walk you through the step-by-step process of growing hydrangeas from cuttings, along with some tips and tricks to ensure success.
Why Grow Hydrangeas from Cuttings?
There are several reasons why growing hydrangeas from cuttings can be beneficial:
- Cost-Effective: Purchasing new plants can be expensive. Propagating from cuttings is a budget-friendly way to expand your garden.
- Preservation: If you have a particularly beautiful or sentimental hydrangea, propagating from cuttings ensures that you can enjoy its beauty for years to come.
- Gifting: Hydrangeas grown from cuttings make wonderful gifts for friends and family, sharing the joy of gardening with others.
Selecting Healthy Cuttings
The first step in propagating hydrangeas is to select healthy cuttings. Here’s how to do it:
- Choose the Right Time: The best time to take cuttings is during late spring or early summer when the plant is actively growing.
- Select a Healthy Stem: Look for a healthy, non-flowering stem. Flowering stems are less likely to root successfully.
- Length of the Cutting: Cut a 4-6 inch section of the stem just below a leaf node (the point where leaves attach to the stem). Make sure the cutting includes at least one set of leaves.
Preparing the Cuttings
Once you have your cuttings, it’s important to prepare them properly to encourage rooting:
- Remove Lower Leaves: Gently remove the leaves from the lower half of the cutting, leaving a few sets of leaves at the top.
- Trim the Cutting: If the remaining leaves are large, you can cut them in half to reduce water loss through transpiration.
- Rooting Hormone: Dip the cut end of the stem into rooting hormone. This helps stimulate root growth and increases the chances of successful propagation.
Planting the Cuttings
After preparing the cuttings, it’s time to plant them:
- Prepare the Potting Mix: Use a well-draining potting mix. A mixture of peat moss and perlite works well for hydrangea cuttings.
- Plant the Cuttings: Insert the cut end of the stem into the potting mix, burying it about 1-2 inches deep. Make sure the cutting stands upright and is firmly in place.
- Water Thoroughly: Water the cuttings thoroughly to ensure the soil is evenly moist.
Providing Proper Care
The care you provide during the rooting process is crucial for the success of your hydrangea cuttings:
- Humidity: Hydrangea cuttings need a humid environment to root successfully. You can cover the pot with a plastic bag or use a humidity dome to maintain high humidity levels. Make sure the cover does not touch the leaves.
- Light: Place the pot in a bright, indirect light. Direct sunlight can scorch the cuttings, while too little light can hinder root development.
- Temperature: Keep the cuttings in a warm location, ideally between 65-75°F (18-24°C).
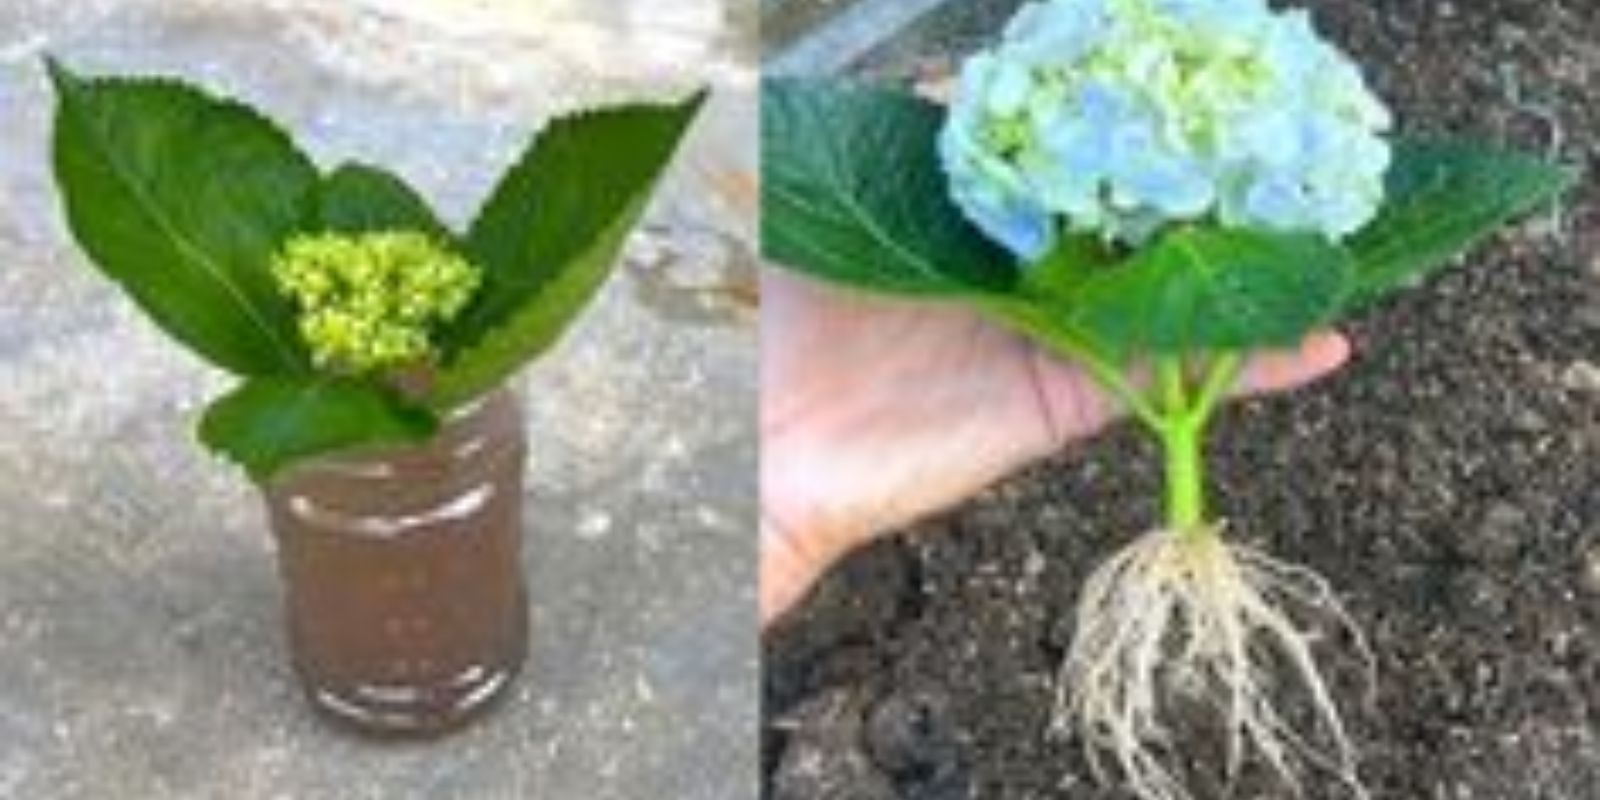
Monitoring and Transplanting
Rooting can take several weeks. During this time, it’s important to monitor the cuttings closely:
- Check for Roots: After a few weeks, gently tug on the cuttings. If you feel resistance, it means roots have started to develop.
- Watering: Keep the soil consistently moist but not waterlogged. Overwatering can lead to rot, while underwatering can cause the cuttings to dry out.
- Ventilation: If using a plastic cover, occasionally remove it to allow fresh air to circulate and prevent mold growth.
Once the cuttings have developed a healthy root system, they are ready to be transplanted:
- Choose the Right Location: Hydrangeas prefer well-draining soil and partial shade. Avoid planting them in full sun or heavy clay soil.
- Prepare the Planting Site: Dig a hole that is slightly larger than the root ball of the cutting. Amend the soil with compost if needed.
- Transplant the Cutting: Gently remove the cutting from the pot, being careful not to damage the roots. Place it in the prepared hole and backfill with soil.
- Watering: Water the newly transplanted hydrangea thoroughly to help it establish in its new location.
Tips for Successful Hydrangea Propagation
To increase your chances of success, keep these tips in mind:
- Patience is Key: Rooting can take time, so be patient and avoid disturbing the cuttings unnecessarily.
- Use Clean Tools: Always use clean, sharp tools when taking cuttings to prevent the spread of disease.
- Monitor for Pests: Keep an eye out for pests like aphids or spider mites, which can hinder the growth of your cuttings.
- Fertilize Sparingly: Once the new plants are established, you can begin to fertilize them lightly. Over-fertilizing can burn young plants.
Conclusion
Growing hydrangeas from cuttings is a fulfilling process that allows you to propagate your favorite plants and enhance the beauty of your garden. By following the steps outlined in this guide, you can successfully root hydrangea cuttings and enjoy the rewards of your efforts. Not only is this a cost-effective way to grow new plants, but it also provides a sense of accomplishment and connection to nature. So why not start today? With a little patience and care, you’ll soon have a garden full of stunning hydrangeas, each with a story of its own.