
Introduction: The Magic of Homegrown Bean Sprouts
Growing your own food at home can be a rewarding and fulfilling experience, especially when it’s easy, fast, and requires minimal space. Bean sprouts are a popular, healthy, and versatile ingredient that can be used in a variety of dishes, from salads and sandwiches to stir-fries and soups. The best part? You can grow them easily at home using a simple plastic bottle. Not only will this method provide you with fresh, crunchy sprouts in just a few days, but it also contributes to reducing plastic waste, making it an eco-friendly option. In this article, we will guide you through every step of growing bean sprouts in plastic bottles, ensuring your success with this sustainable, nutritious, and fun gardening project.
Why Bean Sprouts?
Bean sprouts are packed with essential nutrients such as vitamins C, K, and B, as well as iron, fiber, and protein. They are low in calories, making them a perfect addition to any healthy diet. Sprouts are also rich in antioxidants, which help to protect your body from oxidative stress and inflammation. Furthermore, sprouting beans increases their nutritional value and improves their digestibility, making them an excellent superfood for your meals. Growing them at home ensures you get the freshest sprouts possible, free from chemicals and preservatives often found in store-bought versions.
Why Plastic Bottles?
Plastic bottles offer an ideal environment for sprouting beans due to their cylindrical shape and the ease of creating drainage holes. They are also readily available and can be repurposed, reducing waste and promoting sustainability. By turning an old plastic bottle into a mini greenhouse for your sprouts, you are not only saving money but also contributing to the reduction of plastic pollution.
Step-by-Step Guide: Growing Bean Sprouts in Plastic Bottles
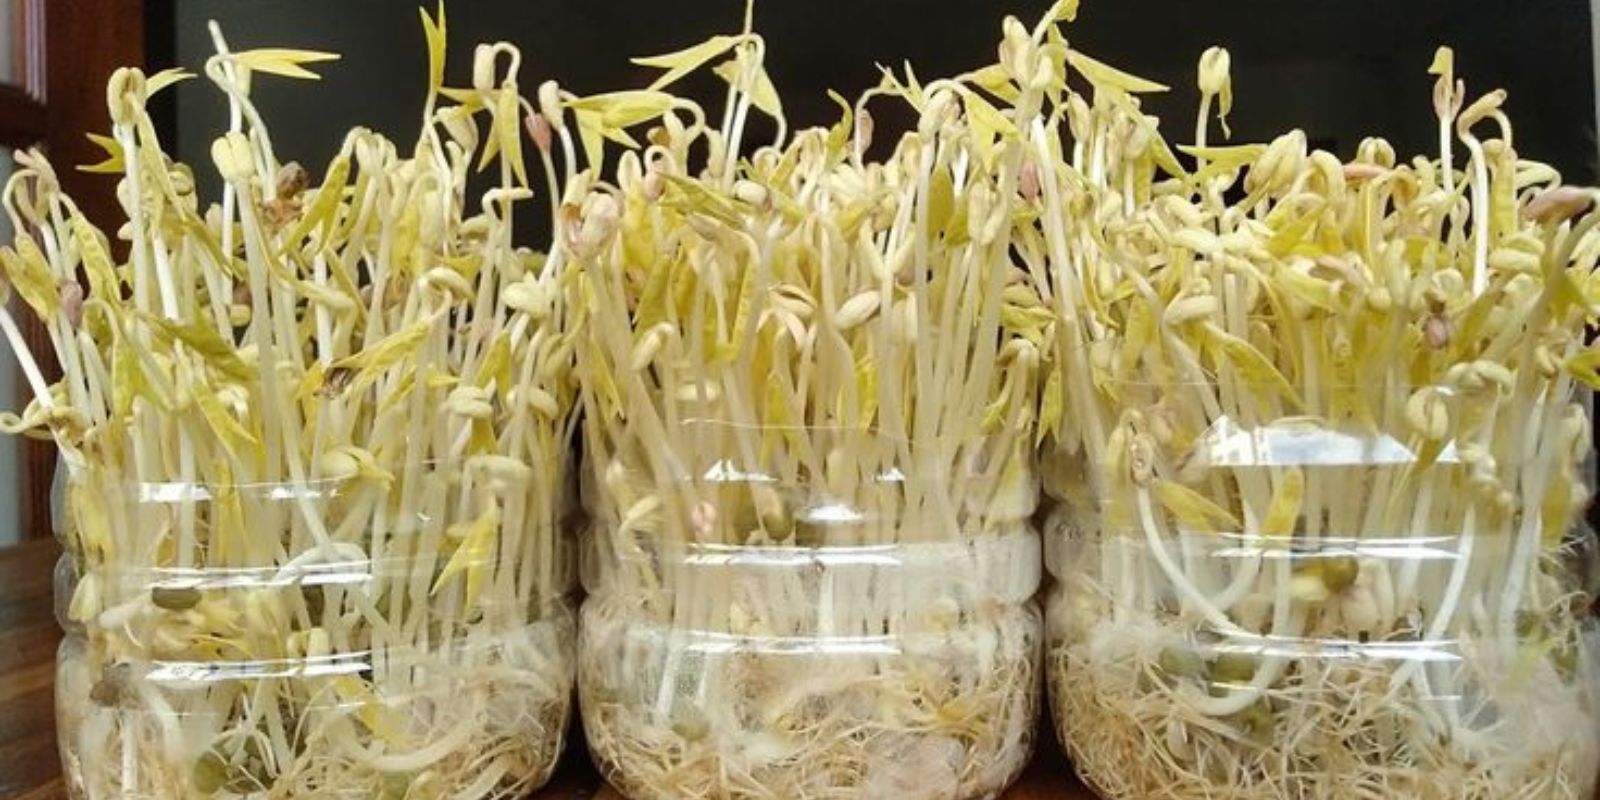
Step 1: Gather Your Materials
To get started, you’ll need:
- A clean plastic bottle (preferably 1 or 2 liters)
- Mung beans or another type of sprouting seed (like alfalfa, chickpeas, or lentils)
- Water
- A knife or scissors
- A piece of cloth or mesh and a rubber band (optional)
Mung beans are commonly used for sprouting due to their quick growth and mild flavor, but other types of beans or seeds work just as well. Make sure the plastic bottle is clean and free of any labels or residue to ensure proper airflow and hygiene for your sprouts.
Step 2: Prepare the Plastic Bottle
Using a knife or a pair of scissors, cut off the top part of the bottle, just below the neck. This creates an open container for easy access to your sprouts. If you’d prefer not to remove the top, you can leave it intact and make the drainage holes on the sides. Then, use the knife to poke small holes in the sides and bottom of the bottle to allow for proper drainage. These holes will also help air circulate, preventing mold from forming on the sprouts.
If you’re leaving the top intact, make a few holes in the cap to let water flow through when rinsing the beans.
Step 3: Soak the Beans
Rinse about ¼ cup of your chosen beans under cold water to remove any dirt or debris. After rinsing, place them in a bowl and cover them with water. The beans will need to soak overnight (about 8–12 hours) to kickstart the sprouting process. Soaking helps soften the seed coat, allowing the beans to germinate more easily.
In the morning, you’ll notice that the beans have swollen and doubled in size. Drain the water and give them another rinse to ensure they are clean.
Step 4: Place the Beans in the Bottle
Once the beans have been rinsed and drained, transfer them into your prepared plastic bottle. Spread the beans evenly across the bottom of the bottle to give them space to grow. If you left the top of the bottle intact, you can cover the opening with a piece of cloth or mesh secured with a rubber band. This acts as a strainer when you rinse the beans.
Step 5: Rinse and Drain Twice a Day
For the next 3–5 days, you will need to rinse and drain your beans twice a day. To do this, fill the bottle with water, swish the beans around, and then drain the water through the holes in the bottle. This keeps the beans moist and clean, preventing any mold or bacteria from growing. Make sure to place the bottle in a well-ventilated area but out of direct sunlight, as too much light can cause the sprouts to become bitter.
Each day, you will notice the beans begin to sprout, developing small tails. As they grow, you can gently shake the bottle to keep the sprouts from clumping together.
Step 6: Harvest Your Bean Sprouts
After 3–5 days, your sprouts will be ready to harvest. When the sprouts are about 2–3 inches long, they are perfect for eating. To harvest, simply remove the sprouts from the bottle, give them a final rinse, and they are ready to be used in your favorite dishes.
Bean sprouts can be stored in the refrigerator for up to a week. To keep them fresh, place them in an airtight container lined with a paper towel to absorb any excess moisture.
Bonus Tip: Enjoying Your Fresh Bean Sprouts
Bean sprouts are incredibly versatile and can be used in a variety of dishes. Here are some ideas for incorporating your homegrown sprouts into your meals:
- Salads: Add fresh sprouts to your favorite salad for extra crunch and nutrition.
- Stir-fries: Toss them into stir-fries during the last few minutes of cooking for a fresh, crisp texture.
- Sandwiches and Wraps: Use sprouts as a healthy topping for sandwiches and wraps.
- Soups: Garnish your soups with fresh sprouts to add flavor and texture.
- Smoothies: Blend a handful of sprouts into your morning smoothie for a nutrient boost.
Sustainability: Repurposing Plastic Bottles
One of the great benefits of growing sprouts in plastic bottles is the positive environmental impact. Instead of throwing away single-use bottles, you’re giving them a second life and reducing plastic waste. This simple gardening project helps you cut down on waste and contribute to a healthier planet, while also providing you with nutritious homegrown food.
If you want to take it a step further, consider using other household items, such as glass jars, to grow your sprouts. There are countless ways to incorporate sustainable practices into your gardening, making it both eco-friendly and rewarding.
Final Thoughts: Why Growing Sprouts in Plastic Bottles is a Game-Changer
Growing bean sprouts in plastic bottles is an easy and accessible way to bring fresh, homegrown food into your kitchen. It’s an ideal gardening project for those with limited space, as it doesn’t require a yard or garden plot. Plus, you’ll enjoy the benefits of nutrient-packed sprouts in just a few days with minimal effort.
Whether you’re a seasoned gardener or a complete beginner, this method of sprouting is simple, fun, and rewarding. You’ll be amazed at how quickly your sprouts grow, and how delicious they taste when added to your meals.
Try it today and discover how easy it is to grow your own crunchy, nutritious bean sprouts at home! 🌱