
Apples are one of the most widely consumed fruits around the world, but did you know that you can grow your own apple tree at home without spending a single penny? If you’ve ever eaten an apple and tossed away the seeds, you might be surprised to learn that those very seeds can sprout into thriving apple saplings. With a bit of patience and care, you can turn kitchen scraps into a beautiful tree that may one day bear delicious fruit.
In this guide, we’ll walk you through the step-by-step process of growing apple saplings from apple seeds, also known as “cold stratification”, to help you start your apple-growing journey in just 10 days!
Why Grow Apples from Scraps?
Before we dive into the process, let’s explore the benefits of growing apples from scraps:
✅ Free and Sustainable – You’re using seeds from apples you’ve already eaten, reducing waste and promoting sustainability.
✅ Educational – A great learning experience for kids and beginner gardeners.
✅ Self-Sufficiency – Growing your own fruit means less reliance on store-bought produce.
✅ Ornamental Value – Even if your tree doesn’t bear fruit, it makes a lovely addition to your garden!
Although growing apples from seeds takes time and patience, the rewards are well worth it. Now, let’s get started!
Step 1: Collecting Apple Seeds
The first step in growing apple saplings is to collect fresh seeds from an apple. Here’s what you need to do:
- Choose a ripe apple from a variety you enjoy. Keep in mind that apples grown from seeds may not produce identical fruit to the parent apple.
- Cut the apple open and remove the seeds.
- Rinse the seeds under cool running water to remove any fruit residue, which could lead to mold.
- Place the cleaned seeds on a paper towel and let them dry for a few hours.
Step 2: Cold Stratification (Mimicking Winter Conditions)
Apple seeds require a process called cold stratification, which simulates winter conditions and encourages germination. In nature, apple seeds only sprout after experiencing a cold, dormant period. To replicate this at home:
- Dampen a paper towel – It should be moist but not soaking wet.
- Wrap the apple seeds in the damp paper towel.
- Place the seeds in a ziplock bag or airtight container.
- Label the bag with the date and store it in the refrigerator. The temperature should be around 32-40°F (0-4°C).
- Leave them for 7-10 days, checking occasionally for signs of sprouting. Some seeds may take up to a few weeks to sprout.
💡 Tip: Make sure the paper towel remains damp throughout the process!
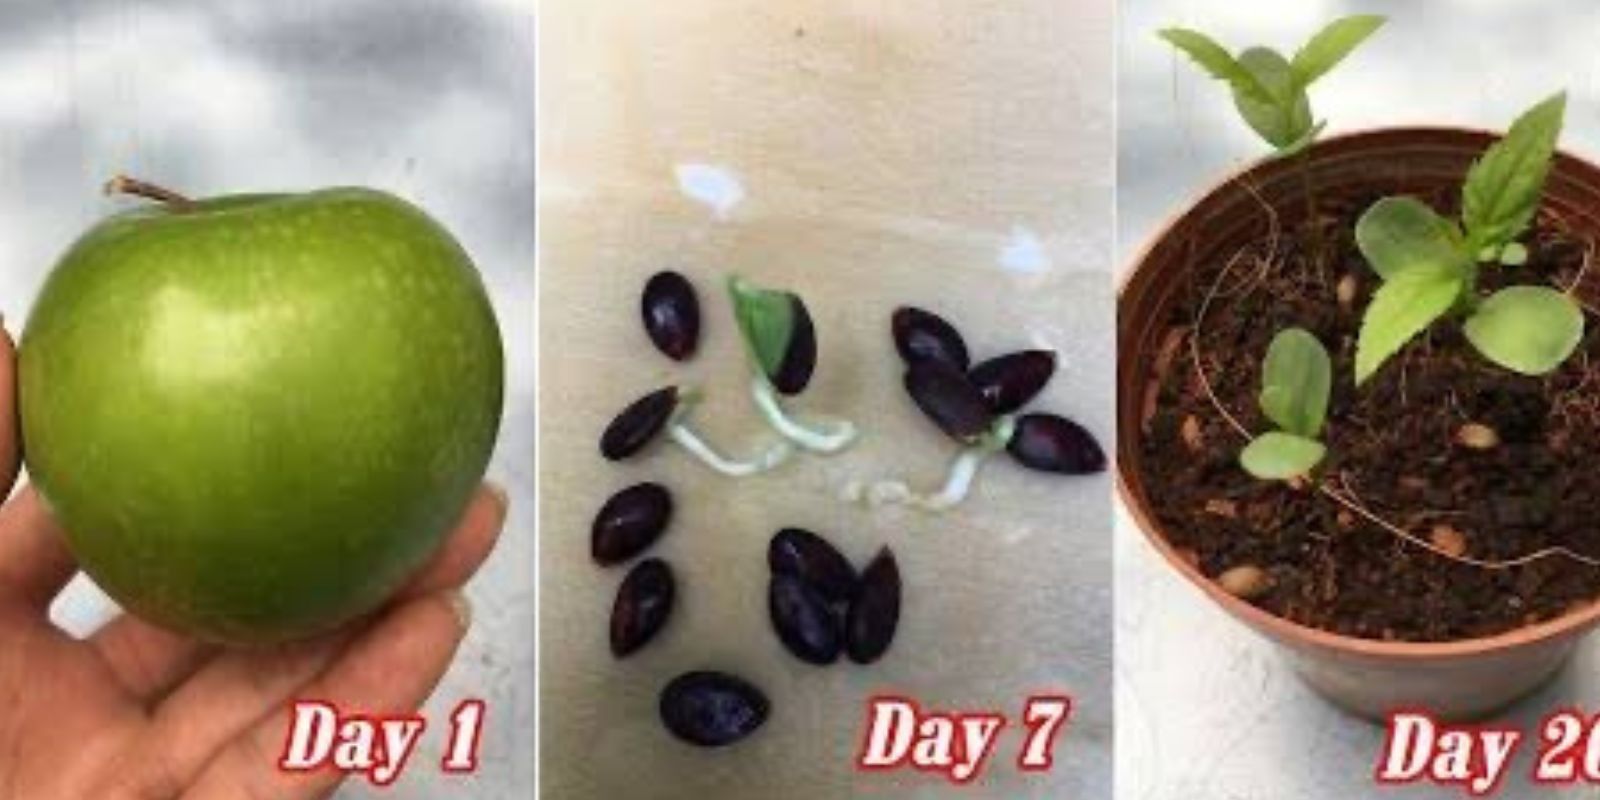
Step 3: Checking for Germination
After 7-10 days, check on your seeds. If they have started to sprout tiny white roots, they’re ready to be planted! If not, give them a few more days, making sure they remain moist but not moldy.
Once your seeds have sprouted, move on to the next step.
Step 4: Preparing the Pot and Soil
Apple saplings need well-draining, nutrient-rich soil to grow strong roots. Here’s how to prepare the perfect home for them:
- Choose a small pot (around 4-6 inches in diameter) with drainage holes.
- Fill the pot with a lightweight potting mix enriched with compost. Avoid heavy garden soil, as it can retain too much water.
- Make a ½-inch hole in the soil using your finger or a pencil.
Step 5: Planting the Sprouted Seeds
Now, it’s time to plant the germinated apple seeds:
- Carefully place each sprouted seed into the hole, root side down.
- Gently cover the seed with soil, but do not compact it too much.
- Lightly water the soil until it is evenly moist but not soggy.
Step 6: Providing the Right Growing Conditions
For your apple saplings to thrive, they need the right environment:
🌞 Sunlight – Place the pot in a sunny window or outdoors where it receives at least 6-8 hours of sunlight daily.
💧 Watering – Keep the soil moist but avoid overwatering. Water when the top inch of soil feels dry.
🌡 Temperature – Apple seedlings grow best in temperatures around 60-75°F (15-24°C).
🌱 Humidity – If the air is dry, mist the leaves occasionally to maintain humidity.
Step 7: Watching for Growth
Within a few days to a couple of weeks, you should start seeing tiny apple saplings emerging from the soil. Once they have 2-4 leaves, they are strong enough to be moved to a slightly bigger pot.
💡 Tip: If multiple seeds sprouted in one pot, thin them out to one strong seedling per pot to give them enough room to grow.
Step 8: Transplanting the Sapling
As your apple sapling grows to about 6-8 inches tall, it will need a larger pot or a permanent outdoor location:
- Choose a larger pot (at least 12-18 inches in diameter) if you want to continue growing it in a container.
- If transplanting outdoors, pick a spot with full sun and well-draining soil.
- Dig a hole deep enough to accommodate the roots without bending them.
- Gently remove the sapling from the original pot and place it in the hole.
- Backfill with soil, pressing it down gently.
- Water thoroughly after transplanting.
Step 9: Caring for Your Young Apple Tree
Your apple sapling will continue to grow into a strong tree with proper care:
✅ Water regularly – Keep the soil moist but not soggy.
✅ Fertilize lightly – Use an organic, balanced fertilizer every 4-6 weeks to boost growth.
✅ Prune when needed – Trim any weak or overcrowded branches to encourage strong growth.
✅ Protect from pests – Keep an eye out for aphids and other pests that may harm your young tree.
Step 10: Being Patient for Future Harvests
Apple trees grown from seeds take 5-10 years to produce fruit, but they make beautiful, long-living trees. Even if your tree doesn’t produce apples identical to the original fruit, the process is rewarding, fun, and a step towards self-sufficiency!
🌱 Start your apple-growing journey today and turn scraps into a thriving tree!
💬 Have you tried growing apples from seeds before? Share your experience in the comments! 👇