
Growing conifers from hardwood cuttings is a gratifying gardening endeavor that allows you to propagate your favorite evergreen trees and shrubs at home. Not only does this method save you money, but it also helps you expand your landscape with beautiful, resilient plants. Whether you’re looking to create a privacy screen, enhance your garden’s aesthetics, or simply enjoy the satisfaction of growing your own trees, this comprehensive guide will walk you through every step of the process.
Understanding Conifers
Before diving into the propagation process, it’s essential to understand what conifers are. Conifers are a group of trees and shrubs that produce cones and needle-like leaves. They belong to the gymnosperm family and are known for their evergreen foliage, which remains lush throughout the year. Common types of conifers include:
- Pines (Pinus)
- Firs (Abies)
- Spruces (Picea)
- Cypress (Cupressus)
- Junipers (Juniperus)
Conifers are versatile and can be used for landscaping, windbreaks, or even as ornamental features in your garden. They thrive in various climates and soil types, making them a popular choice for many gardeners.
Benefits of Propagating Conifers from Cuttings
- Cost-Effective: Buying young conifer plants from a nursery can be expensive. Propagating from cuttings allows you to multiply your plants at a fraction of the cost.
- Customization: You can choose specific varieties of conifers that may not be readily available in local nurseries, allowing you to create a unique landscape.
- Sustainability: By propagating your plants, you’re contributing to environmental sustainability. It reduces the demand for commercial nursery stock and minimizes transportation-related carbon footprints.
- Satisfaction: Watching your cuttings grow into healthy trees provides a sense of accomplishment and deepens your connection to gardening.
Preparing for Propagation
Before you start propagating conifers, gather the necessary materials and information to ensure success.
Materials Needed
- Healthy Conifer Source: Identify a healthy, mature conifer tree or shrub from which to take cuttings.
- Pruning Shears: Sharp, clean shears are essential for taking clean cuts without damaging the plant.
- Rooting Hormone: This promotes root growth and can significantly increase the success rate of your cuttings.
- Pots and Soil: Use small pots filled with a well-draining potting mix or a blend of peat and perlite.
- Plastic Bag or Dome: To create a humid environment, use a clear plastic bag or a humidity dome.
- Water: Clean, room-temperature water for soaking cuttings and watering the soil.
Choosing the Right Time
The best time to take hardwood cuttings from conifers is during late fall or winter, when the tree is dormant. This period reduces stress on the plant and increases the chances of successful rooting.
Step-by-Step Guide to Propagating Conifers
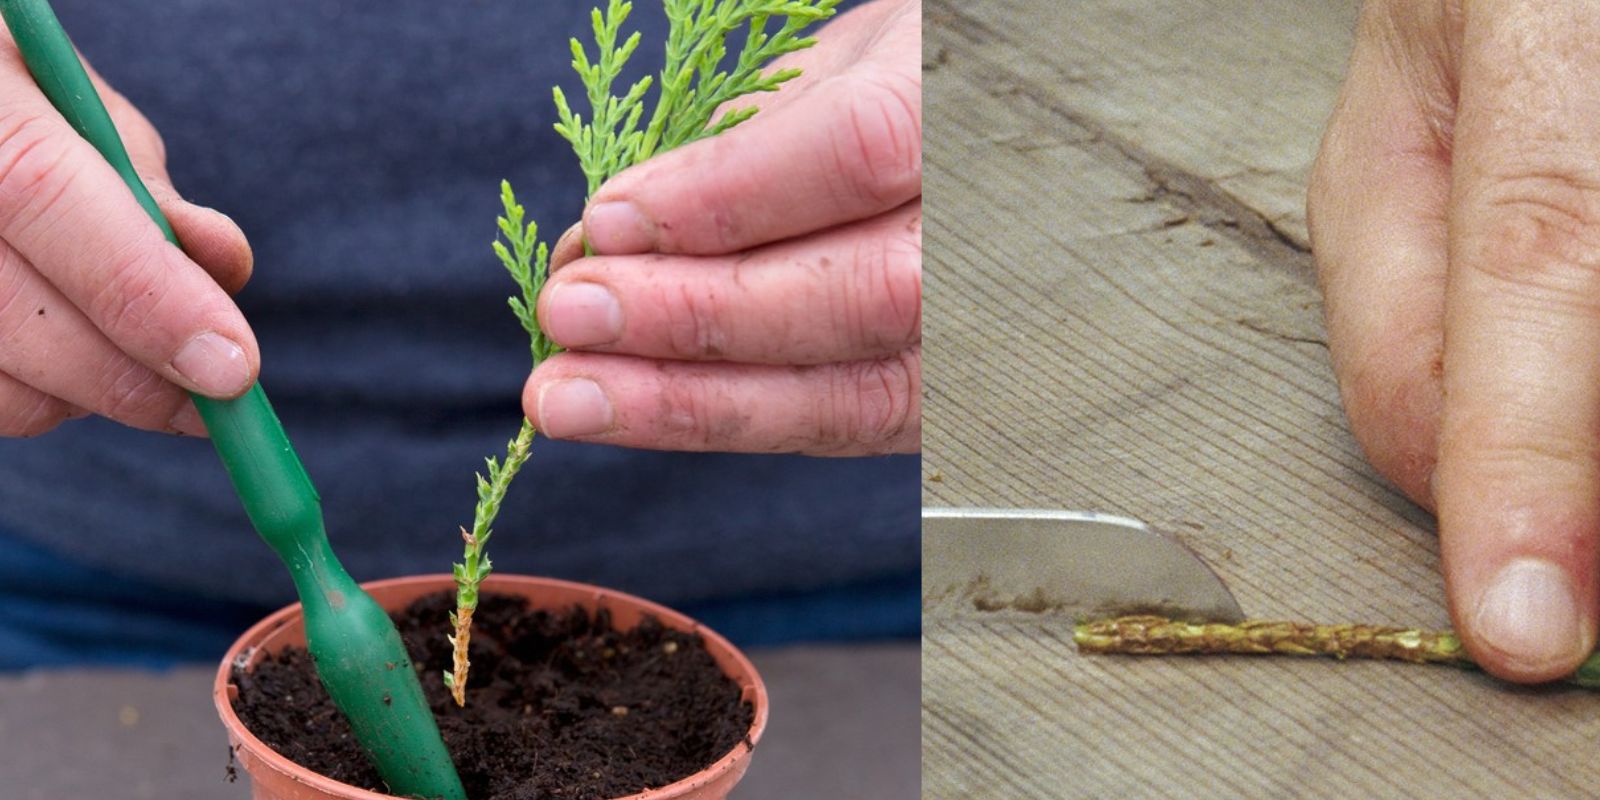
Step 1: Select and Take Cuttings
- Choose the Right Parent Plant: Look for a healthy, disease-free conifer that exhibits desirable traits (growth habit, color, etc.).
- Take the Cuttings: Using clean pruning shears, take 6-8 inch cuttings from the current year’s growth. Cut just below a node (the small bump on the stem) to increase rooting potential.
- Remove Excess Foliage: Trim off the lower leaves to prevent them from rotting in the soil. Leave a few leaves at the top to help with photosynthesis.
Step 2: Prepare the Cuttings
- Soak in Water: Before applying rooting hormone, soak the cut ends of the cuttings in water for about 30 minutes. This helps to hydrate the plant and encourages rooting.
- Apply Rooting Hormone: Dip the cut end of each cutting into rooting hormone, tapping off any excess. This step is crucial, as it significantly enhances the likelihood of successful rooting.
Step 3: Plant the Cuttings
- Prepare Pots: Fill small pots with a well-draining potting mix. You can use a combination of peat, perlite, and sand for optimal drainage.
- Insert Cuttings: Make a hole in the soil with a pencil or your finger, and insert the cutting about 2-3 inches deep, ensuring the hormone-coated end is in contact with the soil.
- Firm the Soil: Gently firm the soil around the cutting to provide stability.
Step 4: Create a Humid Environment
- Water the Soil: Lightly water the soil to ensure it’s moist but not soggy. Good moisture is essential for rooting.
- Cover the Cuttings: Place a plastic bag or humidity dome over the pots to create a greenhouse effect. This helps maintain humidity levels, which is crucial for rooting.
- Ensure Proper Airflow: If using a plastic bag, make sure it’s not tightly sealed. Allow some airflow to prevent mold and fungal growth.
Step 5: Positioning and Care
- Light: Place the pots in a bright location, but avoid direct sunlight, which can overheat the cuttings and cause them to dry out.
- Temperature: Ideally, maintain a temperature between 65°F and 75°F (18°C to 24°C). Consistent warmth helps stimulate root development.
- Watering: Check the soil moisture regularly. Water the cuttings when the top inch of the soil feels dry. Avoid overwatering, as this can lead to rot.
Step 6: Monitoring Progress
- Roots Formation: After about 6-12 weeks, gently tug on the cuttings to check for resistance, which indicates root development.
- Removing the Cover: Once you see signs of new growth and roots, gradually remove the plastic cover or dome to acclimatize the plants to normal humidity levels.
Step 7: Transplanting
- Timing: When the cuttings have established a robust root system (typically several months), they are ready to be transplanted into larger pots or directly into the garden.
- Preparation: Prepare a sunny location in your garden or select larger pots filled with quality potting soil.
- Transplant: Carefully remove the cuttings from their pots, taking care not to damage the roots. Plant them at the same depth they were growing in their original pots.
- Water and Mulch: Water the newly transplanted conifers thoroughly and apply a layer of mulch to help retain moisture and suppress weeds.
Troubleshooting Common Issues
While propagating conifers from hardwood cuttings is generally straightforward, you may encounter a few common challenges:
1. Cuttings Rotting
If your cuttings are rotting, it’s often due to overwatering or poor drainage. Ensure that your pots have adequate drainage holes and that you’re watering sparingly.
2. Mold Growth
Excess humidity can lead to mold growth on the cuttings. To prevent this, ensure there’s adequate airflow and avoid covering the cuttings too tightly. If mold appears, remove the cover and allow the cuttings to dry out slightly.
3. Slow Rooting
If your cuttings are taking longer to root, check the temperature and light conditions. Ensure they are in a warm, bright location, and consider using a heating mat to boost root development.
4. Wilting Leaves
Wilting can indicate underwatering or stress. Check the soil moisture and adjust your watering schedule accordingly. If the leaves are yellowing or falling off, it may be a sign of overwatering.
Conclusion
Growing conifers from hardwood cuttings is an enriching gardening experience that can result in beautiful, evergreen additions to your landscape. By following the steps outlined in this guide, you can enjoy the satisfaction of nurturing your own trees from cuttings to mature plants.
With a little patience and care, you’ll be rewarded with a thriving collection of conifers that enhance the beauty of your garden for years to come. So gather your materials, choose your favorite conifer, and embark on this rewarding gardening journey today! 🌲🌿
Feel free to share your experiences or ask any questions in the comments below! #ConiferPropagation #GardeningTips #GrowYourOwn #PlantParenting #SustainableGardening