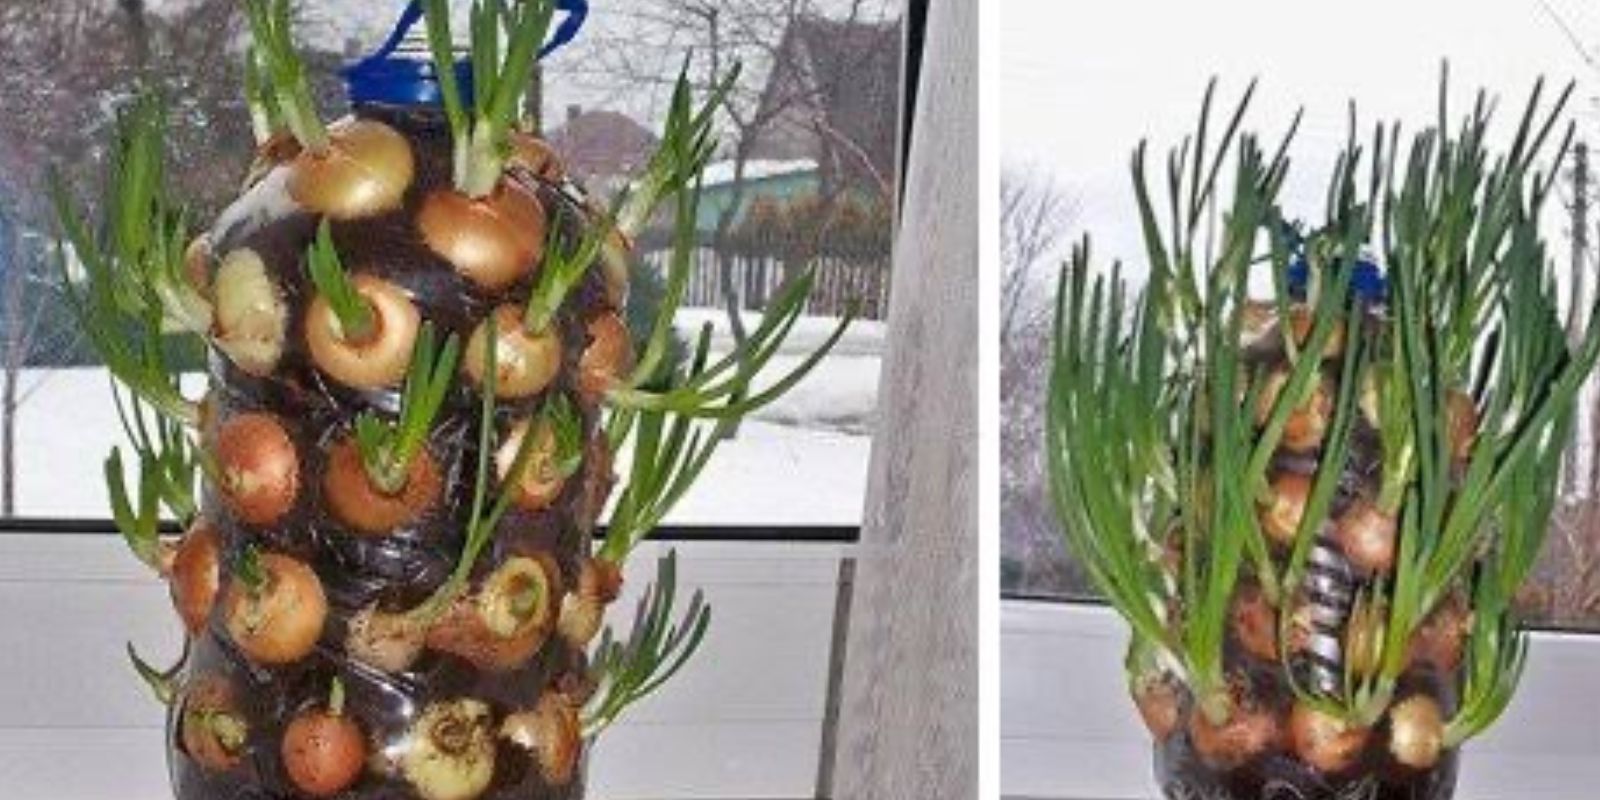
Gardening doesn’t have to be complicated or expensive. With a little creativity, you can grow fresh produce at home using simple items you already have. One of the easiest and most rewarding projects is growing onions on your windowsill using a plastic bottle. This sustainable, space-saving method ensures you’ll always have fresh green onions at hand for your cooking needs.
This article will guide you step-by-step on how to create your own onion garden in a plastic bottle and provide tips to keep your onions thriving.
Why Grow Onions in a Plastic Bottle?
Green onions, also known as scallions, are one of the most versatile and easy-to-grow vegetables. Using a plastic bottle as a planter has several benefits:
- Space-Saving: Perfect for small apartments or homes without outdoor gardens.
- Eco-Friendly: Repurposes plastic waste into something useful.
- Low Maintenance: Onions require minimal care, making them ideal for beginners.
- Continuous Harvest: Green onion tops regrow quickly, providing a constant supply.
- Affordable: All you need are onion bulbs, soil, and an empty plastic bottle.
Materials You’ll Need
To get started, gather the following items:
- A large plastic bottle (2-liter soda bottle or similar)
- Small onion bulbs (or onion sets)
- Potting soil (well-draining)
- A pair of scissors or a utility knife
- Water
Step-by-Step Guide to Growing Onions in a Plastic Bottle
Step 1: Prepare the Plastic Bottle
- Clean the Bottle: Rinse out the bottle thoroughly to remove any residue.
- Cut the Holes: Using scissors or a utility knife, cut small holes around the sides of the bottle. Each hole should be about 1.5 inches in diameter—large enough to fit an onion bulb snugly. Space the holes evenly in rows, leaving enough room for the bulbs to grow.
- Cut the Top Off: Remove the top of the bottle to make it easier to add soil and water.
Step 2: Fill the Bottle with Soil
- Add a layer of potting soil at the bottom of the bottle.
- Insert onion bulbs into the lowest set of holes, positioning the roots inside the bottle and the tips poking out.
- Add more soil to cover the roots and create the next layer.
- Repeat the process, inserting bulbs into each row of holes as you fill the bottle with soil.
Step 3: Water and Place the Bottle
- Lightly water the soil to keep it moist but not soggy.
- Place the bottle on a sunny windowsill or any spot that receives at least 6 hours of sunlight daily.
Caring for Your Onion Bottle Garden
- Watering: Check the soil regularly and water as needed to maintain consistent moisture. Avoid overwatering, as it can lead to rot.
- Sunlight: Ensure the bottle gets enough sunlight, as onions thrive in bright light. If natural light is limited, consider using a grow light.
- Fertilizing: Feed your onions with a diluted liquid fertilizer every 3-4 weeks to encourage growth.
- Pruning: Harvest the green tops as they grow, leaving the base intact. The greens will regrow quickly for multiple harvests.
Benefits of Growing Onions on Your Windowsill
Growing onions in a plastic bottle is not only convenient but also incredibly rewarding. Here are some of the advantages:
- Fresh Flavor: Nothing beats the taste of freshly harvested green onions in your meals.
- Sustainability: This method reduces food waste by growing your own produce and reusing plastic bottles.
- Aesthetic Appeal: A bottle filled with lush green onion shoots adds a touch of greenery to your kitchen or windowsill.
- Educational Value: It’s a fun and educational project for kids and adults alike, teaching the basics of gardening and sustainability.
Common Challenges and How to Overcome Them
- Yellowing Leaves: If the green tops turn yellow, it may be due to overwatering or nutrient deficiency. Adjust watering habits and consider adding fertilizer.
- Slow Growth: Insufficient sunlight can slow down growth. Move the bottle to a sunnier spot or use a grow light.
- Pests: While uncommon indoors, you may occasionally encounter pests like aphids. Use insecticidal soap or a natural solution to address the issue.
Creative Variations and Tips
- Use Different Bottles: Experiment with different bottle sizes and shapes for unique designs.
- Grow Other Veggies: This method also works for other small-rooted plants like lettuce or herbs.
- Decorate the Bottle: Add a personal touch by painting or decorating the bottle to match your kitchen or garden theme.
- Layering Soil: For better drainage, add a layer of small stones at the bottom of the bottle before adding soil.
Harvesting Your Green Onions
Green onions grow quickly, and you’ll be able to start harvesting in just a few weeks. To harvest:
- Use scissors to snip the green tops, leaving at least an inch of growth above the soil.
- The bulbs will continue producing new shoots, giving you an endless supply.
- Repeat the process as needed, and enjoy the satisfaction of homegrown produce.
Conclusion
Growing onions in a plastic bottle is a simple, sustainable, and fun gardening project that anyone can try. With minimal effort and materials, you can enjoy a continuous supply of fresh green onions right from your windowsill. This method not only saves money but also promotes eco-friendly practices by repurposing plastic waste.
So, what are you waiting for? Grab an empty plastic bottle, some onion bulbs, and start your journey toward a greener, fresher lifestyle. Share your progress and tips in the comments – we’d love to see your creative onion gardens!

