
Citrus trees are a popular choice for gardeners due to their vibrant fruits and fragrant blossoms. Whether you’re growing oranges, lemons, limes, or grapefruits, grafting is one of the best ways to propagate citrus trees, improve fruit production, and create strong, disease-resistant plants. One of the most effective grafting methods for citrus trees is the patch bud technique, which involves inserting a bud from a desired tree onto a rootstock. This method is not only simple but also highly reliable, allowing gardeners to create fruitful, high-quality citrus trees with ease.
In this article, we will explore the patch bud grafting technique in detail, offering a step-by-step guide on how to perform it successfully. By the end of this guide, you will understand the benefits of grafting citrus trees, how to select the right materials, and how to ensure your grafting efforts result in healthy, productive trees.
Why Graft Citrus Trees?
Grafting citrus trees offers numerous benefits, making it a popular choice among both amateur and professional gardeners. Here are some of the primary reasons why you should consider grafting citrus trees:
- Improve Fruit Quality: Grafting allows you to combine the desirable qualities of two trees. For example, the rootstock may be resistant to certain diseases, while the scion (the top part of the tree) may produce high-quality fruit. This combination ensures better yields and fruit quality.
- Faster Fruit Production: Trees grown from seeds often take many years to bear fruit. Grafted trees, on the other hand, can begin producing fruit much sooner—usually within 2 to 3 years of grafting, compared to 5 to 7 years for seed-grown trees.
- Increase Disease Resistance: By choosing a rootstock that is resistant to specific diseases, you can create a more robust tree that is less likely to succumb to pests and diseases.
- Repair Damaged Trees: If your citrus tree becomes damaged or diseased, grafting can be a way to revive it by attaching a healthy bud or branch from another tree.
- Preserve Desired Varieties: Grafting allows you to propagate your favorite citrus varieties, ensuring that the new trees will have the same genetic traits as the parent tree.
What Is Patch Bud Grafting?
Patch bud grafting is a common and efficient grafting technique used with citrus trees. It involves inserting a bud from the desired tree (the scion) onto a rootstock tree, using a “patch” of bark to hold the bud in place. The rootstock serves as the root system for the new tree, while the bud will grow into the fruit-producing top.
Unlike other grafting methods, such as the whip-and-tongue or cleft graft, the patch bud method is ideal for trees with smooth bark. It is a relatively simple process, making it an excellent choice for beginners.
Steps for Grafting Citrus Trees Using the Patch Bud Method
Grafting citrus trees with the patch bud method is a straightforward process that requires patience and careful attention to detail. Below is a step-by-step guide on how to perform patch bud grafting on citrus trees:
Step 1: Choose Healthy Materials
Before beginning the grafting process, it’s essential to select healthy and disease-free materials:
- Rootstock: Choose a young, healthy citrus tree with smooth bark. The rootstock should be free from pests and diseases and should be roughly 1–2 years old.
- Scion (Bud): The scion is the bud you will use for grafting. Choose a healthy bud from a mature, fruit-bearing citrus tree. The bud should be mature but not overripe. Ideally, select buds from a tree that has been actively growing in the current season.
Step 2: Prepare the Rootstock
The next step involves preparing the rootstock to receive the bud:
- Select a smooth, healthy section of the rootstock that is free from any branches or damage. The section should be about the thickness of a pencil.
- Using a sharp, sterile knife, make a vertical cut into the bark of the rootstock, about 1–2 inches long. The cut should go through the bark, but not into the wood underneath. This cut is where you will insert the bud.
- Make two horizontal cuts at the top and bottom of the vertical cut to form a small rectangular flap of bark. This “patch” will hold the bud in place.
Step 3: Prepare the Scion Bud
Now that the rootstock is ready, it’s time to prepare the scion bud:
- Using a sharp knife, carefully cut a bud from the scion tree. The bud should be attached to a small piece of bark, which will help it adhere to the rootstock.
- Make sure to cut the bud so that it is small enough to fit into the rectangular flap you created on the rootstock. The bud should be placed with the “eye” (the growing point) facing outward.
- Avoid cutting too much wood with the bud, as it will make it harder to attach to the rootstock.
Step 4: Insert the Bud into the Rootstock
This is the critical step in the grafting process. To insert the bud:
- Carefully lift the flap of bark on the rootstock.
- Insert the prepared bud into the flap, making sure the bud is snug and fits perfectly inside.
- Ensure the bark of the scion and rootstock align well, and the cambium layers (the thin green layer just beneath the bark) are in contact with each other. This contact is essential for successful grafting.
- Gently press the flap back down, securing the bud in place.
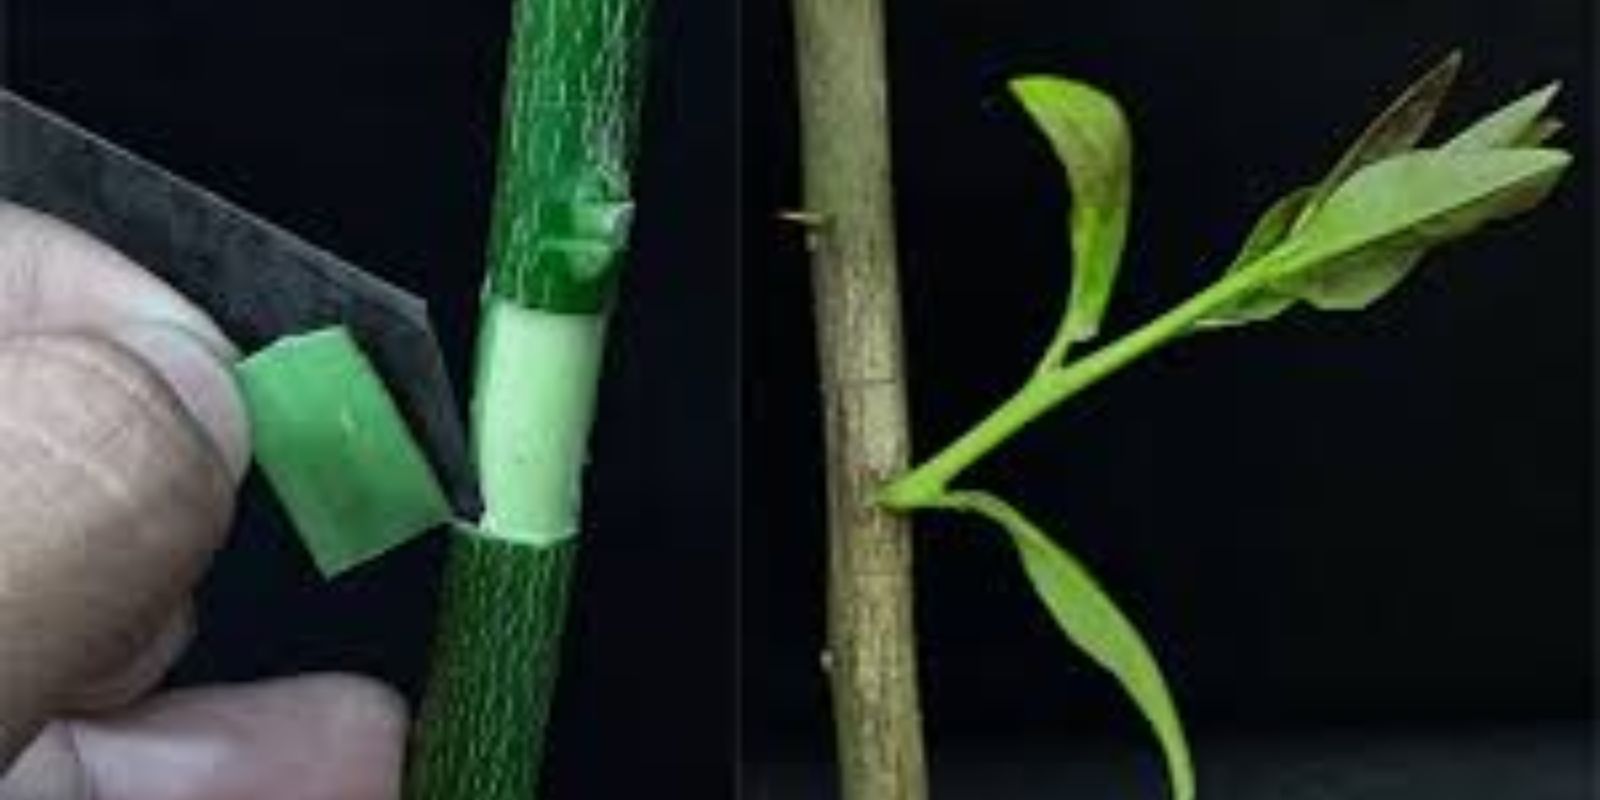
Step 5: Secure the Graft
After inserting the bud, you must secure it to ensure it stays in place and heals properly:
- Wrap the graft union with grafting tape or parafilm to hold the bud and flap in place. The tape should be tight enough to secure the bud but not so tight that it cuts off circulation.
- Make sure the area is well-covered to protect the bud from drying out or being disturbed.
Step 6: Care for the Graft
After grafting, the bud will need time to heal and establish a connection with the rootstock:
- Keep the grafted area moist but not soggy. Mist the area occasionally if necessary.
- Keep the grafted tree in a shaded area for the first few weeks to reduce stress and promote healing.
- After 2–4 weeks, check the graft for signs of success. If the bud has started to “take,” it will show new growth.
Step 7: Remove the Grafting Tape
Once the graft is successful and the bud begins to grow, carefully remove the grafting tape. Be gentle to avoid damaging the newly formed graft.
Step 8: Prune and Shape the Tree
As the bud grows into a new shoot, prune back the rootstock to encourage the bud’s growth. Allow the scion to grow strong and healthy, and eventually, the tree will begin producing fruit.
Tips for Successful Patch Bud Grafting
- Timing: The best time to graft citrus trees is during the spring or early summer when both the rootstock and scion are actively growing. Avoid grafting during extreme heat or cold.
- Clean Tools: Always use clean, sterilized tools to prevent infections and diseases from entering the graft site.
- Be Patient: Grafting takes time, and not every graft will succeed. Don’t be discouraged if the first few attempts don’t take—practice makes perfect.
Conclusion
Grafting citrus trees with the patch bud method is a rewarding and efficient way to propagate your favorite citrus varieties, improve fruit production, and create healthier trees. By following the steps outlined above, you can successfully graft citrus trees and enjoy fresh, homegrown fruit in just a few years. Whether you’re a beginner or an experienced gardener, grafting is a technique that offers many benefits for your garden. Happy grafting, and may your citrus trees flourish!
Have you tried patch bud grafting before? Share your experiences and tips in the comments below!
#CitrusGrafting #FruitTreeCare #GardeningTips #GrowYourOwn #GraftingTechniques #FruitfulGarden #HomeGardening #PlantingTechniques #CitrusLovers #GardeningHacks