
Pine trees are not just majestic additions to landscapes; they also play a vital role in ecosystems by providing shade, purifying air, and offering habitats for wildlife. Growing a pine tree from a tiny pine nut is a fulfilling process that connects you with nature. This comprehensive guide will walk you through every step, from selecting the perfect pine nut to transplanting your thriving tree into the garden.
Why Grow a Pine Tree?
Pine trees symbolize resilience and strength. Their evergreen needles and towering height make them a cherished feature in gardens and parks. By planting a pine tree from a seed, you contribute to reforestation efforts, enhance biodiversity, and reduce your carbon footprint. Plus, it’s a fascinating project for nature enthusiasts of all ages.
Step-by-Step Guide to Growing a Pine Tree from a Pine Nut
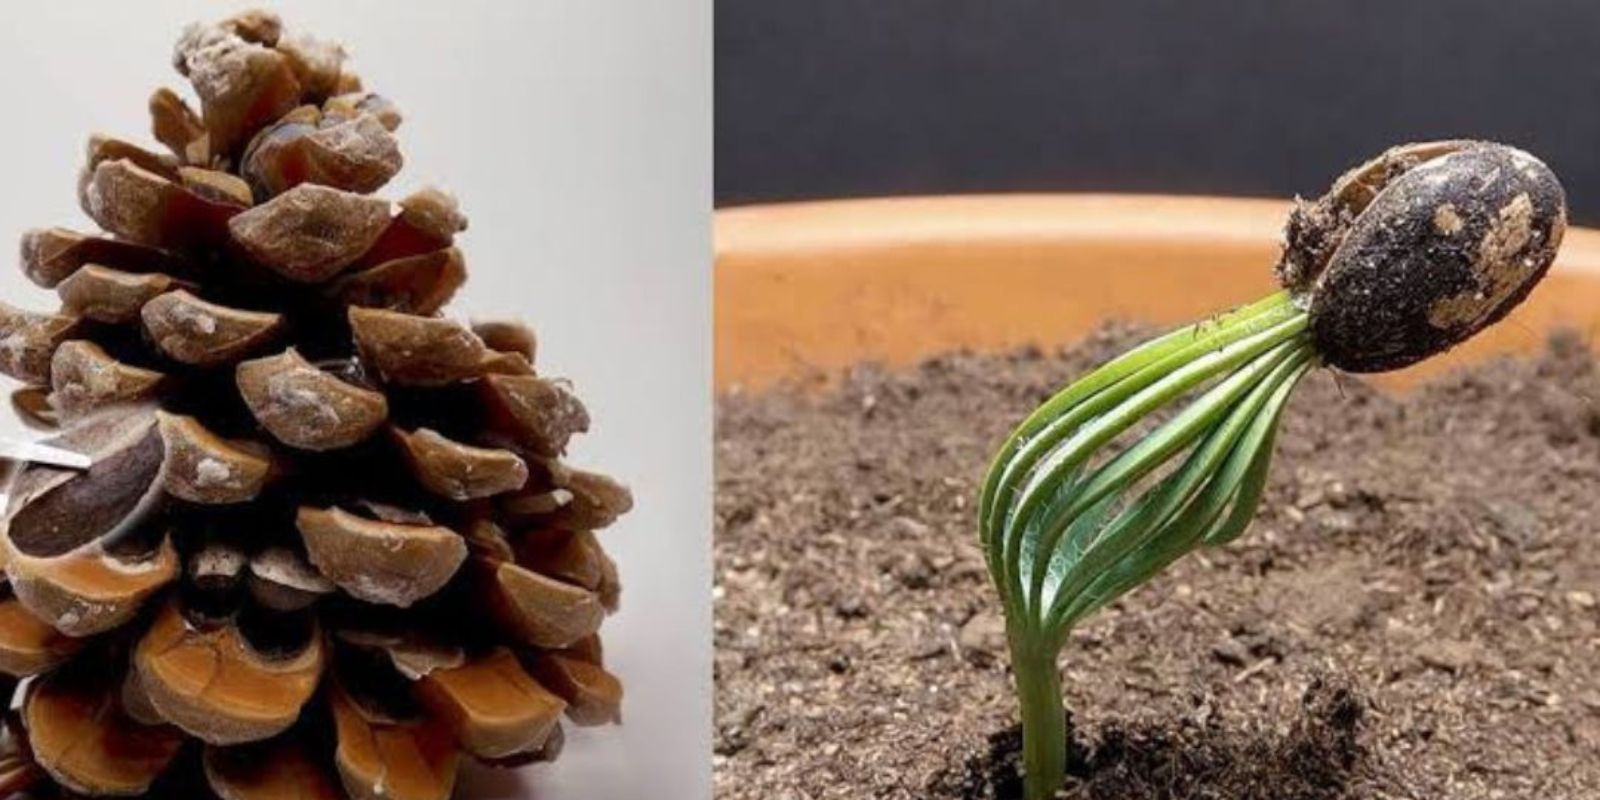
1. Collecting Mature Pine Nuts
The journey begins with selecting the right seeds.
- When to Collect: Late summer to early autumn is the ideal time to gather pine nuts from cones.
- How to Choose: Look for healthy, mature cones from established pine trees. These cones should have naturally opened to release their seeds.
- Pro Tip: Shake the cone gently to dislodge the seeds. Discard damaged or hollow seeds as they won’t germinate.
2. Preparing the Seeds
Once you have your pine nuts, proper preparation is crucial.
- Extracting the Seeds: Use a small knife or tweezers to carefully remove seeds from the cones.
- Cleaning and Drying: Rinse the seeds to remove debris, then dry them at room temperature for 24–48 hours.
3. Stratification: Mimicking Winter Conditions
Pine seeds require stratification to germinate, which simulates the cold winter period they experience in nature.
- How to Stratify:
- Place the seeds in a container filled with moist sand or peat moss.
- Seal the container and store it in the refrigerator for 4–6 weeks.
- Why It’s Important: This process breaks the seed’s dormancy and promotes germination.
4. Preparing the Germination Soil
A nutrient-rich, well-draining soil is essential for pine seed germination.
- Ideal Mix: Combine equal parts of garden soil, sand, and compost.
- Container Selection: Use pots or seed trays with drainage holes to prevent waterlogging.
5. Sowing the Seeds
Planting pine nuts requires precision to ensure healthy growth.
- Depth: Sow the seeds 1–2 times their size into the soil.
- Spacing: Leave at least 2–3 cm between seeds to give roots space to spread.
- Watering: Gently water the soil to keep it moist but not soggy.
6. Germination and Initial Growth
Patience is key during this stage, as pine seeds can take 2–4 weeks to germinate.
- Sunlight: Place the seed tray in a location that receives bright, indirect sunlight.
- Moisture: Regularly mist the soil to maintain consistent moisture levels.
- Temperature: Keep the environment warm, ideally between 18–24°C (64–75°F).
7. Transplanting to Individual Pots
Once seedlings develop a few pairs of true leaves, it’s time to move them to their own pots.
- Pot Selection: Choose pots with adequate depth to accommodate root growth.
- Soil Mix: Use a conifer-specific soil mix for better results.
- Handling: Be gentle to avoid damaging the delicate roots.
8. Gradual Acclimatization
Pine seedlings need time to adapt to outdoor conditions.
- How to Acclimatize: Gradually introduce them to direct sunlight over several days.
- Why It’s Necessary: Sudden exposure to harsh sunlight can cause stress and leaf burn.
9. Watering and Fertilizing
Proper hydration and nutrition are crucial for healthy growth.
- Watering: Keep the soil evenly moist, but avoid waterlogging.
- Fertilizing: Use a slow-release conifer fertilizer during the growing season to promote strong roots and lush foliage.
10. Transplanting to the Garden
After 1–2 years, your young pine tree will be ready for its permanent home.
- Choosing a Location: Select a sunny spot with well-draining soil. Ensure there’s enough space for the tree’s future growth.
- Planting: Dig a hole twice as wide as the root ball. Place the tree in the hole and fill it with soil, pressing gently to remove air pockets.
- Watering: Water thoroughly after planting to help roots establish.
Caring for Your Pine Tree
1. Regular Pruning:
- Remove dead or damaged branches to maintain the tree’s shape and health.
2. Pest and Disease Control:
- Inspect for pests like aphids or diseases like pine needle blight. Use organic treatments as needed.
3. Seasonal Care:
- Mulch around the base to retain moisture and protect roots during extreme temperatures.
4. Long-Term Maintenance:
- Ensure the tree gets at least 6 hours of sunlight daily.
- Water deeply during dry spells, especially in the first few years.
Benefits of Growing a Pine Tree
Environmental Impact:
Pine trees absorb carbon dioxide, improve air quality, and combat climate change.
Aesthetic Appeal:
Their year-round greenery enhances the beauty of any landscape.
Wildlife Habitat:
Pine trees provide shelter and food for birds, squirrels, and other wildlife.
Personal Fulfillment:
Watching a tree grow from seed is a deeply rewarding experience, offering a sense of accomplishment and connection to nature.
Conclusion
Growing a pine tree from a pine nut is a journey that combines patience, care, and a love for nature. Whether you’re planting it as a legacy, contributing to the environment, or simply enjoying the process, the rewards are immense. By following these steps and maintaining consistent care, you’ll cultivate a majestic pine tree that stands tall for generations.
“Have you ever grown a tree from a seed? Share your experience below or tag a fellow nature lover to inspire them to plant a pine tree!”
#GrowFromSeed #PlantATree #PineTreeJourney #EcoGardening #SustainableLiving #NatureGoals