
Growing an apple tree at home can be a deeply rewarding experience, offering not only a connection to nature but also the opportunity to enjoy fresh, organic fruit straight from your garden. Whether you’re a beginner or an experienced gardener, this guide will walk you through the process of planting and caring for an apple tree, from seed to harvest.
1. Choosing the Right Apple Variety
The first step in growing an apple tree is selecting the right variety. Consider your local climate and the space available in your garden. Some popular options include:
- Dwarf apple trees: Perfect for small spaces or container gardening.
- Standard apple trees: Ideal for larger yards, offering more fruit but requiring more space.
- Cold-hardy varieties: If you live in a colder region, choose varieties like Honeycrisp or Haralson that thrive in low temperatures.
Also, remember that many apple trees require cross-pollination from another variety to produce fruit, so plan to plant at least two compatible trees or ensure that a neighbor has an apple tree nearby.
2. Preparing the Seeds or Seedlings
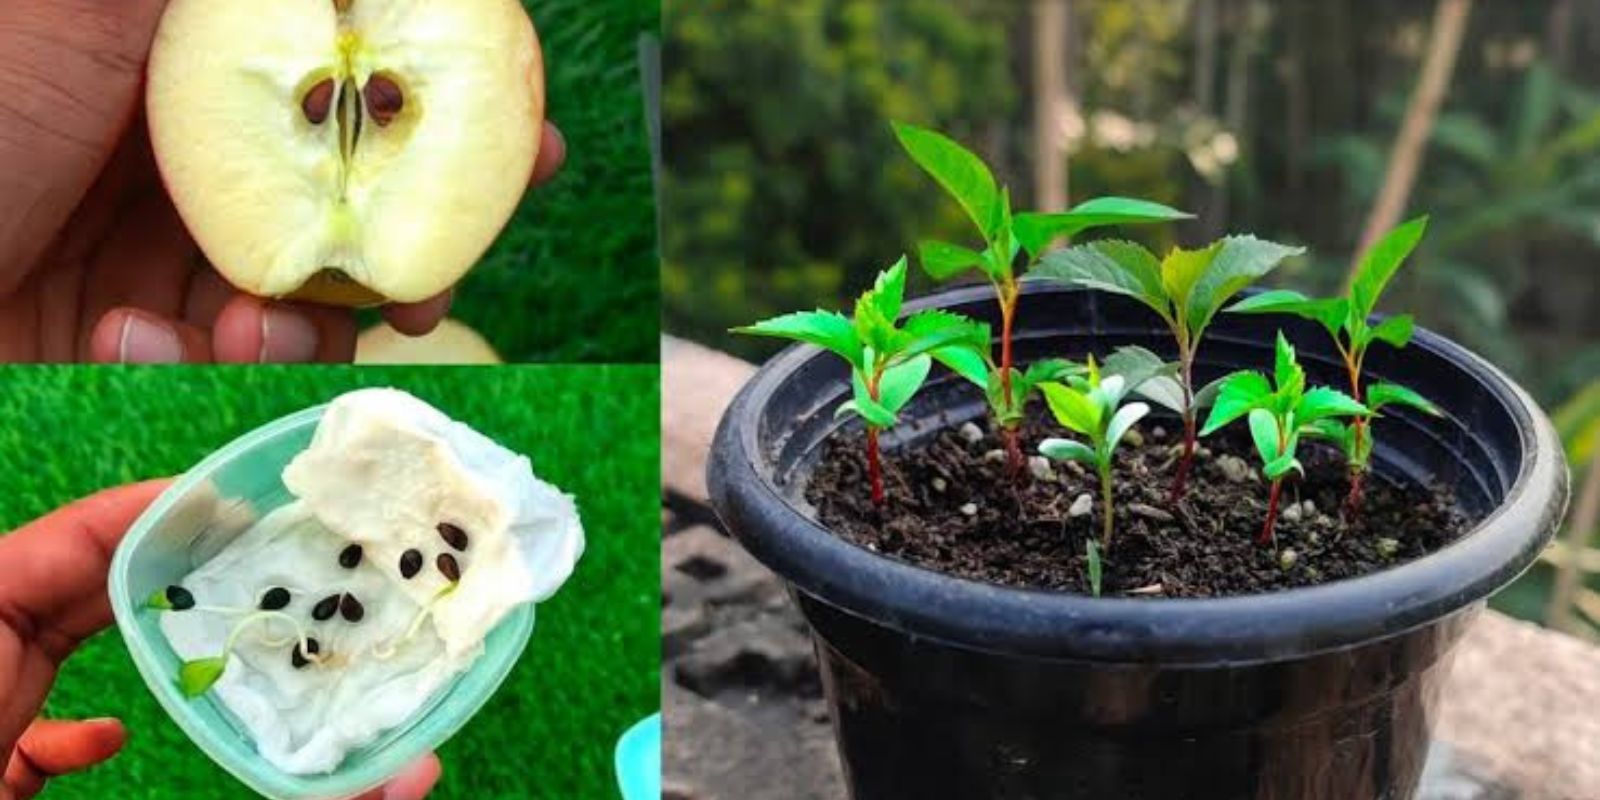
If you’re starting from seeds:
- Collect seeds from fresh apples and rinse them thoroughly to remove any pulp.
- Place the seeds in a damp paper towel, seal them in a plastic bag, and refrigerate for 6–8 weeks. This mimics the winter dormancy period required for germination.
- After stratification, plant the seeds in small pots filled with nutrient-rich soil, ensuring they remain moist but not waterlogged.
For seedlings or young trees:
- Purchase healthy, disease-free saplings from a reputable nursery.
- Ensure the sapling has a strong central leader (main trunk) and healthy roots.
3. Planting the Apple Tree
The best time to plant apple trees is in early spring or late fall. Follow these steps:
- Select a sunny spot: Apple trees require at least 6–8 hours of direct sunlight daily.
- Prepare the soil: Loosen the soil to a depth of 2 feet and mix in compost to improve drainage and fertility.
- Dig a hole: The hole should be twice as wide as the root ball and deep enough to accommodate the roots without crowding.
- Plant the tree: Place the tree in the hole, ensuring the graft union (the bulge near the base of the trunk) is above ground. Backfill with soil, tamping it down gently to remove air pockets.
- Water thoroughly: After planting, water the tree deeply to help the roots establish.
4. Caring for Your Apple Tree
Consistent care is essential for your apple tree to thrive.
Watering
Apple trees need consistent moisture, especially in the first year. Water the tree deeply once or twice a week, depending on rainfall and soil drainage.
Fertilizing
Apply a balanced fertilizer in early spring before new growth begins. For organic options, consider using compost, bone meal, or fish emulsion.
Pruning
Pruning helps maintain the tree’s shape, improves air circulation, and encourages healthy fruit production.
- When to prune: Late winter or early spring while the tree is dormant.
- How to prune: Remove dead, damaged, or crossing branches. Focus on creating an open, vase-like structure with strong, outward-growing branches.
Mulching
Spread a 2–3 inch layer of mulch around the base of the tree to retain moisture, regulate soil temperature, and suppress weeds. Keep the mulch a few inches away from the trunk to prevent rot.
5. Protecting Your Tree
Pests and diseases can pose challenges to apple trees. Some common issues include:
- Apple scab: A fungal disease that causes dark, scabby spots on leaves and fruit. Use disease-resistant varieties and prune for better airflow.
- Codling moths: Small insects that burrow into apples. Use sticky traps or natural predators like birds to control them.
- Deer and rabbits: Protect young trees with fencing or tree guards.
Regularly inspect your tree for signs of trouble and take action promptly to prevent further damage.
6. Patience Pays Off: Fruit Production
Apple trees grown from seeds can take 6–10 years to produce fruit, while grafted trees typically bear fruit within 2–4 years. The wait may seem long, but the payoff is worth it.
Pollination
Ensure proper pollination by planting compatible varieties or attracting pollinators like bees with nearby flowering plants.
Thinning the fruit
Once the tree starts producing, thin out excess fruit clusters, leaving one apple per 4–6 inches of branch. This prevents the tree from being overburdened and improves the size and quality of the fruit.
7. Harvesting Your Apples
The best time to harvest apples is late summer to early fall, depending on the variety. Here’s how to know they’re ready:
- Color: The apples develop their characteristic color.
- Texture: They should feel firm but not hard.
- Taste: Pick one apple and take a bite; it should taste sweet and juicy.
To harvest, gently twist and pull the apples from the tree, being careful not to damage the branches.
8. Storing and Enjoying Your Apples
After harvesting, store apples in a cool, dark place with good air circulation. They can last for several weeks or even months if stored properly. Use your apples for fresh eating, baking, making cider, or preserving as jams and sauces.
Conclusion
Growing an apple tree at home is a long-term commitment that pays off with delicious, homegrown fruit and a sense of accomplishment. By selecting the right variety, providing consistent care, and protecting your tree from pests and diseases, you can enjoy the fruits of your labor for years to come.
What’s your favorite apple variety to grow? Let us know in the comments! 🍎🌳 #HomegrownHarvest #AppleTreeLove #GardeningGoals #FreshFromTheGarden