
The jade plant (Crassula ovata), also known as the money plant, is a beloved succulent known for its thick, glossy leaves and easy-care nature. Propagating this stunning plant from a single leaf is a rewarding and simple process that allows gardeners to multiply their plants or share them with loved ones. This article delves into the step-by-step process, materials needed, tips for success, and common mistakes to avoid. Whether you’re an experienced gardener or a beginner, you’ll find all the guidance you need here to grow a thriving jade tree from a single leaf.
Why Propagate a Jade Plant?
Propagation is an excellent way to grow more jade plants without purchasing new ones. Here are some reasons why you might want to propagate your jade plant:
- Cost-Effective Gardening: Grow more plants without spending money.
- Sentimental Value: Share plants with friends and family.
- Environmental Benefits: Reduce waste by creating new plants from cuttings.
- Aesthetics: Fill your home or garden with lush jade plants for a cohesive and natural decor.
Materials Needed for Propagation
Before diving into the steps, gather the following materials:
- A healthy jade plant
- Sterilized scissors or pruning shears
- A small pot with drainage holes
- Well-draining soil mix (preferably designed for succulents)
- Watering spray bottle
- (Optional) Rooting hormone powder for faster root development
Step-by-Step Guide to Propagating Jade Plants
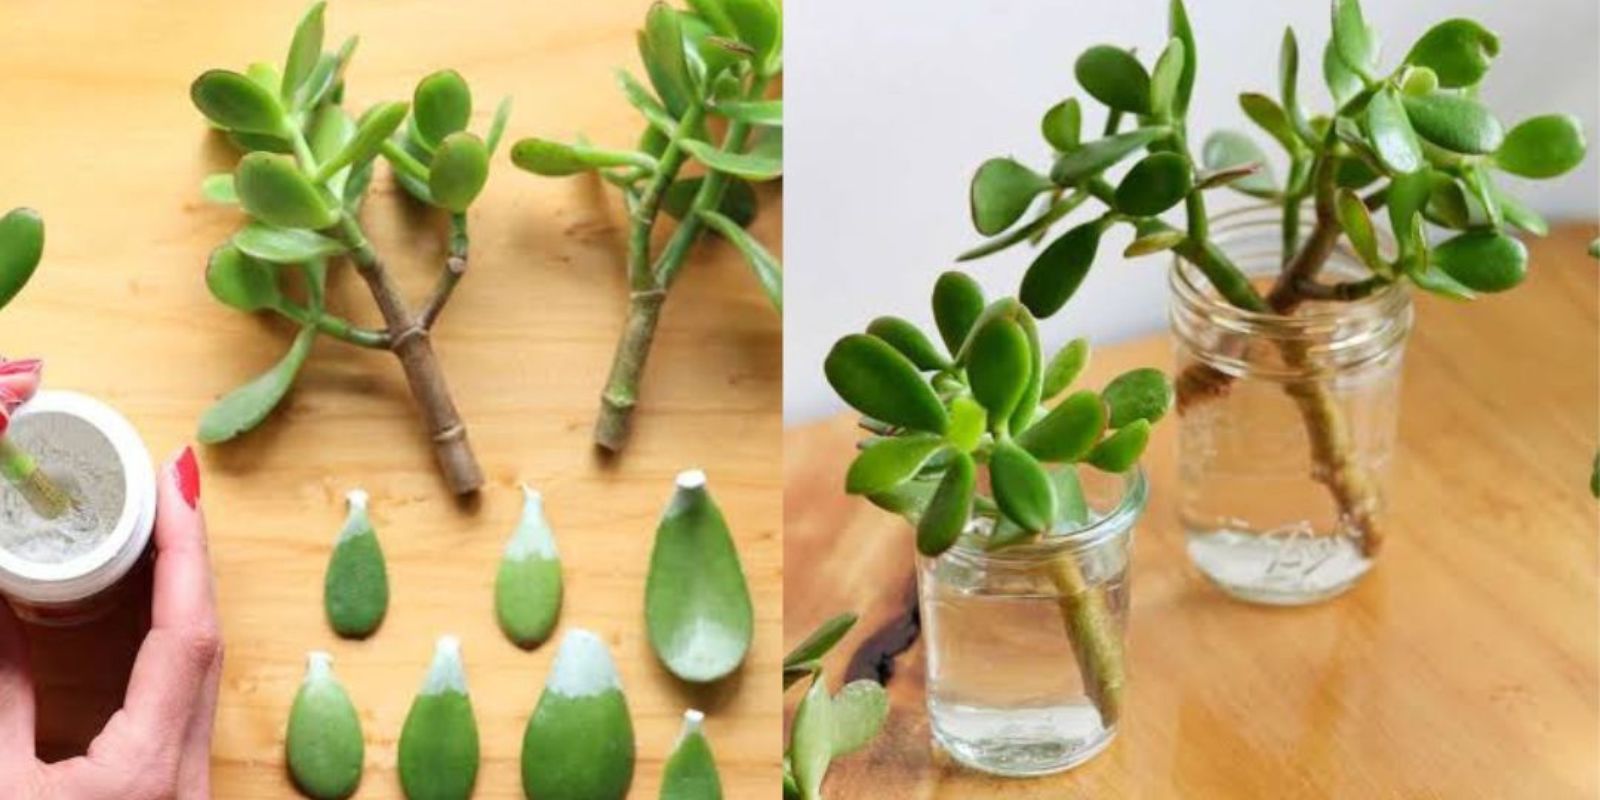
1. Select a Healthy Leaf
Start by identifying a healthy, plump leaf on your jade plant. Avoid leaves that are shriveled, damaged, or discolored. A robust leaf will have the best chance of producing a strong, thriving plant.
2. Remove the Leaf Properly
Using your fingers or sterilized scissors, gently twist or cut the leaf at its base, ensuring a clean break. A smooth detachment minimizes damage to the leaf and promotes better rooting.
3. Allow the Leaf to Dry
Place the removed leaf in a dry, shaded area for 2–4 days. This drying period is crucial because it allows the cut end to form a callus. This protective layer reduces the risk of rot and infection once the leaf is placed in soil.
4. Plant the Calloused Leaf
Once the leaf has dried and calloused, lay it on top of a pot filled with well-draining soil. The cut end should face downward and make slight contact with the soil. Unlike traditional planting, do not bury the leaf completely; this ensures proper air circulation.
5. Water Sparingly
Using a spray bottle, mist the soil lightly to provide moisture without saturating it. Overwatering can cause the leaf to rot. Allow the soil to dry completely between waterings, mimicking the arid conditions jade plants prefer.
6. Watch for Roots and Sprouts
Over the next few weeks or months, roots will begin to develop from the cut end of the leaf. Eventually, tiny sprouts resembling miniature jade plants will emerge. Be patient—this process can take time depending on environmental conditions.
7. Transplant Once Established
Once the new plantlets are large enough and the roots are well-established, transfer them to a larger pot or outdoor garden space. Use a pot with proper drainage and fill it with succulent soil. Continue to water sparingly and provide bright, indirect sunlight.
Tips for Successful Jade Plant Propagation
- Use Rooting Hormone (Optional): Dipping the cut end of the leaf in rooting hormone can speed up the rooting process and improve success rates.
- Avoid Overwatering: Jade plants are succulents that thrive in dry conditions. Too much water can lead to rot.
- Provide Indirect Light: Place the leaf in a bright area with indirect sunlight. Direct sunlight can scorch the delicate leaf.
- Be Patient: Growth may seem slow at first, but jade plants are naturally slow growers. Trust the process.
- Check Soil Quality: A mix containing sand, perlite, and peat moss provides excellent drainage.
Common Mistakes to Avoid
- Using Unhealthy Leaves: Starting with a damaged or shriveled leaf reduces the likelihood of success.
- Skipping the Callusing Step: Planting the leaf immediately after removal increases the risk of rot.
- Overwatering: Excess moisture is the most common cause of failure in jade plant propagation.
- Exposing to Harsh Sunlight: Direct sunlight can dry out or burn the leaf, halting growth.
Frequently Asked Questions
How Long Does It Take for a Jade Plant Leaf to Root?
Rooting can take anywhere from a few weeks to a couple of months, depending on factors like humidity, temperature, and light.
Can I Use Regular Potting Soil for Propagation?
Regular potting soil retains too much moisture for succulents. Opt for a well-draining mix specifically designed for cacti and succulents.
What Should I Do If the Leaf Starts to Rot?
If you notice signs of rot, such as a mushy texture or dark discoloration, remove the affected leaf and ensure the soil isn’t too wet.
Can I Propagate Multiple Leaves at Once?
Absolutely! You can propagate several leaves simultaneously to increase your chances of success.
The Beauty of Jade Plant Propagation
Propagating a jade tree from a single leaf is an excellent way to connect with nature, expand your plant collection, and experience the joy of gardening. With minimal materials and a little patience, you can create a thriving jade plant that brings greenery and elegance to any space.
So why not give it a try? The process is simple, and the rewards are well worth the effort. Start your jade plant propagation journey today and share your success with the gardening community!
Interact with Us!
Have you tried propagating a jade plant before? Share your tips, photos, or questions in the comments below. Let’s grow together!