
Orchids are among the most enchanting plants in the botanical world, captivating gardeners and flower enthusiasts with their exotic beauty and delicate blooms. While traditionally grown in pots with bark or moss as the growing medium, a fascinating trend in orchid care has emerged: cultivating them in water. Known as water culture, this hydroponic approach offers a low-maintenance and aesthetically pleasing way to nurture orchids, ensuring their health and vibrant blooms. This guide will take you through the step-by-step process of growing orchids in water and maintaining them for years to come.
Why Grow Orchids in Water?
The water culture method is gaining popularity for several compelling reasons:
- Minimal Maintenance: Unlike traditional methods, water culture eliminates the need to deal with potting media that decomposes or molds over time.
- Root Health Visibility: A clear glass container allows you to monitor root health easily.
- Elegance: Orchids in water provide a sleek, modern look, turning your plant into a living piece of art.
- Longevity: Proper water culture practices can ensure orchids live longer and bloom repeatedly.
Getting Started: Preparing Your Orchid
1. Choose the Right Orchid
Not all orchids thrive in water. Phalaenopsis orchids (moth orchids) are the most suitable for this method because their roots adapt well to hydroponic conditions. Ensure you select a plant with firm, healthy roots and vibrant leaves.
2. Remove the Orchid from Its Pot
Carefully remove the orchid from its pot, taking care not to damage the roots. If the roots are tangled in bark or moss, gently loosen them.
3. Clean the Roots
Rinse the roots under lukewarm water to remove all traces of soil or debris. Use sterile scissors to trim away any mushy, rotting, or dried-out roots. Healthy roots will be firm and white or green.
4. Sterilize the Plant
To prevent bacterial infections, soak the orchid’s roots in a solution of 1 part hydrogen peroxide to 10 parts water for about 10 minutes.
Setting Up Your Water Culture System
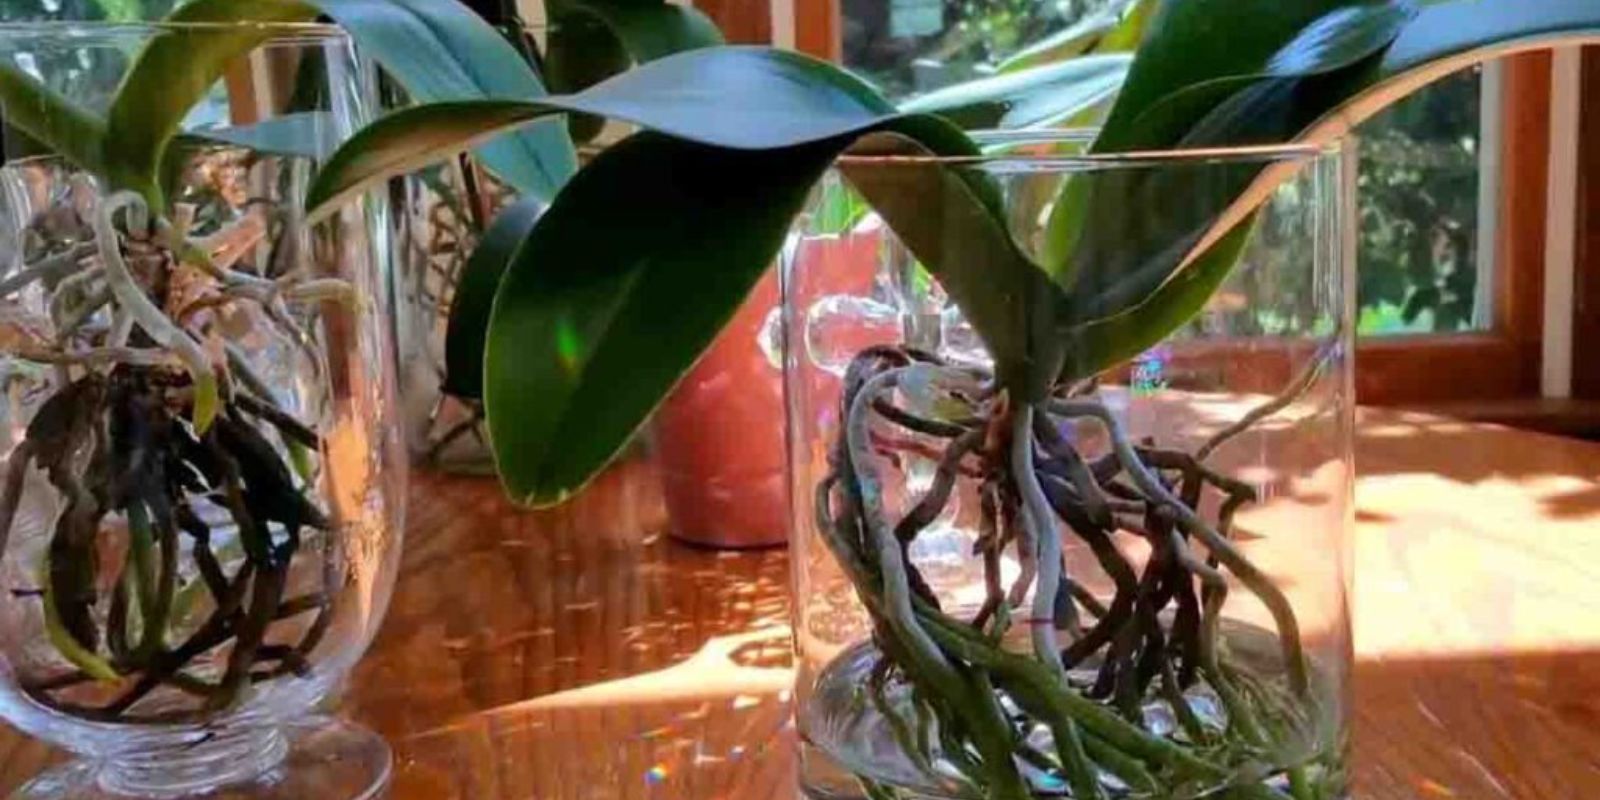
1. Select a Clear Container
Choose a glass vase, jar, or any transparent container that will allow you to monitor the roots and water level. The container should be tall enough to support the orchid’s stem and leaves.
2. Position the Orchid
Place the orchid inside the container, ensuring that the roots dangle freely and only the lower portion of the roots is submerged. The crown (the part where leaves and roots meet) must remain dry to avoid rot.
3. Add Water
Fill the container with clean, room-temperature water. Submerge no more than one-third of the orchid’s roots. Use distilled or rainwater for best results, as tap water may contain salts and chemicals that harm the plant.
Caring for Your Orchid in Water
1. Establish a Water Routine
Change the water every 5–7 days to prevent stagnation and bacterial growth. When changing the water, rinse the container and the roots to remove any slime or debris.
2. Lighting Requirements
Place the orchid in bright, indirect light. Avoid direct sunlight, as it can scorch the leaves and cause the water to overheat.
3. Humidity and Temperature
Orchids thrive in moderate to high humidity (50–70%) and temperatures between 65–75°F (18–24°C). If the air in your home is dry, consider using a humidity tray or a room humidifier.
4. Fertilizing Your Orchid
Orchids in water need occasional nutrients to support growth and blooming. Use a diluted orchid fertilizer (at quarter strength) once every two weeks. Add it directly to the water during a change, but ensure to flush the roots with fresh water afterward to prevent salt buildup.
Troubleshooting Common Issues
Root Rot
If you notice mushy, brown roots, trim them immediately and reduce the water level. Ensure the roots have time to dry out between water changes.
No Blooms?
Orchids bloom in cycles, so patience is key. However, insufficient light or nutrients can delay blooming. Adjust the light exposure or introduce fertilizer to encourage flowers.
Algae Growth
If algae start forming in the container, reduce light exposure by using an opaque container or moving the orchid to a less bright location.
Benefits of Hydroponic Orchid Care
Water culture is more than a growing method—it’s a way to showcase the beauty of orchid roots and the plant’s resilience. Unlike traditional methods that can sometimes mask underlying issues like root rot, water culture brings transparency and simplicity.
Furthermore, this technique eliminates the cost and mess of replacing potting media and significantly reduces pest issues. For urban gardeners or those with limited space, hydroponic orchids offer a modern, minimalist solution that blends function with design.
The Aesthetic Appeal of Orchids in Water
Displaying orchids in glass containers creates an elegant focal point for any room. Whether placed on a windowsill, desk, or dining table, these hydroponic beauties enhance the space with their sleek, modern appearance. Adding decorative stones, beads, or colored water can further personalize your orchid display.
Why You Should Try It
Growing orchids in water might seem unconventional, but it’s a rewarding method that combines beauty, simplicity, and science. By following these steps, you can transform your orchid care routine and enjoy vibrant, blooming plants for years to come.
What are your thoughts on hydroponic orchid care? Have you tried it before? Share your experiences, tips, or questions in the comments below!
#OrchidCare #HydroponicGardening #WaterCultureOrchids #PlantLovers #GardeningMadeSimple