
Introduction:
There’s something incredibly satisfying about making your own cheese at home. Not only do you get to enjoy the fresh, delicious results, but you also gain a deeper appreciation for the simple ingredients and the process that transforms them. In this article, we’ll guide you through the steps to make homemade cheese using just milk, yogurt, and lemon juice. This easy, no-fuss method yields a soft, creamy cheese that’s perfect for snacking, spreading, or incorporating into your favorite recipes. Let’s dive into the delightful world of homemade cheese!
Why Make Cheese at Home?
Homemade cheese offers several benefits over store-bought varieties:
- Control Over Ingredients:
- You know exactly what’s going into your cheese, without any preservatives, artificial flavors, or additives.
- Freshness:
- Freshly made cheese has a unique taste and texture that’s hard to beat.
- Customization:
- You can adjust the flavor and texture to your liking by experimenting with different types of milk, yogurt, and additional flavorings.
- Satisfaction:
- There’s a special joy in creating something from scratch, and cheese-making is a rewarding culinary adventure.
Ingredients:
To make this simple homemade cheese, you’ll need:
- 1 liter of milk
- 1 cup of yogurt
- Juice of ½ lemon
Step-by-Step Guide:
- Heat the Milk:
- Start by pouring 1 liter of milk into a large, heavy-bottomed pot. Whole milk works best for a richer, creamier cheese, but you can use low-fat or skim milk if you prefer. Place the pot over medium heat and slowly bring the milk to a gentle boil. Stir occasionally to prevent the milk from scorching on the bottom of the pot.
- Add the Yogurt:
- Once the milk has reached a gentle boil, reduce the heat to low and add 1 cup of yogurt. The yogurt acts as a natural culture, introducing beneficial bacteria that help in the cheese-making process. Stir the mixture thoroughly to ensure the yogurt is well incorporated into the milk.
- Add Lemon Juice:
- After stirring in the yogurt, squeeze the juice of half a lemon into the pot. The acidity of the lemon juice will cause the milk to curdle, separating into curds (solid) and whey (liquid). Stir gently as you add the lemon juice, and you should see the milk begin to curdle almost immediately.
- Curdling Process:
- Continue to stir gently for a few more minutes to ensure that the curdling process is complete. Once you see clear separation of curds and whey, remove the pot from the heat. Let it sit for about 10 minutes to allow the curds to fully form and settle.
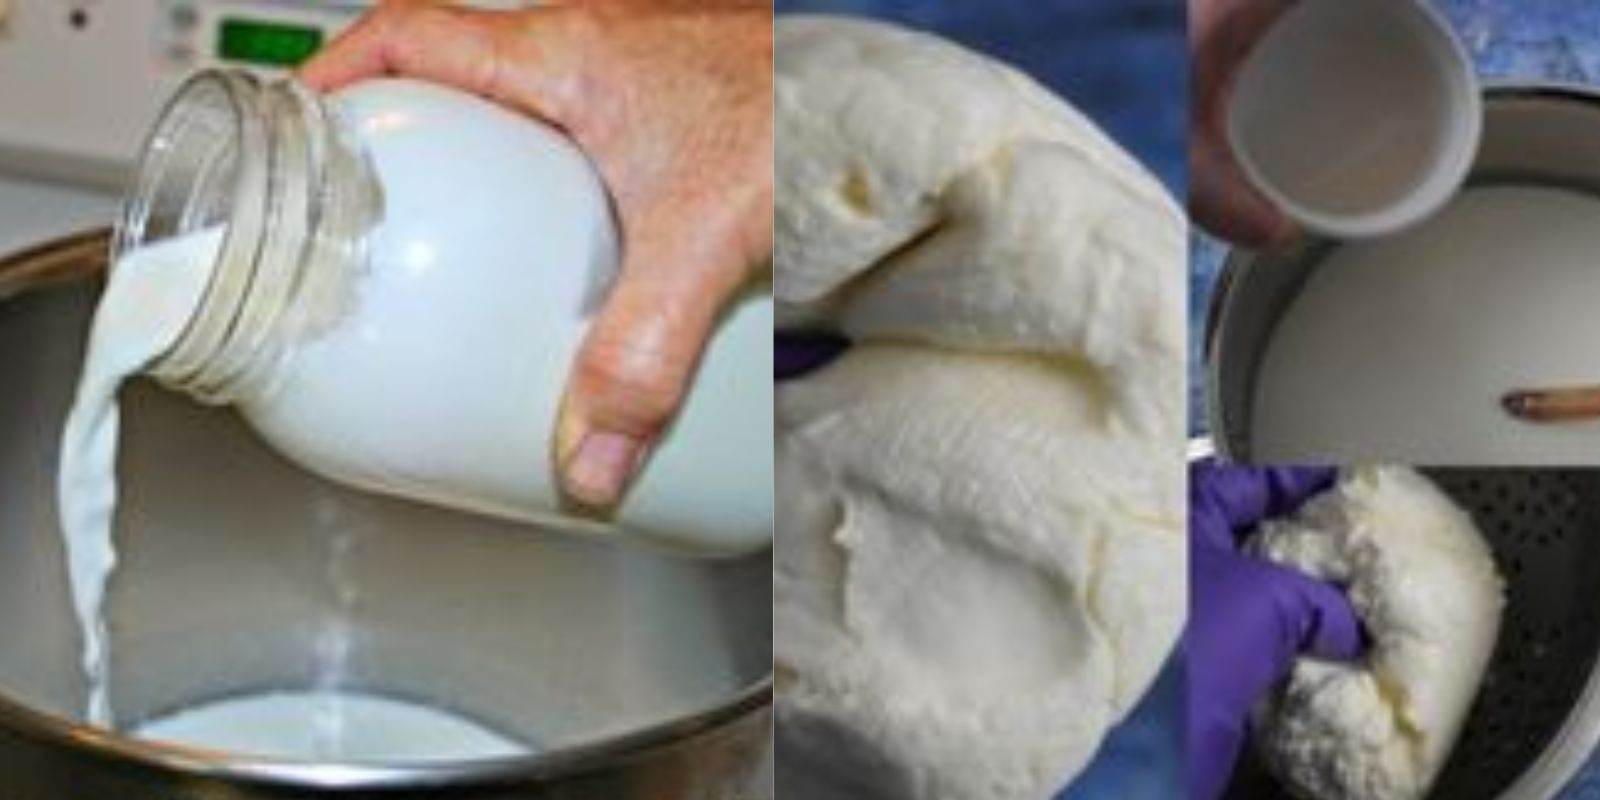
- Strain the Curds:
- Place a large colander or sieve over a bowl and line it with cheesecloth or a clean kitchen towel. Carefully pour the curdled mixture into the colander, allowing the whey to drain through while the curds remain in the cheesecloth. You can gather the cheesecloth corners to form a pouch and gently squeeze out additional whey for a firmer cheese.
- Shape the Cheese:
- Once most of the whey has drained, you can shape the cheese to your preference. For a soft, spreadable cheese, you can transfer it to a container and refrigerate. If you prefer a firmer cheese, you can press it into a mold and place a weight on top to drain more whey. Let it sit for a few hours or overnight in the refrigerator.
Flavor Variations:
One of the joys of making your own cheese is the ability to customize it to your taste. Here are a few ideas for flavor variations:
- Herbs:
- Add finely chopped fresh herbs like chives, dill, or basil to the curds before shaping.
- Spices:
- Mix in spices such as black pepper, red pepper flakes, or garlic powder for a flavorful kick.
- Sweet Additions:
- For a sweet version, mix in a bit of honey or maple syrup and some dried fruit.
Using Homemade Cheese:
Your homemade cheese can be used in a variety of ways:
- Spread:
- Spread it on toast or crackers for a delicious snack.
- Salads:
- Crumble it over salads for a fresh, tangy addition.
- Cooking:
- Use it in recipes that call for soft cheese, such as lasagna, stuffed pasta, or cheese-filled pastries.
- Desserts:
- Incorporate it into desserts like cheesecake or as a topping for fruit.
Health Benefits:
Making cheese at home not only ensures freshness but also offers several health benefits:
- High Nutritional Value:
- Cheese is a good source of protein, calcium, and essential vitamins.
- Probiotics:
- Using yogurt in the recipe introduces beneficial probiotics, which are good for gut health.
- Reduced Additives:
- Homemade cheese contains no artificial preservatives or additives, making it a healthier choice.
Conclusion:
Making cheese at home is a fun and rewarding process that allows you to enjoy fresh, delicious cheese with minimal effort. With just milk, yogurt, and lemon, you can create a versatile cheese that’s perfect for a variety of dishes. The steps are straightforward, and the result is a delightful homemade cheese that’s sure to impress.
Motivation:
Why not try making your own cheese today? With this easy recipe, you’ll discover the joy of creating fresh, homemade cheese right in your kitchen. Enjoy the natural flavors and the satisfaction of making something delicious from scratch!