
Introduction
Basil is one of the most versatile and popular herbs, cherished for its aroma and flavor in various cuisines. However, keeping basil plants consistently hydrated can be a challenge, especially for busy gardeners or those new to growing herbs. A self-watering basil planter solves this problem by providing a consistent supply of moisture, ensuring healthy growth with minimal effort. In this guide, we’ll walk you through creating a self-watering planter using everyday materials, so you can enjoy fresh, thriving basil year-round.
Why a Self-Watering Planter?
Self-watering planters are ideal for herbs like basil, which require consistent moisture to thrive but can suffer from overwatering or drying out. Here are some key benefits:
- Convenience: Reduces the need for daily watering.
- Water Conservation: Minimizes water waste by delivering only what the plant needs.
- Healthy Growth: Prevents waterlogging, which can lead to root rot.
- Eco-Friendly: Reuses common household items, reducing waste.
Materials You’ll Need
Creating your self-watering basil planter is simple and cost-effective. Gather the following materials:
- A large plastic bottle or container (1-2 liters works best)
- A cotton or nylon wick (such as shoelaces or braided yarn)
- Potting soil suitable for herbs
- Basil seeds or a small basil plant
- Scissors or a utility knife
- Optional: Paint, tape, or fabric for decorating the planter
Step-by-Step Instructions
Step 1: Prepare the Bottle
- Rinse the plastic bottle thoroughly to remove any residue.
- Using scissors or a utility knife, carefully cut the bottle into two sections:
- The bottom portion will serve as the water reservoir.
- The top portion will hold the soil and basil plant.
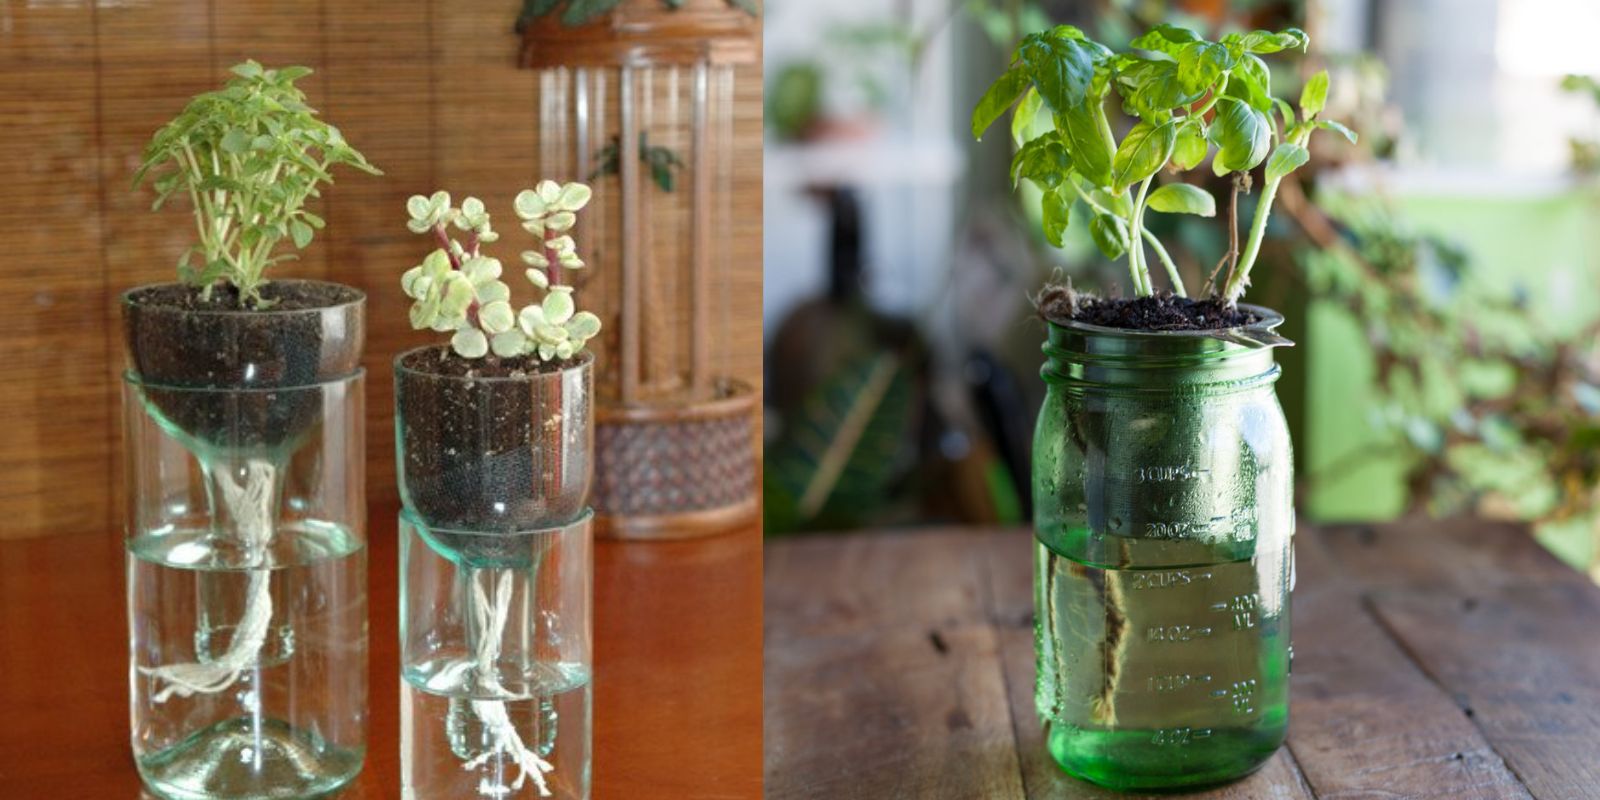
- Invert the top section so it forms a funnel-like shape when placed inside the bottom reservoir.
Step 2: Insert the Wick
- Thread a cotton or nylon wick through the neck of the bottle. Ensure that:
- One end of the wick extends into the water reservoir.
- The other end lies in the top section where the soil will be placed.
- The wick acts as a bridge, drawing water from the reservoir to the soil through capillary action.
Step 3: Assemble the Planter
- Fill the inverted top section with potting soil, ensuring the wick is evenly embedded in the soil.
- Leave about an inch of space at the top for planting seeds or a basil transplant.
Step 4: Plant Your Basil
- If using seeds:
- Sprinkle basil seeds on the soil surface and cover lightly with a thin layer of soil.
- Water gently to moisten the soil.
- If using a basil transplant:
- Dig a small hole in the soil and place the basil plant’s roots inside.
- Gently firm the soil around the base of the plant.
Step 5: Add Water
- Pour water into the bottom reservoir until it’s about three-quarters full.
- Place the funnel section (with soil and basil) into the reservoir, ensuring the wick remains submerged.
Caring for Your Self-Watering Basil Planter
- Monitor Water Levels:
Check the water reservoir every few days and refill as needed. The wick will ensure the basil receives a steady supply of moisture. - Provide Adequate Sunlight:
Place your planter in a sunny spot where the basil can receive at least 6-8 hours of sunlight daily. - Prune Regularly:
Harvest basil leaves frequently to encourage bushier growth. Avoid letting the plant flower, as this can reduce leaf production. - Fertilize Sparingly:
Use a diluted organic fertilizer once a month to provide essential nutrients.
Optional: Customize Your Planter
Make your self-watering planter as stylish as it is functional! Decorate the plastic bottle with:
- Paint or spray paint for a pop of color.
- Washi tape or fabric for a textured look.
- Labeling for easy identification.
Why Basil Thrives in a Self-Watering Planter
Basil’s shallow roots are highly responsive to consistent moisture, making it an excellent candidate for self-watering systems. Unlike manual watering, which can lead to periods of drought or overwatering, a self-watering planter creates a stable environment where the plant can thrive.
Troubleshooting Common Issues
- Wilted Leaves: Check the water reservoir to ensure the wick is functioning properly.
- Yellowing Leaves: This may indicate overwatering. Ensure the soil isn’t saturated and the reservoir isn’t overflowing.
- Slow Growth: Basil needs ample sunlight and occasional feeding. Move the planter to a sunnier location and consider fertilizing.
Benefits of Growing Basil at Home
- Culinary Uses: Fresh basil enhances dishes like pasta, salads, and homemade pesto.
- Health Benefits: Basil is rich in antioxidants and has anti-inflammatory properties.
- Eco-Friendly: Growing your own herbs reduces the need for store-bought options, cutting down on packaging and transportation.
Conclusion
A self-watering basil planter is a simple yet effective way to grow fresh, flavorful basil at home with minimal effort. This DIY project not only ensures consistent hydration for your plant but also promotes sustainable gardening by repurposing materials.
Why not try it yourself? 🌿 Share your self-watering planter creations, and don’t forget to tag us! Let’s inspire others to grow their green thumb, one herb at a time.
Hashtags:
#SelfWateringPlanter #DIYGardening #GrowBasil #FreshHerbs #EcoFriendlyGardening #GardeningHacks #UrbanGardening #SustainableLiving #IndoorPlants #GreenThumb