
Introduction
Orchids are celebrated for their stunning blooms and graceful presence, but maintaining their vibrant health requires proper nourishment. While commercial orchid fertilizers are widely available, making your own DIY orchid fertilizer can be a rewarding and cost-effective way to ensure your orchids receive the nutrients they need to thrive. In this article, we’ll guide you through the process of creating your own orchid fertilizer at home, offering tips on the best ingredients and methods to boost your orchids’ blooms naturally.
Understanding Orchid Nutritional Needs
Orchids, like all plants, require a balance of essential nutrients to grow and bloom successfully. The primary nutrients needed are nitrogen (N), phosphorus (P), and potassium (K), often referred to as N-P-K. Each of these nutrients plays a crucial role in plant health:
- Nitrogen (N): Essential for leaf and stem growth, nitrogen helps in the development of lush foliage.
- Phosphorus (P): Vital for root development and flower production, phosphorus supports strong root systems and vibrant blooms.
- Potassium (K): Important for overall plant health, potassium aids in water regulation, disease resistance, and enzyme activation.
In addition to these primary nutrients, orchids also benefit from secondary nutrients like calcium, magnesium, and sulfur, as well as trace elements such as iron, manganese, and zinc. A well-rounded DIY fertilizer can provide these nutrients to promote robust growth and abundant flowering.
Benefits of DIY Orchid Fertilizer
Creating your own orchid fertilizer offers several benefits:
- Cost-Effective: Homemade fertilizers often cost less than store-bought options, especially when using readily available ingredients.
- Customizable: You can adjust the nutrient ratios based on your orchids’ specific needs.
- Eco-Friendly: Using household waste like banana peels and eggshells reduces waste and supports sustainable gardening practices.
- Control Over Ingredients: By making your own fertilizer, you avoid unnecessary chemicals and additives.
Ingredients for DIY Orchid Fertilizer
To create an effective DIY orchid fertilizer, you’ll need a mix of ingredients that provide a balanced range of nutrients. Here’s a breakdown of commonly used ingredients and their benefits:
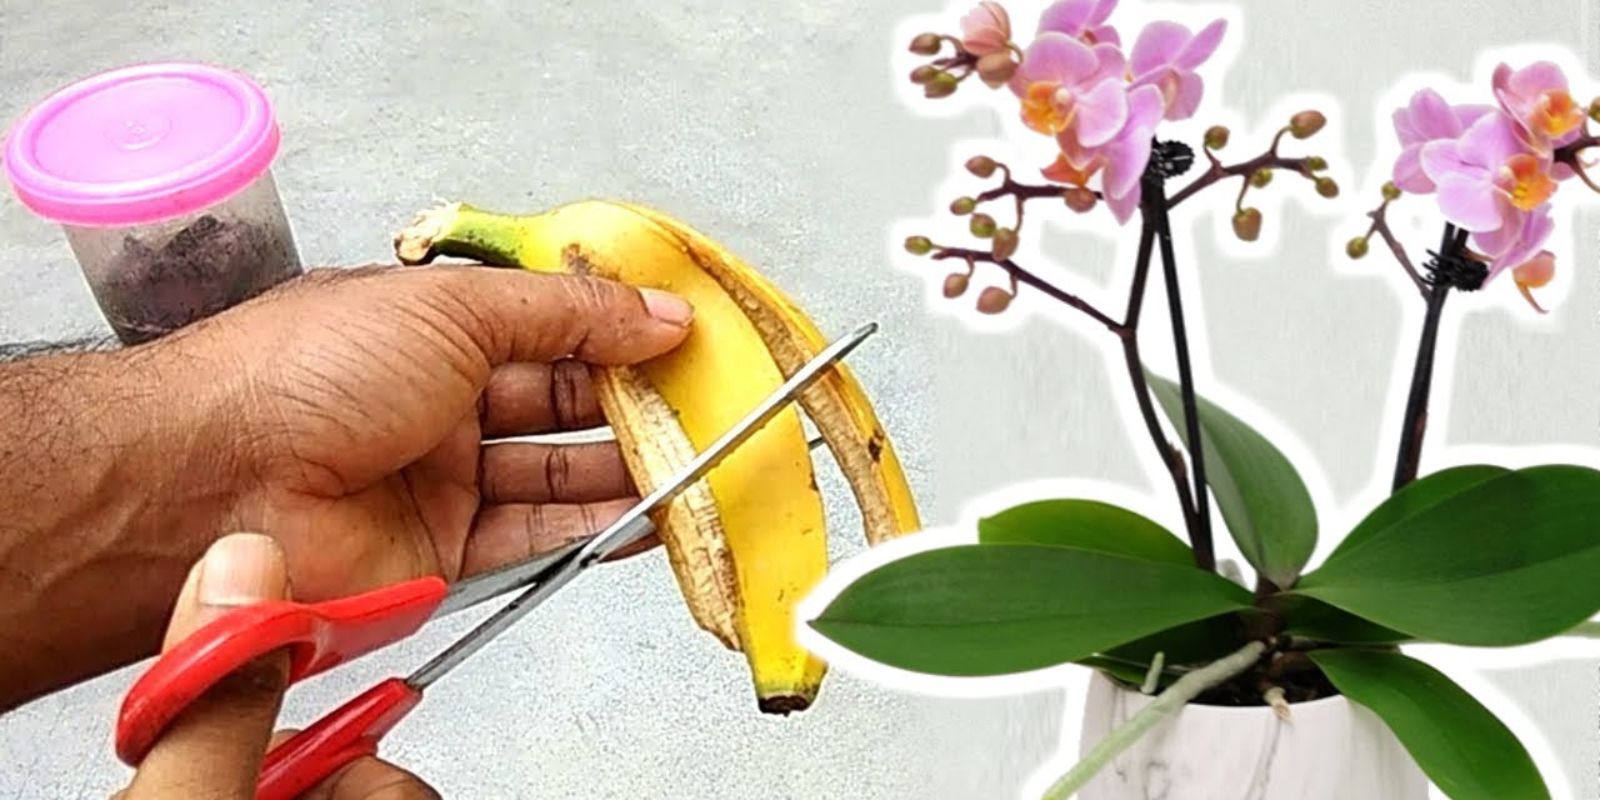
- Banana Peels: Rich in potassium, which is essential for flower production and overall plant health. They also contain small amounts of phosphorus and calcium.
- Eggshells: High in calcium, which helps strengthen cell walls and supports healthy root development.
- Coffee Grounds: Provide nitrogen and improve soil structure, promoting better root growth and plant vitality.
- Epsom Salt: A source of magnesium, which is crucial for photosynthesis and enzyme function.
- Other Optional Additives: Bone meal (for phosphorus), fish emulsion (for a balanced nutrient profile), and compost (for a range of nutrients and soil health).
Step-by-Step Guide to Making DIY Orchid Fertilizer
1. Gather Your Ingredients
Start by collecting the following ingredients:
- Banana peels
- Eggshells
- Coffee grounds
- Epsom salt
2. Prepare the Ingredients
Banana Peels:
- Chop banana peels into small pieces and let them dry out. This can be done by spreading them on a tray and leaving them in a well-ventilated area.
- Once dry, grind the peels into a fine powder using a blender or food processor.
Eggshells:
- Rinse and dry eggshells to remove any residual egg white.
- Crush the eggshells into small pieces or powder them using a mortar and pestle or a blender.
Coffee Grounds:
- Allow used coffee grounds to dry out completely. This helps prevent mold growth.
- Store the dried grounds in an airtight container until ready to use.
Epsom Salt:
- Dissolve 1 tablespoon of Epsom salt in 1 gallon of water to create a magnesium-rich solution.
3. Mix the Fertilizer
Combine the following ingredients to create a balanced fertilizer mixture:
- 2 tablespoons of banana peel powder
- 2 tablespoons of crushed eggshells
- 1 tablespoon of dried coffee grounds
Mix these ingredients thoroughly in a bowl. This combination provides a good balance of potassium, calcium, and nitrogen.
4. Apply the Fertilizer
Dry Application:
- Sprinkle a small amount of the dry fertilizer mixture onto the surface of the orchid’s growing medium. Be careful not to overapply, as excessive fertilizer can harm the plant.
Liquid Application:
- For a liquid fertilizer, dissolve 1 tablespoon of the dry mix in 1 gallon of water.
- Stir well to ensure the mixture is evenly distributed.
5. Water Thoroughly
After applying the fertilizer, water the orchid thoroughly to help the nutrients penetrate the soil and reach the plant’s roots. Ensure that the growing medium is moist but not waterlogged.
Tips for Effective Use
- Apply Regularly: Use the DIY fertilizer once a month during the growing season (spring and summer). Reduce frequency during the dormant period (fall and winter) to avoid over-fertilizing.
- Monitor Plant Response: Observe your orchids for any signs of nutrient deficiency or excess. Adjust the fertilizer mixture or application frequency based on the plant’s response.
- Avoid Over-Fertilization: Too much fertilizer can lead to salt build-up in the soil, which can harm the roots. Always follow the recommended application rates and monitor your plants for any adverse effects.
- Complement with Other Care Practices: In addition to fertilizing, ensure your orchids receive adequate light, water, and proper ventilation for optimal growth and blooming.
Conclusion
Creating your own DIY orchid fertilizer is a simple and effective way to provide your orchids with the nutrients they need for healthy growth and stunning blooms. By using common household ingredients, you can make a cost-effective, eco-friendly fertilizer that supports your orchids’ vitality and enhances their beauty.
Ready to give your orchids a nutrient boost with homemade fertilizer? Share your DIY fertilizer experiences and results with us using the hashtags #DIYFertilizer #OrchidCare #GardenHacks #BloomingOrchids and inspire others to create their own nourishing blends! 🌸🌿