
Building a brick walkway in your garden can transform your outdoor space, enhancing its beauty and functionality. Not only does a well-constructed pathway provide a clear route for guests to follow, but it can also define areas within your garden, guiding visitors through the various plantings and features you’ve created. Whether you’re looking to create a charming path to your front door, lead guests through a flower garden, or connect different sections of your yard, this guide will walk you through the steps needed to create a stunning brick walkway.
Benefits of a Brick Walkway
Before diving into the project, let’s discuss some of the benefits of installing a brick walkway:
- Aesthetic Appeal: A brick walkway adds a classic and timeless look to your garden, complementing the natural beauty of your plants and flowers.
- Durability: Bricks are incredibly durable and can withstand various weather conditions, making them a long-lasting option for outdoor paths.
- Low Maintenance: Compared to other materials, brick walkways require less maintenance, needing only occasional cleaning and weeding.
- Versatility: With numerous design patterns and colors available, brick walkways can be tailored to suit any style, from rustic to modern.
- Increased Property Value: Well-designed landscaping can enhance your home’s curb appeal and potentially increase its market value.
Tools and Materials Needed
Before starting your project, gather the following tools and materials:
Tools
- Shovel: For digging the trench.
- Level: To ensure the walkway is even.
- Mallet: For tapping the bricks into place.
- Broom: For cleaning up and filling in gaps.
- Garden hose: To help outline the path.
Materials
- Bricks: Choose bricks that fit your desired aesthetic. Consider color, size, and texture.
- Landscape fabric: To prevent weeds from growing through the walkway.
- Gravel: For the base layer.
- Sand: To create a smooth surface for laying the bricks.
- Edging material (optional): Such as metal or plastic edging, to define the walkway edges.
Step-by-Step Guide to Building Your Brick Walkway
Step 1: Plan Your Path
Begin by envisioning where you want your walkway to go. Consider factors like foot traffic patterns, the locations of your plants, and how the walkway will fit into the overall landscape. Once you have an idea, mark the path using a garden hose or stakes and string.
Step 2: Measure and Gather Materials
After you’ve outlined your path, measure its length and width to calculate the number of bricks needed. Standard bricks are typically 7.5 inches by 3.5 inches, and you’ll want to account for the spacing between them when calculating your materials. Gather your bricks, gravel, sand, landscape fabric, and any tools you’ll need.
Step 3: Prepare the Ground
Remove any grass, plants, or debris along the path. Use a shovel to dig a trench approximately 4-6 inches deep. The depth will depend on the size of your bricks and how much base material you’ll be using.
Step 4: Install Landscape Fabric
Once the trench is ready, lay down landscape fabric in the bottom. This will help prevent weeds from growing up through the walkway, reducing maintenance in the long run.
Step 5: Add a Base Layer of Gravel
Pour about 2-3 inches of gravel into the trench on top of the landscape fabric. Use a rake to spread it evenly, then pack it down firmly. This base layer is crucial for providing drainage and stability for your walkway.
Step 6: Create a Sand Layer
Next, add about 1 inch of sand on top of the gravel. This layer will create a smooth surface for laying your bricks. Use a level to ensure the sand is even across the entire path.
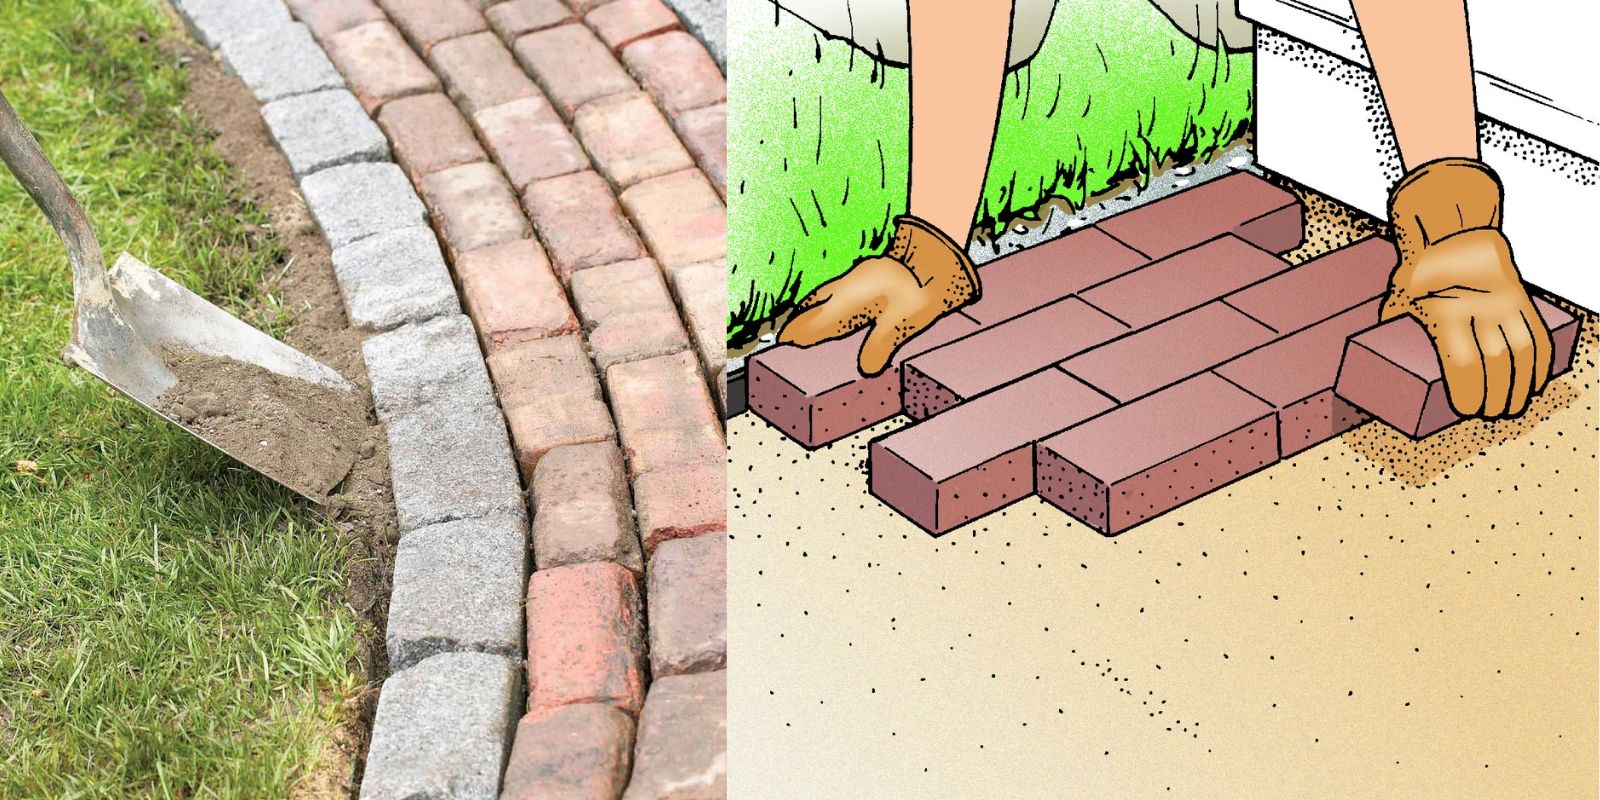
Step 7: Lay the Bricks
Now comes the fun part! Begin laying your bricks in your chosen pattern, starting from one end of the path and working toward the other. As you place each brick, leave a small gap between them for the sand or fine gravel that will fill the gaps later. Use a level frequently to ensure that each brick is even and adjust them as needed with your mallet.
Step 8: Fill the Gaps
Once all the bricks are laid, it’s time to fill the gaps between them. Use fine sand or gravel for this purpose. Pour it over the walkway and use a broom to sweep it into the spaces. This helps to lock the bricks in place and prevents them from shifting.
Step 9: Finish Up
Take a step back and admire your work! Sweep away any excess sand or debris from the top of the bricks. Ensure everything looks clean and that the walkway is stable and level. If you used edging material, install it at this stage to define the walkway’s edges.
Step 10: Enjoy Your New Pathway
Your new brick walkway is now complete! Take a moment to enjoy the beauty of your hard work and envision how it will enhance your garden’s charm.
Maintenance Tips for Your Brick Walkway
While brick walkways are relatively low-maintenance, a few simple tasks can help keep them looking their best:
- Regular Cleaning: Use a broom to remove leaves and debris. You can also use a pressure washer for deeper cleaning as needed.
- Weed Control: Occasionally check for weeds and remove them by hand or use a garden hoe.
- Resanding: If you notice the sand in the gaps diminishing, add more to keep the bricks secure.
- Inspection: Periodically inspect for any loose bricks and adjust them if necessary.
Conclusion
Building a brick walkway in your garden is a rewarding project that can enhance both its beauty and functionality. With careful planning and execution, you can create a stunning path that not only looks great but also provides a practical route through your outdoor space. Don’t hesitate to share your progress and results with friends, family, or fellow gardening enthusiasts—your beautiful brick walkway may inspire others to take on similar projects!
Call to Action
Are you ready to enhance your garden with a beautiful brick walkway? Gather your materials, follow these steps, and create a path that not only beautifies your outdoor space but also brings joy to you and your visitors. Share your journey and results on social media using the hashtags below, and inspire others to get gardening!