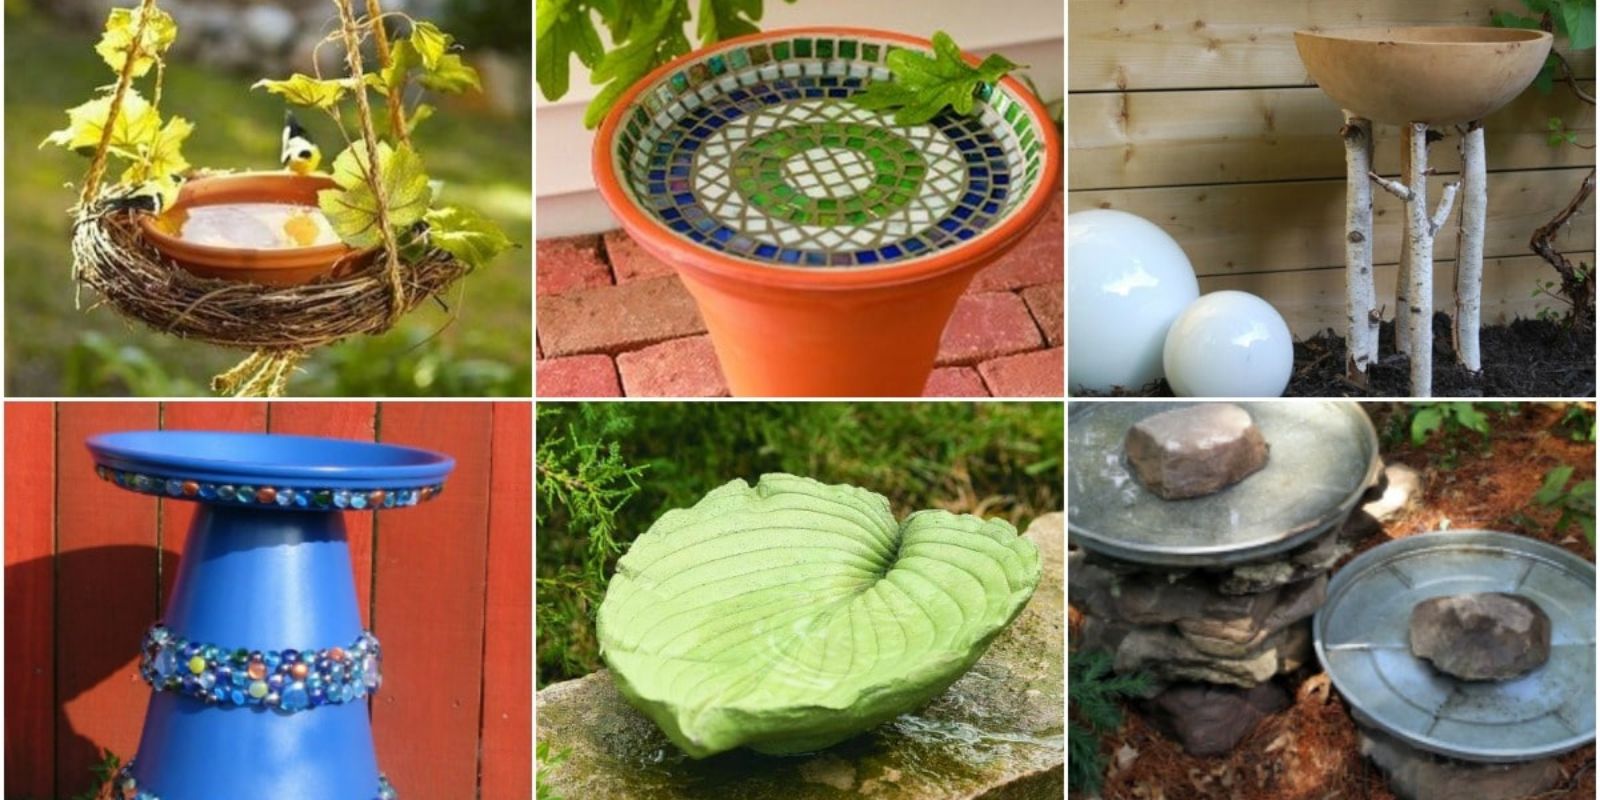
Bird baths are a fantastic addition to any garden, not only enhancing its beauty but also providing a sanctuary for birds to drink and bathe. If you’re looking to create a charming bird bath on a budget, inspired by timeless DIY traditions, you’re in the right place. This guide will walk you through the process of crafting a frugal yet delightful bird bath that will attract feathered friends to your outdoor space.
Introduction
A bird bath doesn’t need to be an expensive purchase to be effective and aesthetically pleasing. With a few simple materials and some creative ingenuity, you can build a bird bath that looks great and serves its purpose well. Whether you’re an experienced DIYer or a beginner gardener, this project is easy to follow and will add a touch of nature to your garden.
Materials You’ll Need
- Container: A large, shallow container is the main component of your bird bath. Consider using a plastic plant saucer, an old birdbath bowl, or even a repurposed dish. Ensure it is weather-resistant and safe for birds.
- Base: The base should be sturdy enough to support the container and keep it stable. Options include a concrete block, a garden pedestal, or even a stack of bricks.
- Adhesive or Screws: Use weather-resistant adhesive or screws to attach the container to the base securely.
- Optional Decorations: Decorative elements such as paint, stones, or tiles can be used to personalize your bird bath and enhance its visual appeal.
- Tools: Depending on your chosen attachment method, you may need a drill, screwdriver, or paintbrush.
Steps to Build Your DIY Frugal Bird Bath
1. Select and Prepare the Container
Choose a container that is wide and shallow. A plant saucer works well because it is already designed to hold water. Clean the container thoroughly to remove any residue or dirt. If you’re using a repurposed item, make sure it’s free of chemicals and safe for birds.
2. Prepare the Base
The base needs to be sturdy enough to hold the container and withstand outdoor elements. If using a concrete block, clean it and make sure it’s level. If you prefer a garden pedestal or an old plant stand, ensure it is stable and can support the weight of the filled container.
3. Attach the Container to the Base
Position the container on top of the base to ensure proper alignment. If you’re using adhesive, apply a generous amount around the bottom edge of the container and press it firmly onto the base. Allow it to cure according to the adhesive manufacturer’s instructions. For screws, drill pilot holes in the container’s base and the top of the pedestal or block. Secure the container with screws, ensuring it is level and stable.
4. Add Decorative Touches (Optional)
If you wish to personalize your bird bath, this is the time to do so. Paint the base or container with weather-resistant paint for a colorful touch. You can also decorate the rim of the container with decorative stones or tiles to give it a more refined look. Ensure any paint or materials used are safe for birds.
5. Fill and Maintain
Once the adhesive is fully cured or the screws are securely fastened, fill the bird bath with fresh water. Regularly clean the bath to prevent algae buildup and provide a safe environment for birds. Changing the water frequently and scrubbing the container as needed will keep your bird bath in top condition.
Benefits of a DIY Bird Bath
- Cost-Effective: Building your own bird bath is much more affordable than purchasing a pre-made one. You can use materials you already have or buy inexpensive items.
- Customization: A DIY project allows you to customize the bird bath to match your garden’s style and your personal preferences.
- Eco-Friendly: Repurposing materials and making use of items that might otherwise be discarded contributes to a more sustainable lifestyle.
- Attracting Wildlife: A well-maintained bird bath will attract various bird species, offering opportunities for birdwatching and enhancing your garden’s ecosystem.
Conclusion
Creating your own frugal bird bath is a rewarding project that combines creativity, resourcefulness, and a love for nature. By following these simple steps, you can build a bird bath that is both functional and visually appealing, without spending a fortune. It’s a great way to bring more life into your garden and provide a welcoming space for our feathered friends.
Motivational Sentence: Dive into this DIY project and create a charming bird bath for your garden—your feathered friends will thank you! 


