
Growing watermelons typically evokes images of sprawling vines covering large garden plots. However, even with limited space, it’s possible to enjoy the sweet, refreshing taste of homegrown watermelon by cultivating them in containers. This approach allows urban gardeners, apartment dwellers, and anyone with a small outdoor area to relish the joys of gardening and harvest delicious fruit. Here’s a comprehensive guide on how to grow watermelons in containers, from selecting the right materials to caring for your plants.
Selecting the Right Container
- Container Size: To accommodate the robust growth of watermelon plants, choose a large container. Ideal sizes are at least 18 inches deep and wide, but larger is better. Watermelons have extensive root systems that require ample space to thrive.
- Drainage: Ensure the container has sufficient drainage holes. Watermelons do not tolerate waterlogged soil, which can lead to root rot. If necessary, drill additional holes in the bottom of the container to improve drainage.
- Material: Containers can be made from various materials including plastic, clay, or fabric. Plastic containers are lightweight and retain moisture well, while fabric pots provide excellent drainage and air circulation. Choose a material that suits your climate and aesthetic preferences.
Choosing the Right Watermelon Variety
- Compact Varieties: Opt for compact or bush-type watermelon varieties that are specifically bred for container gardening. Varieties like ‘Sugar Baby,’ ‘Mini Love,’ or ‘Bush Sugar Baby’ are ideal for smaller spaces due to their more manageable size and shorter vines.
- Seed vs. Seedling: You can start watermelons from seeds or purchase seedlings from a nursery. Starting from seeds offers a wider selection of varieties, while seedlings provide a head start.
Preparing the Soil
- Potting Mix: Use a high-quality potting mix designed for container gardening. This mix should be well-draining and rich in organic matter. A blend of compost, peat moss, and perlite is often recommended for optimal soil health.
- Soil Preparation: Before planting, mix in a slow-release fertilizer to provide initial nutrients. Follow the manufacturer’s instructions for the correct amount to avoid over-fertilizing.
Planting Watermelons
- Timing: Plant watermelons after the last frost date when the soil temperature is consistently above 60°F (15°C). Watermelons are sensitive to frost and need warm soil to grow effectively.
- Sowing Seeds: If starting from seeds, plant 2-3 seeds per container, spacing them about 1 inch deep. Once seedlings emerge, thin them to the strongest plant.
- Transplanting Seedlings: If using seedlings, plant them at the same depth they were growing in their nursery pots. Space the seedlings about 2 feet apart if growing multiple plants in one container.
Caring for Your Container Watermelons
- Sunlight: Place your container in a location that receives full sunlight. Watermelons need at least 6-8 hours of direct sunlight each day to produce sweet, mature fruit.
- Watering: Keep the soil consistently moist, but avoid waterlogging. Water the container thoroughly, allowing excess water to drain out. During hot weather, you may need to water daily.
- Fertilizing: Feed your watermelon plants with a balanced, water-soluble fertilizer every 2-4 weeks. A fertilizer with higher potassium content can encourage fruit development and sweetness.
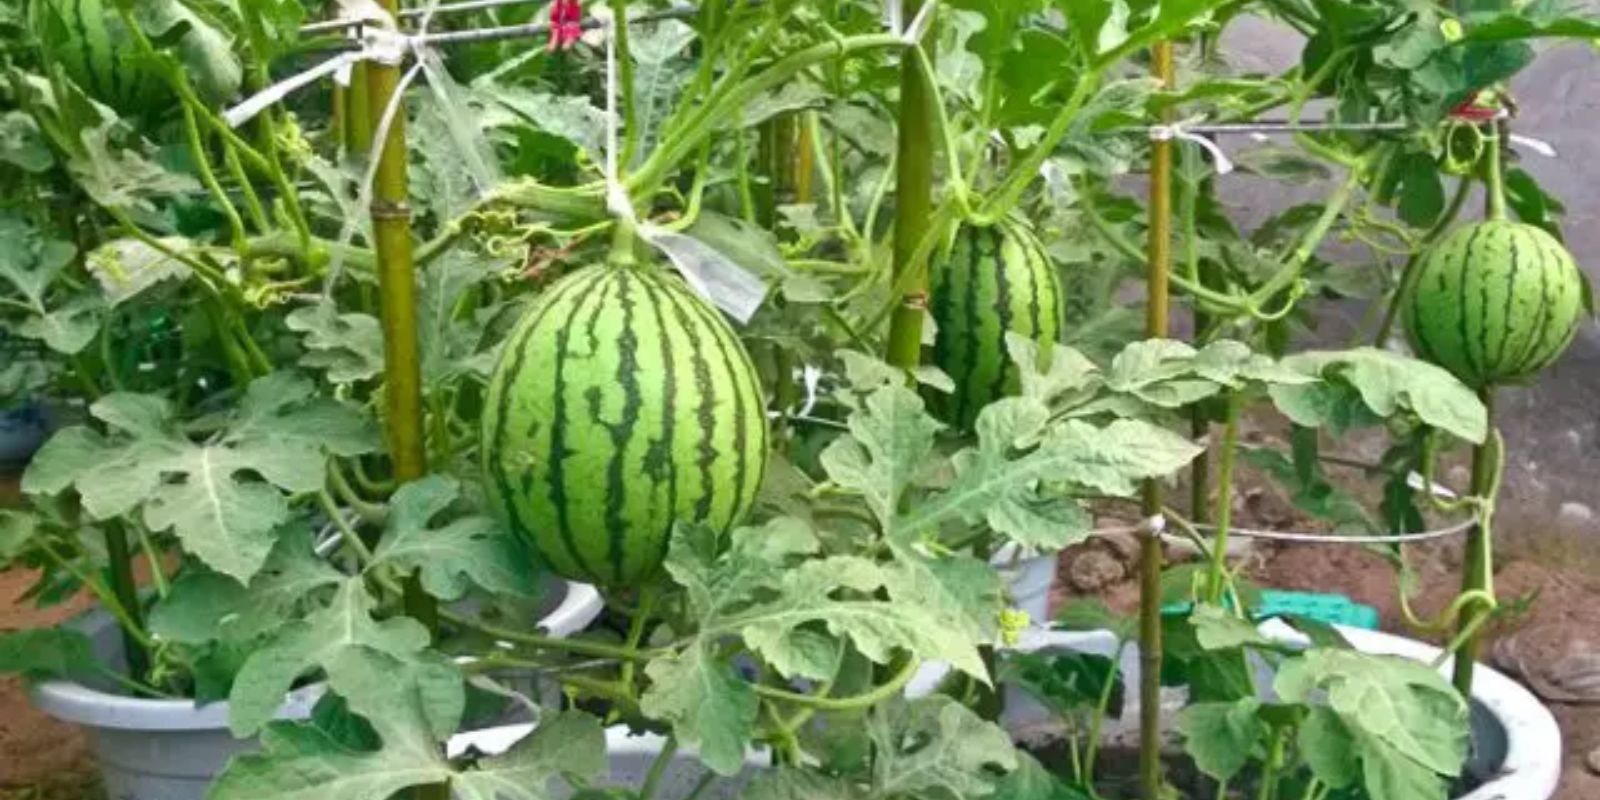
- Supporting Vines: As the vines grow, they will need support. Use stakes or a trellis to keep the vines upright and prevent them from sprawling too much. This also helps keep the fruit off the ground, reducing the risk of rot.
Managing Pests and Diseases
- Pest Control: Watch for common pests such as aphids, spider mites, and cucumber beetles. Use organic insecticidal soap or neem oil to control infestations.
- Disease Prevention: Ensure good air circulation around your plants to prevent fungal diseases. Avoid overhead watering to reduce the risk of mildew and rot.
Harvesting Watermelons
- Timing: Watermelons are typically ready to harvest when the tendril closest to the fruit turns brown and dries out. The fruit should also have a uniform color and a dull finish rather than a shiny appearance.
- Testing: Knock on the watermelon and listen for a deep, hollow sound. This indicates that the fruit is ripe. Additionally, the ground spot where the melon touches the soil should be a creamy yellow color.
- Harvesting: Use a sharp knife to cut the watermelon from the vine, leaving a short stem attached to the fruit. Handle the fruit carefully to avoid bruising.
Additional Tips
- Space Efficiency: Consider using vertical gardening techniques to maximize space. Growing watermelons on a trellis or using hanging baskets can save space and add a decorative element to your garden.
- Season Extension: Use row covers or cloches to extend the growing season if you live in a cooler climate. These can provide additional warmth and protect your plants from early frost.
- Companion Planting: Grow complementary plants such as herbs or flowers around your container to deter pests and enhance the growth of your watermelons.
Conclusion
Growing watermelons in containers is a rewarding endeavor that allows gardeners with limited space to enjoy the sweet taste of this summer fruit. By selecting the right container, variety, and providing proper care, you can successfully cultivate watermelons on your patio, balcony, or small garden. Embrace this space-saving gardening technique and look forward to a bountiful harvest of homegrown watermelons. Happy gardening! 🍉🌿