
Worm farming, also known as vermiculture or vermicomposting, is a highly effective and sustainable method of composting organic waste. By cultivating worms, such as the red wiggler (Eisenia fetida), gardeners and homeowners can turn kitchen scraps, yard waste, and other organic materials into rich, nutrient-dense compost. This compost is an excellent addition to gardens, providing essential nutrients for plants while reducing waste. However, when you live in a cold climate, traditional outdoor worm farms can struggle due to freezing temperatures that can harm the worms and halt composting activity. The solution? Building an underground worm farm.
This article will guide you through the process of building a successful underground worm farm that can thrive even in cold climates, providing you with valuable compost year-round.
What is an Underground Worm Farm?
An underground worm farm is essentially a worm composting system that is located below ground level, designed to take advantage of the earth’s natural insulation. This type of farm offers several benefits, including temperature regulation, which is crucial in cold climates. By burying the worm farm in the ground, the worms stay protected from harsh winter conditions, and the soil around the farm helps maintain a consistent, moderate temperature. As a result, worms continue to work and process organic material, creating nutrient-rich vermicompost all year long.
Why Choose an Underground Worm Farm?
- Temperature Control: In cold climates, temperatures can drop significantly in the winter, making it difficult for surface-level worm farms to survive. The earth provides insulation, helping maintain an ideal temperature for the worms even in freezing conditions.
- Space Efficiency: Burying your worm farm underground saves valuable space, allowing you to use your above-ground garden area for other plants or projects. This is especially important in smaller yards or urban environments.
- Reduced Odor: Underground worm farms tend to produce less odor than surface-level farms because the earth absorbs the smells and prevents the waste from being exposed to the air.
- Protection from Pests: By burying the farm, you reduce the risk of pests, such as rodents, invading your worm bin.
- Sustainability: Building an underground worm farm is a great way to contribute to sustainability by reducing food waste and improving soil health.
Step-by-Step Guide to Building an Underground Worm Farm
Building an underground worm farm requires some basic materials and tools, along with knowledge of worm care and composting principles. Here’s a step-by-step guide to getting started:
1. Choose the Right Location
The first step in building an underground worm farm is selecting a location. You’ll need to find a spot in your garden that is sheltered from harsh winds and extreme weather conditions. Ideally, this should be an area that receives partial sunlight but isn’t exposed to direct heat or freezing conditions for prolonged periods. A shaded location, such as beneath a tree, can help keep the temperature stable year-round.
Additionally, the ground should be relatively flat to ensure that the worm farm is level. Avoid areas near large roots or waterlogged soil, as these can affect the health of your worms.
2. Dig the Hole
Once you have chosen the location, it’s time to dig the hole. The size of the hole depends on the type of worm bin you plan to use. Aim for a depth of about 3-4 feet to ensure that the worms remain insulated from the cold.
The hole should also be wide enough to accommodate your worm bin or composting container. Make sure there is enough space for the worms to move around comfortably and that the organic material has room to break down. The wider the hole, the more capacity the worm farm will have.
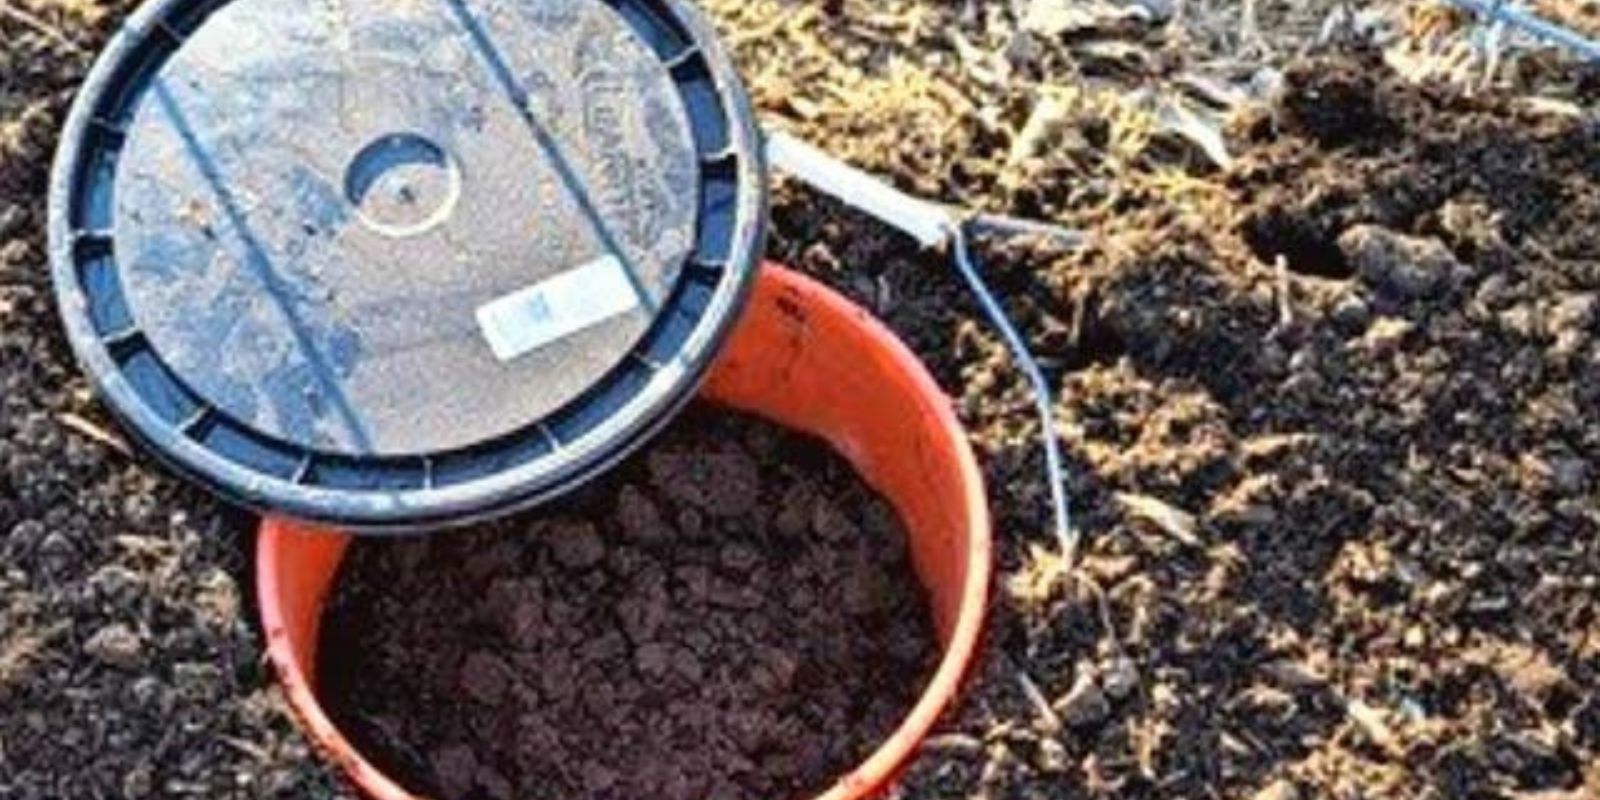
3. Prepare the Worm Bin
The worm bin is the container where the worms will live and process organic waste. You can use a variety of containers, such as a wooden box, plastic bin, or even a galvanized steel container. The key is to ensure that the bin has adequate ventilation and drainage to prevent the worms from suffocating or drowning.
To create a proper worm bin:
- Drill several small holes at the bottom and sides for airflow and drainage.
- Ensure that the lid of the bin is tight-fitting but can be easily removed for access.
- If you are using a wooden box, consider treating the wood with a non-toxic sealant to prevent decay.
Once the bin is ready, you can place it into the hole you’ve dug, making sure it’s level and stable.
4. Add Bedding
Worms need bedding to live in and to help break down the organic waste. Bedding also absorbs moisture and creates a healthy environment for the worms to thrive. Common bedding materials include shredded newspaper, cardboard, straw, coconut coir, and dried leaves.
Place about 3-4 inches of bedding at the bottom of your worm bin, and add more as necessary over time to maintain a comfortable environment for the worms. The bedding should be kept moist but not soggy, as worms require a damp environment to survive.
5. Introduce the Worms
Red wiggler worms (Eisenia fetida) are the best species for worm farming, as they are efficient at breaking down organic material. You can typically purchase red wigglers from garden centers, worm farms, or online suppliers.
Add the worms to the bin gently, distributing them evenly over the bedding. Depending on the size of your bin, you can add anywhere from 500 to 2,000 worms to start. Keep in mind that worms can multiply rapidly in a healthy environment, so you may need to add more bedding and organic matter over time.
6. Feed the Worms
Worms eat organic materials such as fruit and vegetable scraps, coffee grounds, tea bags, and crushed eggshells. However, avoid feeding them dairy products, meat, oily foods, or citrus, as these can harm the worms or create odors.
Add food scraps to the bin in small quantities, burying them under the bedding to keep odors at bay. Over time, the worms will break down the food, converting it into rich, dark compost.
7. Insulate the Worm Farm
To protect the worms from freezing temperatures, it’s important to insulate the underground worm farm. You can do this by covering the top of the worm bin with a layer of mulch, straw, or leaves. This will help trap heat and maintain a stable temperature inside the bin.
If you live in an area with particularly harsh winters, you may want to add an extra layer of protection, such as foam board or a heavy tarp, to further insulate the bin. In extreme conditions, consider using an outdoor heating cable or mat to help regulate the temperature inside the bin.
8. Monitor the Temperature
Worms are most active when the temperature is between 55°F and 77°F (13°C to 25°C). In colder climates, it’s important to regularly check the temperature of your worm bin to ensure that the worms are not freezing. You can use a thermometer to monitor the internal temperature of the bin.
If the temperature drops too low, you may need to add extra insulation or move the bin to a more sheltered location. Conversely, if the temperature gets too warm, the worms may become stressed or die, so it’s essential to maintain a balance.
9. Harvest the Compost
After several months, your worms will have processed the organic material, converting it into nutrient-rich compost known as worm castings. You can harvest the compost by gently sifting the contents of the bin and separating the worms from the finished material. Use the compost to enrich your garden soil, providing your plants with essential nutrients.
Conclusion
Building an underground worm farm in a cold climate is a sustainable and effective way to compost organic waste while maintaining a healthy garden year-round. By following the steps outlined above, you can create an insulated environment for your worms that will protect them from freezing temperatures and allow them to continue processing organic material throughout the winter months. The result is nutrient-rich compost that can improve the health and productivity of your garden, all while reducing waste and promoting sustainability.