Introduction
Hydrangeas are beloved for their stunning, abundant blooms that add elegance and color to any garden. If you’re looking to expand your garden or share the beauty of hydrangeas with friends and family, propagating them from cuttings is an excellent and cost-effective method. This comprehensive guide will walk you through the entire process of propagating hydrangeas from cuttings, ensuring you achieve beautiful new plants that will flourish in your garden.
Why Propagate Hydrangeas from Cuttings?
Propagating hydrangeas from cuttings allows you to:
- Expand Your Garden: Grow more hydrangeas without purchasing new plants.
- Share the Beauty: Gift new hydrangeas to friends and family.
- Preserve Varieties: Maintain specific hydrangea varieties or cultivars you love.
- Save Money: Propagate plants at a fraction of the cost of buying new ones.
When to Take Hydrangea Cuttings
The best time to take hydrangea cuttings is during late spring or early summer. This period corresponds with the plant’s active growing season, making it easier for the cuttings to root and establish themselves.
Selecting the Right Cuttings
- Choose a Healthy Plant: Select a mature and healthy hydrangea plant as your source. Avoid plants with signs of disease or pest issues.
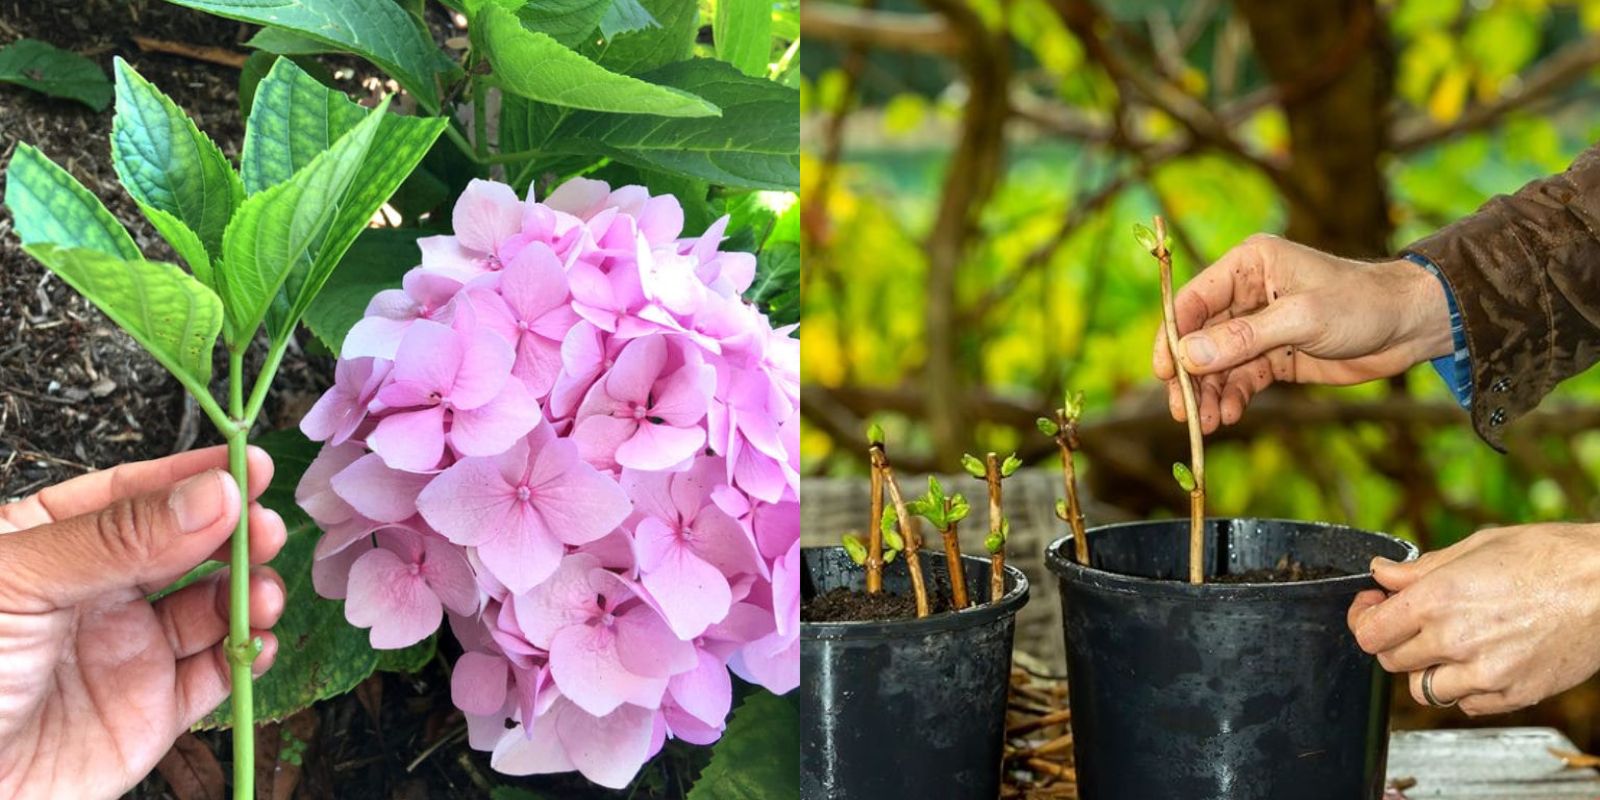
- Select New Growth: Opt for cuttings from new, green growth rather than older, woody stems. New growth is more likely to root successfully.
- Cut Length: Use sharp, clean pruning shears to cut 4-6 inch long sections from the plant. Each cutting should have at least two sets of leaves.
Preparing the Cuttings
- Remove Lower Leaves: Strip the lower leaves from each cutting, leaving only the top set of leaves. This helps prevent rot and directs energy to root development.
- Apply Rooting Hormone: Dip the cut end of each cutting into rooting hormone powder or gel. Rooting hormone encourages root growth and improves the chances of successful propagation.
Planting the Cuttings
- Prepare the Potting Mix: Use a well-draining potting mix composed of equal parts peat moss and perlite. This mixture provides the right balance of moisture and aeration.
- Plant the Cuttings: Make a hole in the potting mix with a pencil or stick and insert the cutting about 1-2 inches deep. Gently firm the soil around the cutting to hold it in place.
- Water Thoroughly: Water the cuttings thoroughly, ensuring the potting mix is evenly moist but not waterlogged.
Creating a Humid Environment
- Cover with Plastic: To retain humidity and create a mini-greenhouse effect, cover the pot with a plastic bag or a clear plastic dome. This helps keep the cuttings moist and promotes root development.
- Ventilation: If using a plastic bag, make a few small holes for ventilation to prevent mold and mildew. Remove the cover periodically to allow fresh air to circulate.
Providing the Right Conditions
- Light: Place the pot in a location with bright, indirect light. Avoid direct sunlight, which can cause the cuttings to overheat.
- Temperature: Maintain a consistent temperature of around 65-75°F (18-24°C). A warm environment supports faster rooting.
Monitoring and Care
- Check Moisture: Regularly check the potting mix to ensure it remains consistently moist. Avoid letting it dry out completely, as this can hinder root development.
- Look for Roots: After 4-6 weeks, gently tug on the cuttings to check for resistance. If you feel resistance, the roots have likely formed. You can also inspect the bottom of the pot for visible root growth.
Transplanting Your New Hydrangeas
- Prepare New Pots: Once the cuttings have developed a healthy root system, prepare larger pots or garden beds with well-draining soil.
- Transplant Carefully: Gently remove the rooted cuttings from the pot and transplant them into the new containers or garden beds. Ensure the roots are spread out and not cramped.
- Water and Mulch: Water the newly transplanted hydrangeas thoroughly and apply a layer of mulch to retain moisture and regulate soil temperature.
Common Challenges and Solutions
- Wilting: If the cuttings wilt, it may be due to insufficient humidity or inadequate watering. Increase humidity and ensure the potting mix remains moist.
- Rot: Root rot can occur if the potting mix is too wet or poorly draining. Ensure proper drainage and avoid overwatering.
- Slow Rooting: Slow rooting can result from low temperatures or inadequate light. Ensure the cuttings are in a warm, well-lit environment.
Tips for Successful Propagation
- Use Clean Tools: Always use clean, sharp tools to prevent the spread of disease and ensure clean cuts.
- Take Multiple Cuttings: Increase your chances of success by taking several cuttings from the same plant.
- Label Cuttings: If propagating different hydrangea varieties, label each pot to keep track of the plants.
Conclusion
Propagating hydrangeas from cuttings is a rewarding and enjoyable process that allows you to expand your garden and share the beauty of these stunning plants. By following these steps and paying attention to detail, you can successfully grow new hydrangeas that will thrive and enhance your landscape. With patience and care, you’ll be able to enjoy the vibrant blooms and lush foliage of your propagated hydrangeas for years to come.
Motivation: Dive into hydrangea propagation and watch your garden blossom with new, beautiful blooms! 🌸✂️ #HydrangeaPropagation #GardeningTips #PlantCuttings #GrowYourOwn #GardenHacks #PlantLovers #GreenThumb #HydrangeaLove

