
Growing your own potatoes can be a rewarding and enjoyable experience, and using containers makes it easier than ever. Whether you live in an apartment, have a small garden, or want to maximize your space, container gardening allows you to cultivate delicious, homegrown potatoes right at your doorstep. In this article, we’ll cover everything you need to know to successfully grow potatoes in containers, from selecting the right variety to harvesting your crop.
Why Grow Potatoes in Containers?
Container gardening has several advantages, especially for potatoes:
- Space Efficiency: Containers can be placed on patios, balconies, or even indoors, allowing you to maximize limited space.
- Soil Control: You have complete control over the soil quality, ensuring your potatoes receive the nutrients they need.
- Easy Harvesting: Harvesting is much easier with containers; simply tip the container over, and your potatoes are ready to be collected.
- Reduced Pest Problems: Growing in containers can minimize the risk of soil-borne pests and diseases.
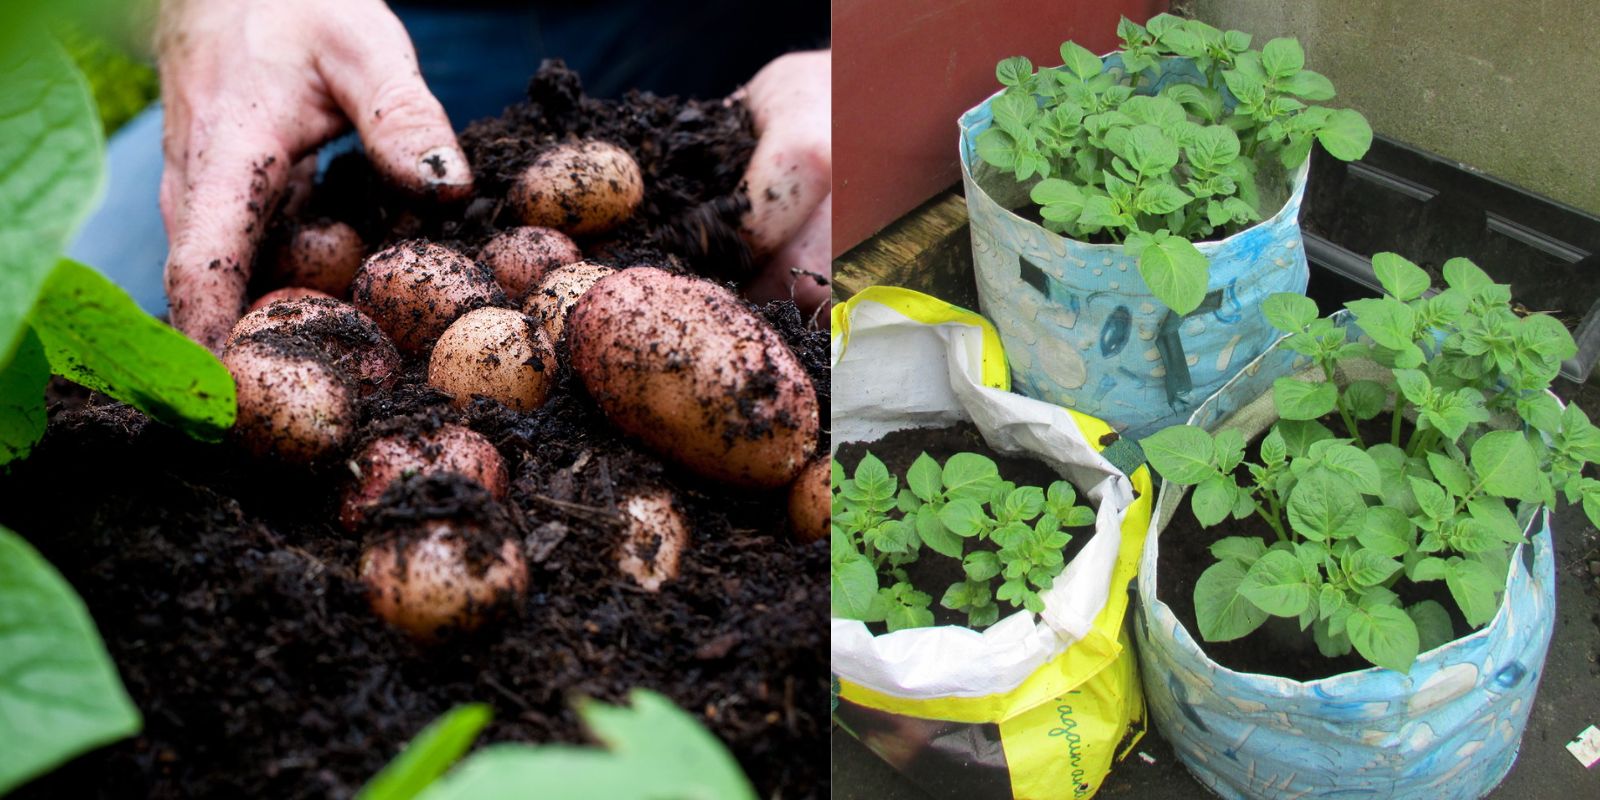
Choosing the Right Container
The first step in growing potatoes in containers is selecting the right type of container. Here are some options to consider:
- Size: Choose a container that is at least 5 gallons in size to allow for adequate root development. Larger containers can hold more plants and provide a more abundant harvest.
- Material: You can use plastic pots, fabric grow bags, wooden crates, or even old barrels. Just make sure that whatever you choose has drainage holes to prevent waterlogging.
- Accessibility: Consider how you’ll access your containers for watering, fertilizing, and harvesting. Placing them at a comfortable height can make the process easier.
Selecting Seed Potatoes
Choosing the right seed potatoes is crucial for a successful crop. Here are some tips:
- Type: Select certified seed potatoes from a reputable nursery or garden center. Popular varieties for container growing include Yukon Gold, Red Pontiac, and Fingerling potatoes.
- Size: If your seed potatoes are large (the size of a fist), you can cut them into smaller pieces. Each piece should have at least one or two “eyes,” which are the small buds where shoots will emerge.
- Pre-sprouting: To encourage faster growth, you can pre-sprout your seed potatoes by placing them in a warm, light location for a couple of weeks before planting. This will help them develop shoots.
Preparing the Soil
The right soil mix is essential for healthy potato growth. Here’s how to prepare your container soil:
- Soil Mix: Use a combination of high-quality potting soil, compost, and well-rotted manure. This blend provides essential nutrients and promotes good drainage.
- pH Level: Potatoes prefer slightly acidic soil with a pH of 5.5 to 6.5. You can test your soil’s pH using a home testing kit.
- Fill the Container: Fill your container with the prepared soil mix, leaving about 4-6 inches of space from the top.
Planting Your Potatoes
Once your container is ready, it’s time to plant your seed potatoes:
- Planting Depth: Place the seed potatoes in the soil, eyes facing upward, and cover them with about 4 inches of soil.
- Spacing: If planting multiple seed potatoes in one container, space them about 12 inches apart to allow for healthy growth.
Watering and Caring for Your Potato Plants
Proper care is vital for a successful potato crop. Here’s how to maintain your plants:
Watering
- Consistency: Potatoes need consistent moisture, especially during their early growth stages. Water them regularly to keep the soil evenly moist but not soggy.
- Signs of Watering Issues: If the leaves start to wilt, it’s a sign that your plants may need water. Conversely, yellowing leaves may indicate overwatering.
Sunlight
- Light Requirements: Potatoes require at least 6-8 hours of direct sunlight each day. Place your containers in a sunny location, rotating them if necessary to ensure even light exposure.
Fertilization
- Nutrient Needs: Potatoes benefit from regular feeding during their growth cycle. Use a balanced, slow-release fertilizer every few weeks or apply liquid fertilizer every 2-3 weeks as per package instructions.
- Organic Options: You can also use organic fertilizers, such as fish emulsion or seaweed extract, which provide essential nutrients and promote healthy growth.
Hilling Potatoes
As your potato plants grow, you will need to “hill” them to encourage more tuber production:
- What is Hilling?: Hilling involves adding soil around the base of the plants as they grow. This helps to prevent green potatoes and encourages more tuber growth.
- When to Hill: Start hilling when the plants reach about 6-8 inches in height. Add 3-4 inches of soil around the stems, being careful not to cover the leaves.
Managing Pests and Diseases
While growing potatoes in containers can reduce the risk of soil-borne diseases, pests can still be a concern. Here are some common pests and diseases to watch for:
- Pests: Watch for aphids, potato beetles, and spider mites. Use organic insecticidal soap or neem oil as needed.
- Diseases: Fungal diseases, such as blight, can affect potatoes. Ensure good air circulation around your plants and avoid overhead watering to minimize disease risk.
Harvesting Your Potatoes
After several months of growth, it will soon be time to harvest your potatoes. Here’s how to know when to pick them:
- Timing: Potatoes are typically ready to harvest 70-120 days after planting, depending on the variety. The tops of the plants will begin to yellow and die back when they are mature.
- Testing for Maturity: You can test the maturity by gently digging into the soil with your hands to check for tubers. If they are the desired size, it’s time to harvest!
- Harvesting: To harvest, tip the container on its side and gently remove the soil to collect the potatoes. Be careful not to bruise them during the process.
Storing Your Potatoes
Once harvested, it’s important to store your potatoes properly to ensure their longevity:
- Curing: Before storage, allow your potatoes to cure in a cool, dark, and well-ventilated area for a couple of weeks. This helps to toughen their skins and extend shelf life.
- Storage Conditions: Store cured potatoes in a cool, dark place (ideally around 45-50°F) in breathable containers such as burlap sacks or cardboard boxes. Avoid storing them in the refrigerator, as cold temperatures can affect their flavor.
Enjoying Your Homegrown Potatoes
There’s nothing quite like the taste of freshly harvested potatoes! Here are a few ideas for enjoying your homegrown bounty:
- Cooking: Use your potatoes in various dishes, from mashed potatoes to potato salads or roasted veggies. The possibilities are endless!
- Sharing: Consider sharing your harvest with friends and family. Homegrown produce always makes a thoughtful gift.
- Learning: Keep track of your growing experience to improve your technique for future planting seasons.
Conclusion
Growing potatoes in containers is an excellent way to enjoy fresh produce while maximizing limited space. With a little effort and care, you can cultivate delicious, homegrown potatoes right at home. Start your potato-growing journey today, and share your successes with fellow gardeners! Whether you’re a novice or an experienced gardener, there’s always something new to learn and explore in the world of gardening.
By following these comprehensive steps, you’ll be well on your way to a fruitful potato harvest. Don’t hesitate to share your experiences and engage with the gardening community using your favorite gardening hashtags! Happy gardening!