
Lemon trees are one of the most popular fruit trees grown around the world. Their aromatic fruits add zest to recipes, beverages, and even gardening itself. If you’ve ever wanted to grow your own lemon tree but don’t have the space for a full-sized tree, or if you simply want to propagate a tree from one you already own, you can do so by taking cuttings. This process, known as vegetative propagation, allows you to create a new tree with all the characteristics of the parent tree, ensuring a continued supply of delicious lemons.
In this article, we’ll take you through the steps and techniques to successfully propagate lemon trees from cuttings. You’ll learn about the best time to take cuttings, how to prepare and plant them, and tips to ensure your success. Whether you’re a seasoned gardener or a beginner, this guide will help you on your journey to grow your own lemon tree.
Why Propagate Lemon Trees from Cuttings?
Lemon trees are typically propagated through grafting or seed, but using cuttings is a more reliable and faster method. When you propagate from cuttings, you are creating a genetic clone of the parent tree. This means the new tree will inherit the same fruit quality, disease resistance, and growth habits as the parent plant.
Unlike growing lemon trees from seed, which can take years to produce fruit and may not produce offspring with the same traits as the parent, cuttings provide a quick route to fruit-bearing trees. Additionally, propagating from cuttings is a more cost-effective way to increase your citrus tree collection.
Step-by-Step Guide to Propagating Lemon Trees from Cuttings
1. Selecting the Right Cutting
The first step in propagating a lemon tree is choosing the right cutting. Ideally, you want to take a semi-hardwood cutting, which is between soft and fully matured wood. Semi-hardwood cuttings are more likely to root successfully compared to very soft or fully mature stems.
What to look for:
- The cutting should be 4-6 inches long and have a healthy, green color.
- Look for a mature branch that has not yet hardened but is firm enough to snap when bent.
- Select a cutting that has at least 2-3 sets of leaves, but avoid overly mature or woody branches.
- Ensure that the parent tree is free from disease or pests to avoid passing them to the new plant.
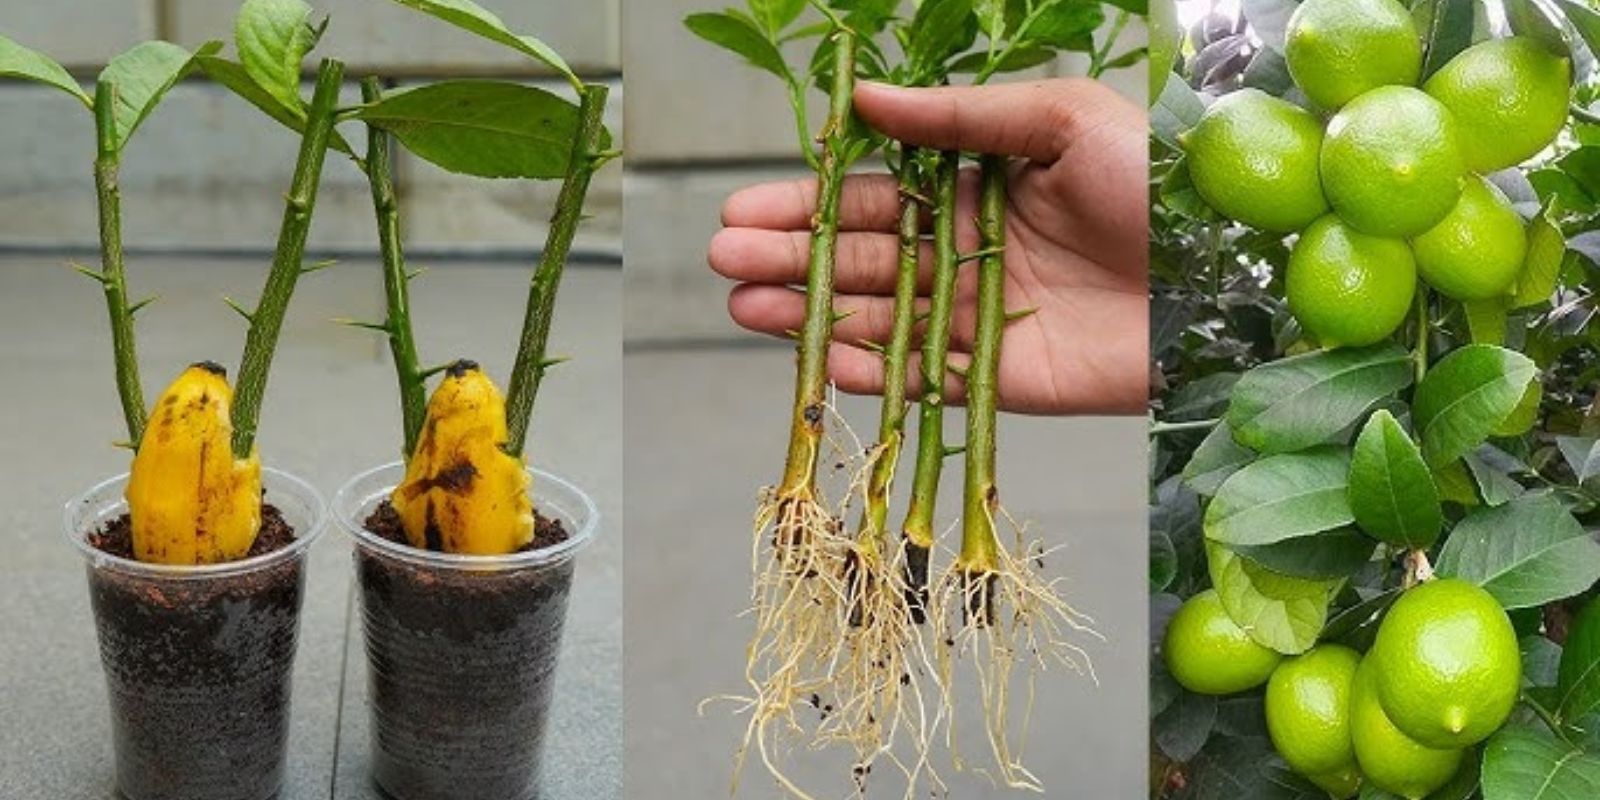
2. Preparing the Cutting
Once you’ve selected your cutting, the next step is preparing it to root. You need to remove the lower leaves, leaving the top leaves intact to help nourish the cutting as it roots.
Steps to prepare the cutting:
- Using a sharp, sterile knife or scissors, make a clean cut just below a leaf node (where leaves join the stem). This is where the roots will grow from.
- Remove any leaves that are located along the lower half of the cutting to prevent them from rotting in the soil.
- Trim the remaining leaves by about half to reduce water loss through transpiration.
3. Applying Rooting Hormone
While not strictly necessary, applying rooting hormone can greatly increase your chances of success. Rooting hormones contain auxins, which stimulate root development. You can buy rooting hormone powder or gel from most gardening centers.
How to apply rooting hormone:
- Dip the cut end of the cutting into the rooting hormone, covering the bottom 1-2 inches of the stem.
- Gently tap off any excess powder to prevent clumping.
- Rooting hormone helps the cutting establish roots more quickly and reduces the likelihood of the cutting rotting.
4. Planting the Cutting
After preparing the cutting and applying rooting hormone, the next step is planting it. You’ll want to plant your cutting in a well-draining potting mix to give it the best chance of rooting.
How to plant the cutting:
- Fill a small pot (about 3-4 inches in diameter) with a sterile potting mix, such as a mix made for cacti or succulents. These mixes provide excellent drainage.
- Insert the cutting into the soil, burying it about 2 inches deep.
- Gently pack the soil around the base of the cutting to stabilize it.
- Water the cutting lightly to settle the soil, but avoid over-watering, as excess moisture can lead to rot.
5. Creating a Humid Environment
Lemon cuttings need a humid environment to encourage root growth and prevent them from drying out. You can create this environment by covering the cutting with a plastic bag or a clear plastic dome. This will trap moisture and keep the cutting at the right humidity level.
How to create humidity:
- Place a plastic bag over the pot, ensuring it doesn’t touch the leaves, or use a clear plastic dome.
- If you’re using a plastic bag, secure it around the base of the pot with a rubber band.
- You can also use a mini greenhouse if you have one. The key is to maintain a high humidity level without suffocating the cutting.
6. Placing the Cutting in the Right Location
Once you’ve created a humid environment, place the pot in a warm location with indirect sunlight. Avoid direct sunlight, as this could cause the cutting to overheat or dry out. The ideal temperature for rooting lemon cuttings is between 70°F and 80°F (21°C – 27°C).
Where to place the cutting:
- A bright windowsill with indirect sunlight works well, as long as the cutting doesn’t get too hot.
- Avoid areas with drafts or sudden temperature fluctuations, as these can stress the cutting and slow down the rooting process.
7. Watering and Caring for the Cutting
While your cutting is rooting, it’s essential to keep the soil lightly moist but not soggy. Water the cutting whenever the top inch of soil feels dry to the touch. Mist the leaves regularly to maintain humidity if the air in your home is dry.
How to care for the cutting:
- Check the cutting daily for signs of wilting or drying out. If it seems to be struggling, consider placing it in a more humid location.
- After a few weeks, you should see the cutting begin to root. You can test for roots by gently tugging on the cutting—if you feel resistance, roots are starting to form.
- Once you see substantial root growth, remove the plastic bag or dome and allow the plant to adapt to normal air conditions.
8. Transplanting the New Lemon Tree
After about 6-8 weeks, when the cutting has rooted well, it’s time to transplant the new lemon tree into a larger pot. Be sure to use a well-draining potting mix, similar to what you used for the cutting.
Steps for transplanting:
- Carefully remove the cutting from the pot and examine the roots. If the roots have filled the pot, it’s time to transfer the cutting to a larger container.
- Choose a pot that’s 1-2 inches larger in diameter than the current one.
- Gently plant the rooted cutting into the new pot, ensuring the roots are spread out and not crowded.
- Water the newly transplanted tree lightly, and place it in a sunny spot.
Tips for Successful Lemon Tree Propagation
- Be patient: Rooting takes time, and it may take several weeks before you see new growth. Don’t be discouraged if you don’t see immediate results.
- Avoid over-watering: Too much water can lead to rot, so be sure to check the soil regularly and only water when necessary.
- Use sterile equipment: To reduce the risk of infection, always use clean, sterile tools when cutting or handling your lemon tree cutting.
- Fertilize once rooted: Once your cutting has rooted and started to grow, you can start feeding it with a balanced, diluted fertilizer to encourage healthy growth.
- Acclimate the plant slowly: When the cutting is ready to be moved to a larger pot or planted outdoors, gradually acclimate it to full sunlight by placing it in a partially shaded area first.
Conclusion
Propagating a lemon tree from cuttings is an easy and rewarding process that allows you to grow your own fruit-bearing trees. By following the steps outlined in this guide, you can have your own lemon tree thriving in your garden or indoors in a pot. Whether you’re expanding your citrus collection or simply love the idea of growing fruit from cuttings, this method offers a reliable and quick way to enjoy fresh, homegrown lemons. With a little patience and care, you’ll be harvesting lemons in no time!
Happy gardening! 🍋🌱
#LemonTreePropagation #GrowYourOwnLemonTree #PlantCuttings #CitrusGardening #DIYGarden #HomeGrownFruit #GardenTips #GreenThumb #SustainableLiving #GardeningHacks #UrbanGardening #HealthyPlants #GardeningJoy