
Christmas Cactus (Schlumbergera), a popular succulent, is loved for its vibrant blooms that add a festive touch to any home. Known for being low-maintenance and adaptable, this plant can be propagated easily from cuttings, making it a perfect choice for gardeners looking to expand their collection or share the beauty of their plants with friends and family. Whether you want to propagate your existing Christmas cactus for personal use or create gifts for others, this comprehensive guide will walk you through the steps to propagate a Christmas cactus successfully.
Introduction
Christmas cactus, unlike its desert-dwelling cousins, thrives in a humid environment and has distinct characteristics. Its flattened, segmented stems are green and produce beautiful flowers in various shades of pink, white, and red, usually blooming around the holiday season. Because they are often passed down from generation to generation, propagating Christmas cactus is a tradition in many households.
The best part about Christmas cactus is that it is not only easy to grow but also simple to propagate. If you’ve ever admired someone’s lush Christmas cactus and thought about growing one yourself, this guide will help you get started. By following a few simple steps, you’ll be able to create new plants from your existing ones and share the joy of these beautiful blooms.
Why Propagate a Christmas Cactus?
Propagating your Christmas cactus can be an incredibly rewarding process. Not only will it allow you to grow new plants for your home or garden, but it also ensures that you preserve the unique traits of your original plant, including the color and shape of its flowers. Additionally, propagating your cactus allows you to:
- Expand your collection: Grow more plants from one original cactus.
- Share with others: Gift propagations to friends, family, or neighbors.
- Control growth: You can create a manageable, more compact plant that suits your space.
Overall, propagating Christmas cactus is a great way to keep your plant collection fresh and thriving.
Step-by-Step Guide to Propagating Christmas Cactus
Here are the simple steps you need to follow to propagate your Christmas cactus successfully.
1. Select a Healthy Parent Plant
The first step in propagating Christmas cactus is selecting a healthy parent plant. Look for a cactus with healthy, vibrant stems that show no signs of disease or damage. The parent plant should also be well-established with plenty of segments or “pads” to spare for propagation.
It’s important to choose a cactus that is in good health, as it will produce the best cuttings. Avoid plants that have wilting, yellowing, or drooping segments, as these signs often indicate stress or poor health.
2. Choose the Right Time to Take Cuttings
The best time to propagate a Christmas cactus is during its active growing period, which is typically in the spring or early summer. While you can technically propagate Christmas cactus at any time of year, taking cuttings during its growing season allows the plant to establish itself more quickly and ensures successful rooting.
Ideally, take cuttings after the plant has finished blooming. This ensures that it is not putting its energy into flowering and can focus on the rooting process.
3. Prepare the Cutting Tools
Before you start taking cuttings, make sure your tools are clean and sharp. Use clean, sterilized scissors or pruning shears to make a clean cut on the cactus stem. This will help reduce the risk of infection or disease from dirty tools.
If you don’t have sterilized tools, you can clean them using rubbing alcohol or a diluted bleach solution (1 part bleach to 9 parts water) and wiping them with a clean cloth.
4. Cut the Segments for Propagation
Using your sterilized pruning scissors or shears, cut a segment of the cactus. It’s best to choose a segment that is about 3 to 4 inches long. Make sure the cutting contains at least two or three pads (segments), as these will provide more growth potential for the new plant.
Be sure to cut the cactus at a natural joint between the pads to avoid damaging the plant. After making the cut, remove the cutting from the plant carefully.
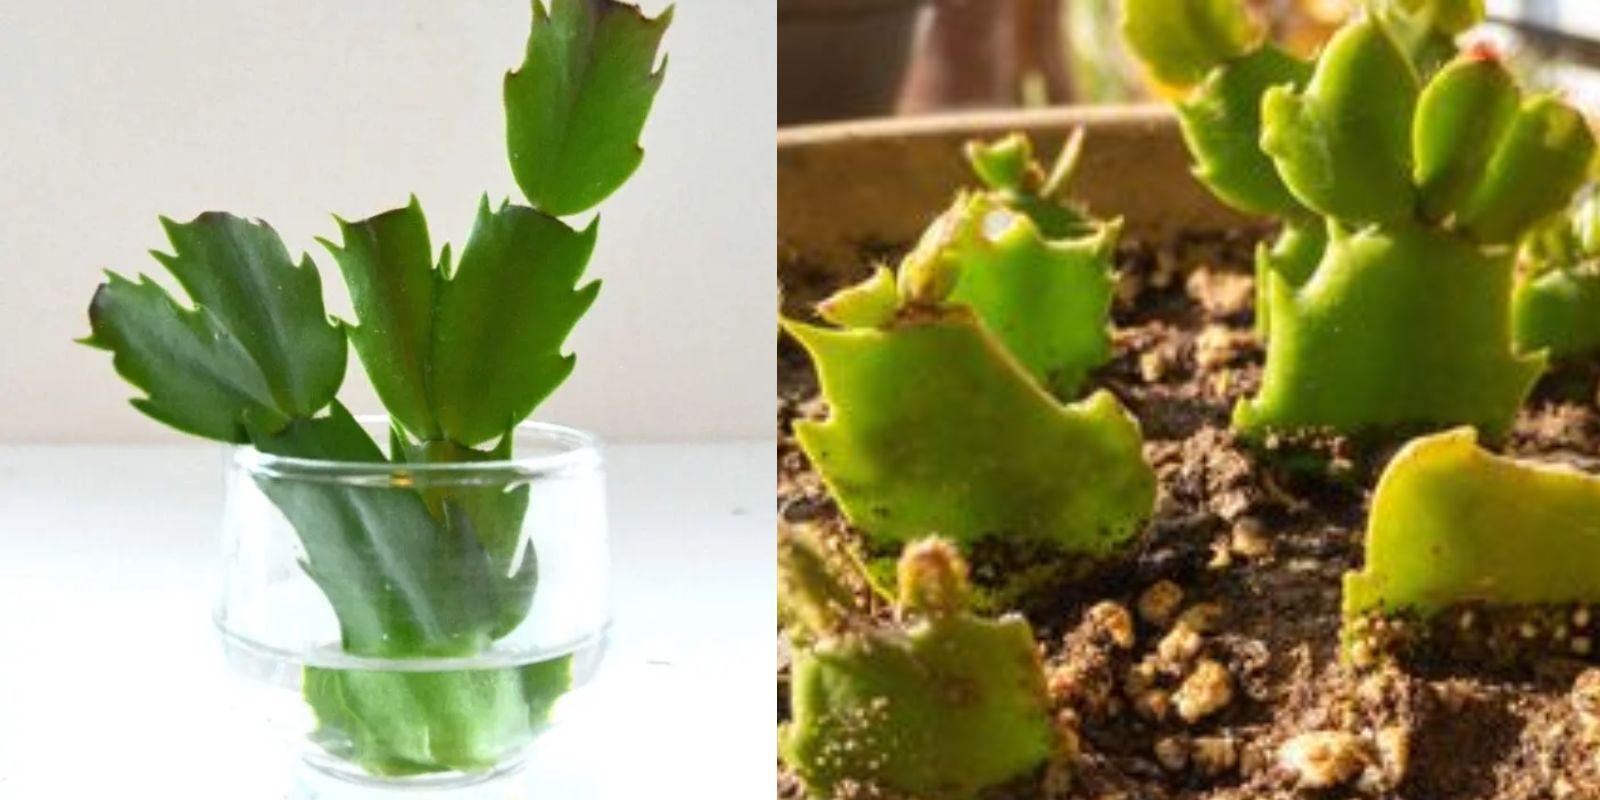
5. Allow the Cutting to Callus Over
Once the cutting is made, it’s crucial to let it callus over before planting it in soil. Callusing helps to prevent the cutting from rotting and creates a protective layer that enables roots to form more effectively. Place the cutting in a dry, warm location for about 2 to 3 days.
Don’t skip this step, as it is vital for the health of the cutting. You’ll notice that the cut end of the stem will turn a lighter color, which indicates that it is forming a protective callus.
6. Prepare the Potting Mix
While the cutting is callusing, prepare a small pot with well-draining potting soil. Christmas cactus prefers slightly acidic, well-draining soil. A mix designed for cacti or succulents will work perfectly. If you don’t have cactus soil, you can use regular potting soil mixed with perlite or sand to improve drainage.
Fill the pot with the prepared soil, leaving a small amount of space at the top to make room for watering.
7. Plant the Cutting
Once the cutting has callused, it’s time to plant it. Gently insert the callused end of the cutting into the soil about 1 inch deep. Make sure the cutting is upright and stable, so it doesn’t topple over. Pat the soil around the base to secure the cutting in place.
Avoid watering immediately after planting. Instead, wait for a few days to allow the cutting to settle into the soil and avoid promoting rot.
8. Watering and Care for the New Cutting
Once the cutting is planted, water it lightly. Christmas cactus cuttings don’t need a lot of water, especially in the early stages of rooting. Mist the soil occasionally, but don’t soak it. Overwatering is one of the most common causes of failure when propagating Christmas cactus, so be sure to let the soil dry out between waterings.
Place the pot in a bright, indirect light location. Avoid placing it in direct sunlight, as it could scorch the cutting. The ideal temperature for the cutting is between 60°F to 70°F (15°C to 21°C).
9. Wait for Rooting
It can take anywhere from 2 to 3 weeks for the cutting to develop roots. To check if the cutting has rooted, gently tug on the plant. If you feel resistance, the roots have taken hold. If the cutting comes out easily, give it more time to establish itself.
Once the cutting has rooted, you can care for it just like a mature Christmas cactus.
10. Transplanting and Long-Term Care
When the new plant has rooted and is growing well, you can transplant it into a larger pot if desired. Continue to care for it with the same guidelines as your mature Christmas cactus. Ensure it gets plenty of bright, indirect light and water when the soil dries out. Fertilize your new plant once a month during the growing season with a balanced, water-soluble fertilizer.
Conclusion
Propagating Christmas cactus is an easy and rewarding process that allows you to create new plants and expand your collection. By following these simple steps and caring for your cuttings properly, you’ll have a thriving new plant in no time. With a little patience and attention, you can enjoy the vibrant, festive blooms of your very own Christmas cactus and share them with others.
Happy gardening!